


Custom Scan
- The custom scan feature allows you to check for malware in specific files/folders/drives.
- You will need to restart your computer if you choose to scan memory, critical areas, or hidden registry services/files/folders.
When the scan is complete, you can:
- Clean the detected threats, or move them to quarantine
- Exclude an application you consider as safe from the threat list
- Report false positives to Comodo
See the following areas for more help:
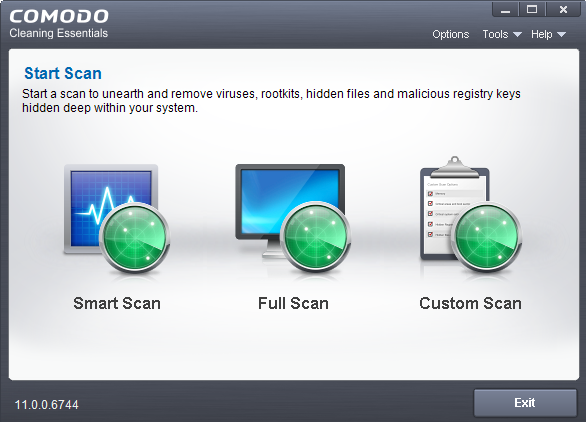
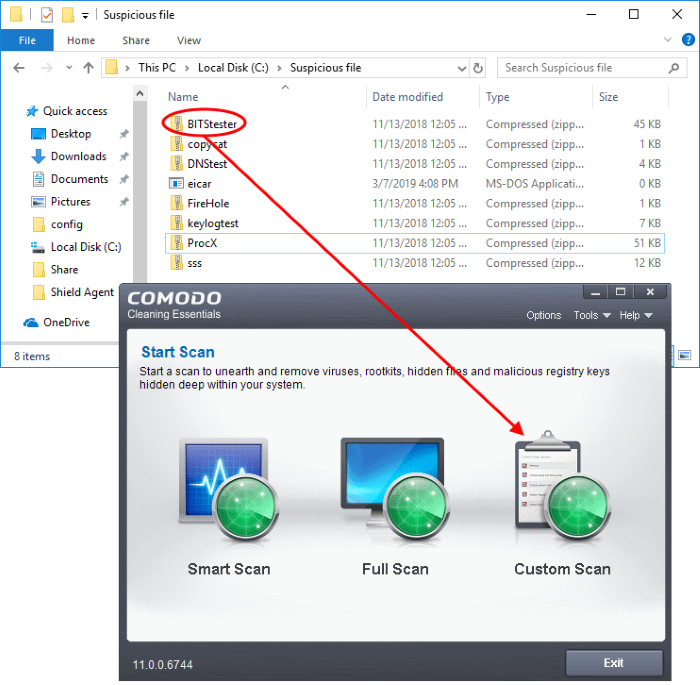
- Open Comodo Cleaning Essentials
- Click the 'Custom Scan' icon on the right:
You can now configure which locations you want to scan:
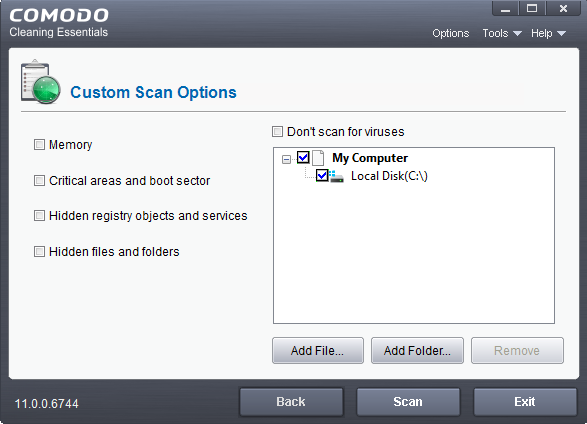
Select your the scan preferences on the left. Choose which files, folders or drives you want to scan on the right.
- Memory - CCE scans system memory at the start of the scan.
- Critical areas and boot sector - CCE scans the 'Program Files' and 'Windows' folders, all user folders, important registry keys, and the system startup area of your hard drive.
- Hidden registry objects and services - CCE will identify and scan obfuscated files and services.
- Hidden files and folders - CCE scans any invisible items on drives in the 'Scan Target' area.
- Don't scan for viruses - CCE will NOT scan any target in the box on the right (it will be grayed out). If this option is selected, you must choose at least option on the left.
- Use the 'Add File...' and 'Add Folder...' buttons to browse for specific items
- Click
'Scan' to run your scan
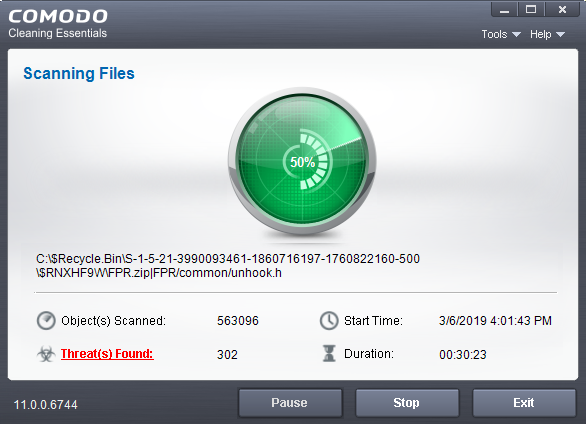
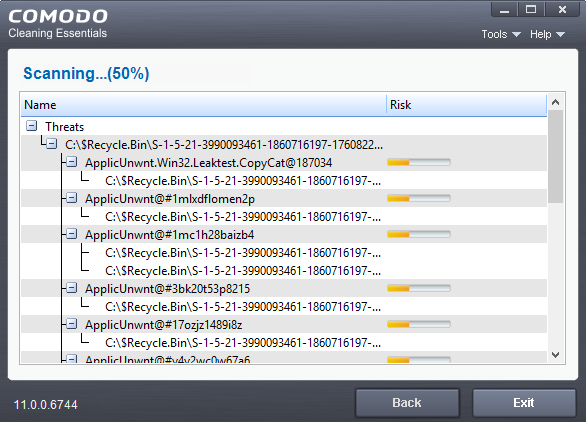
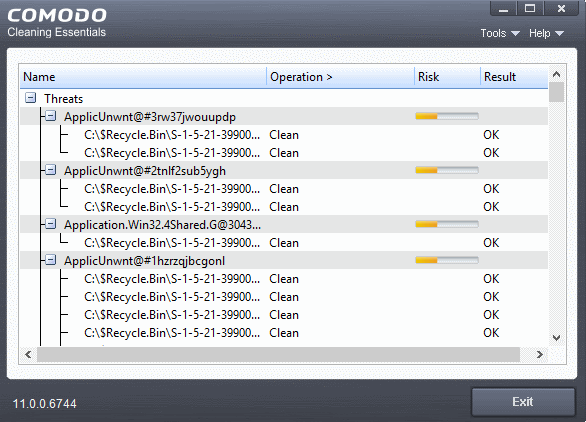
Click the 'Threat(s) Found' link at any time to view more details about the malware discovered on your system.
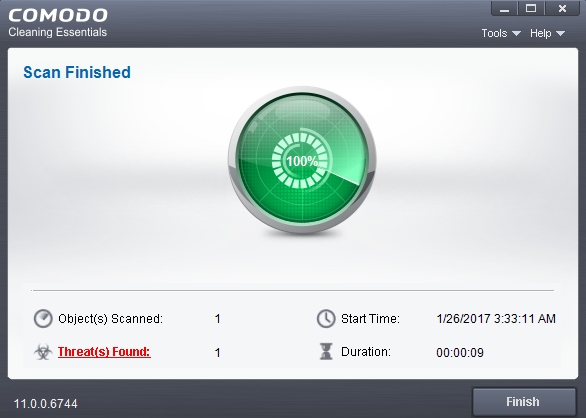
Full results are shown at the end of the scan.
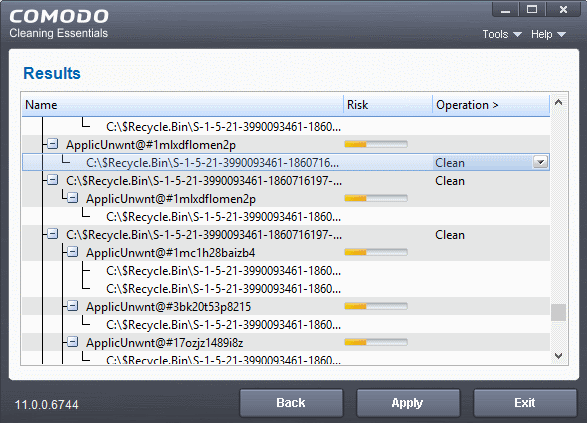
- The results show the names and location of all malware found
- Click the text in the 'Operation >' column to take actions on the reported malware:
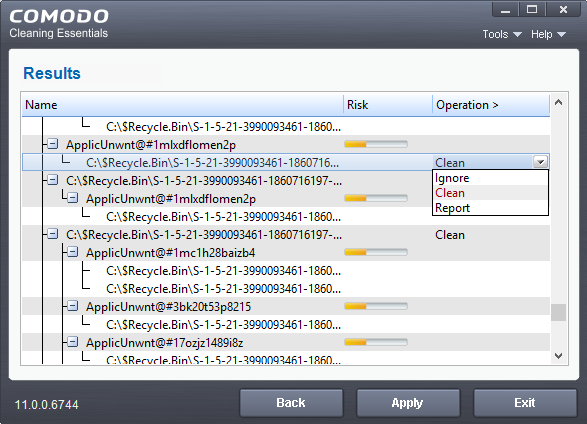
The following actions are available:
- Clean - The file will be deleted or moved to quarantine. You can later delete the file from quarantine if required. See Manage Quarantined Items for more details.
- Ignore - CCE will take no action on the file. Note - the file will be caught by the next scan you run.
- Report - Submit the file as a false-positive to Comodo. Do this if you think the file is safe, and CCE was incorrect to flag it as malicious. The file will be analyzed by Comodo technicians.
Click on the 'Operations >' column header to apply one action to all files in the list.
- Click 'Apply' to implement your actions.
- You now need to restart your computer. This is so CCE can check whether the threats have been completely removed, and to scan for hidden services and drivers:
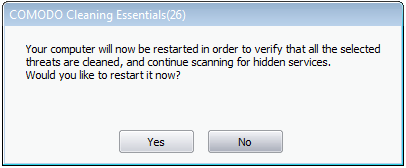
- Save all your work first then click 'Yes' to restart your computer. If you plan to restart later, click 'No'. The scan will run the next time you restart your computer.
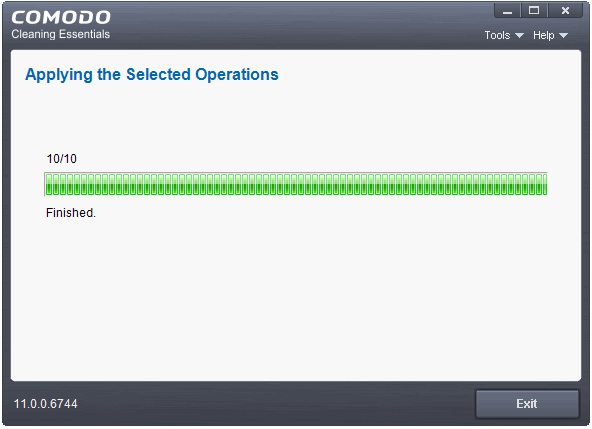
After the restart, CCE will scan for and clean any hidden processes. Results are shown as follows:
- You can scan a folder or file any file or folder by dragging it on to the CCE interface:
The folder/file will be scanned immediately.
Results are shown at the end of the scan. See The Results if you want help with the actions you can take on this screen.