


Data Loss Prevention
- Open a Windows profile, then click the 'Data Loss Prevention' tab.
'Data Loss Prevention' attaches discovery and monitoring rules that look for sensitive data on the device and control what can be done with it. The panel carries a 'Delete' button and has two sub-tabs.
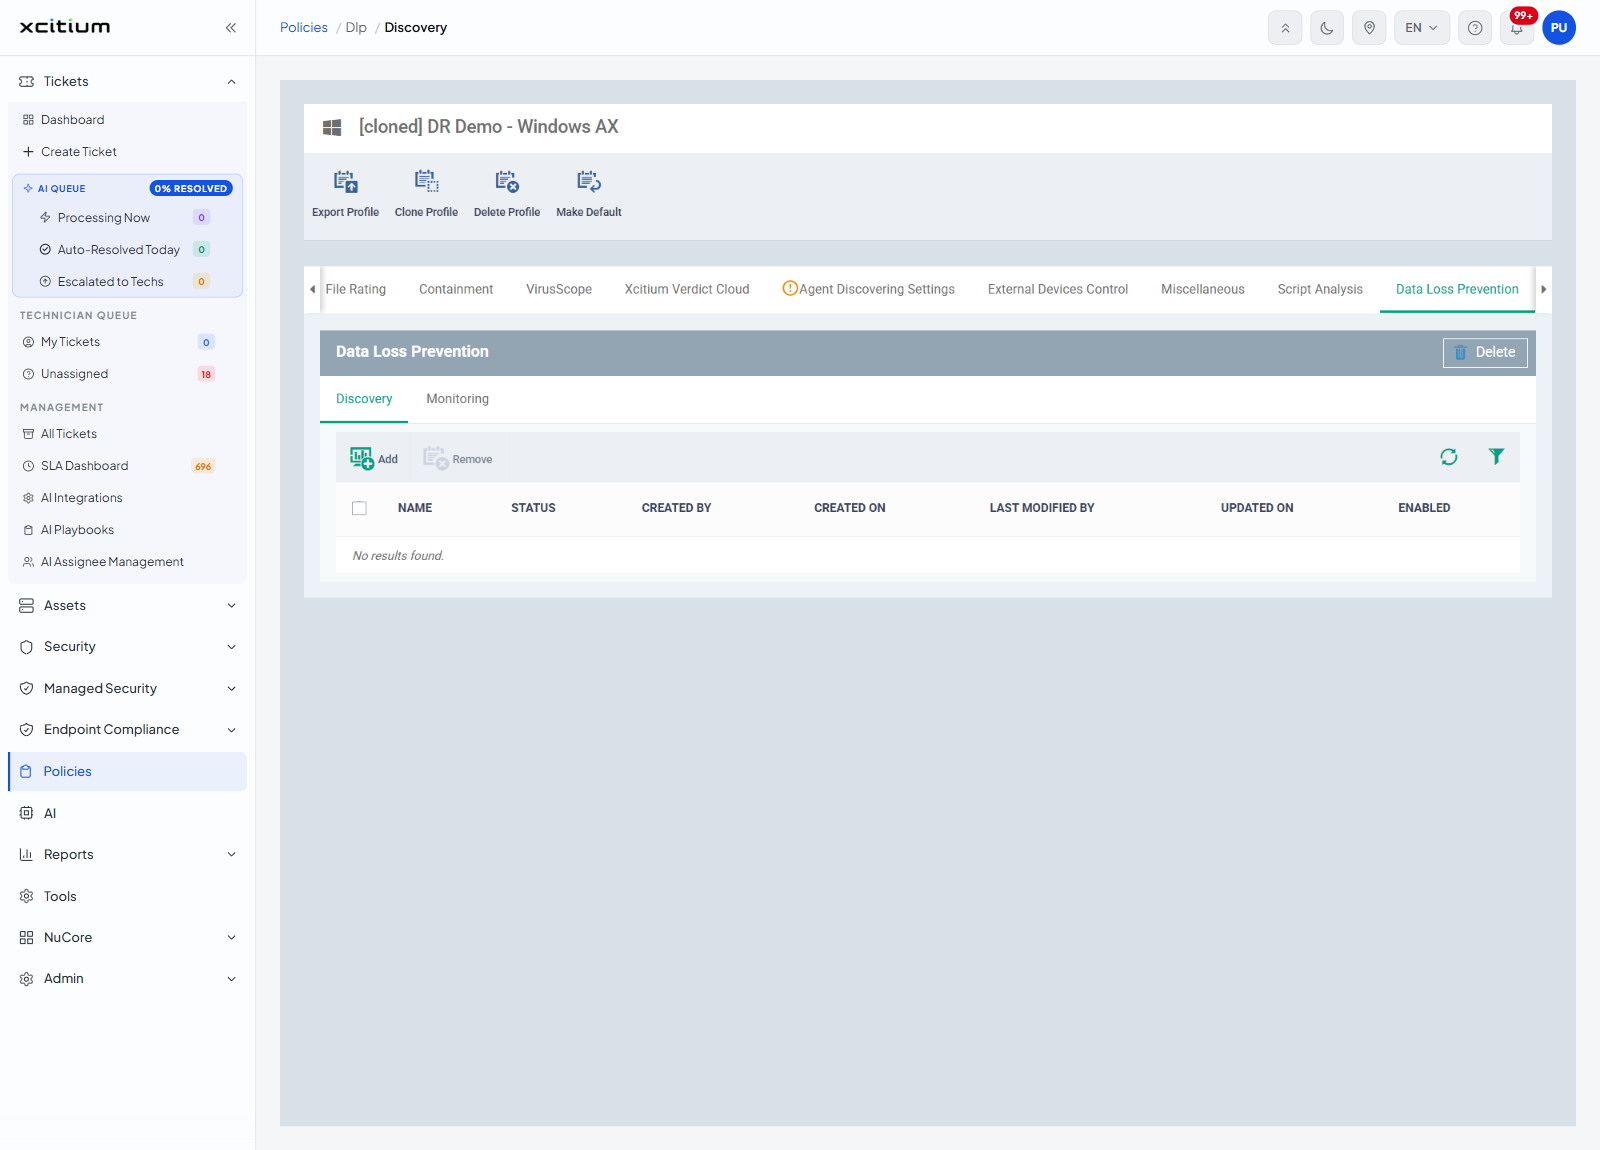
Discovery
Rules that search the device for sensitive data.
| Button | Description |
| Add | Attaches a discovery rule to the profile. |
| Remove | Takes the ticked rule off the profile. |
| Column | Description |
| Check box (first column) | Ticks the row for 'Remove'. |
| NAME | The name of the rule. |
| STATUS | The state of the rule. |
| CREATED BY | Who made the rule. |
| CREATED ON | Date and time it was made. |
| LAST MODIFIED BY | Who last changed it. |
| UPDATED ON | Date and time it was last changed. |
| ENABLED | Whether the rule is in force. |
A profile that carries no discovery rules shows the list headings over 'No results found.'
Add a discovery rule
'Add' opens the 'Add Data Loss Prevention Discovery Rule' dialog. The dialog attaches a rule that already exists, so write the rule first on the 'Data Loss Prevention' page. It carries the line 'To create a new discovery rule, go to Data Loss Prevention page.'
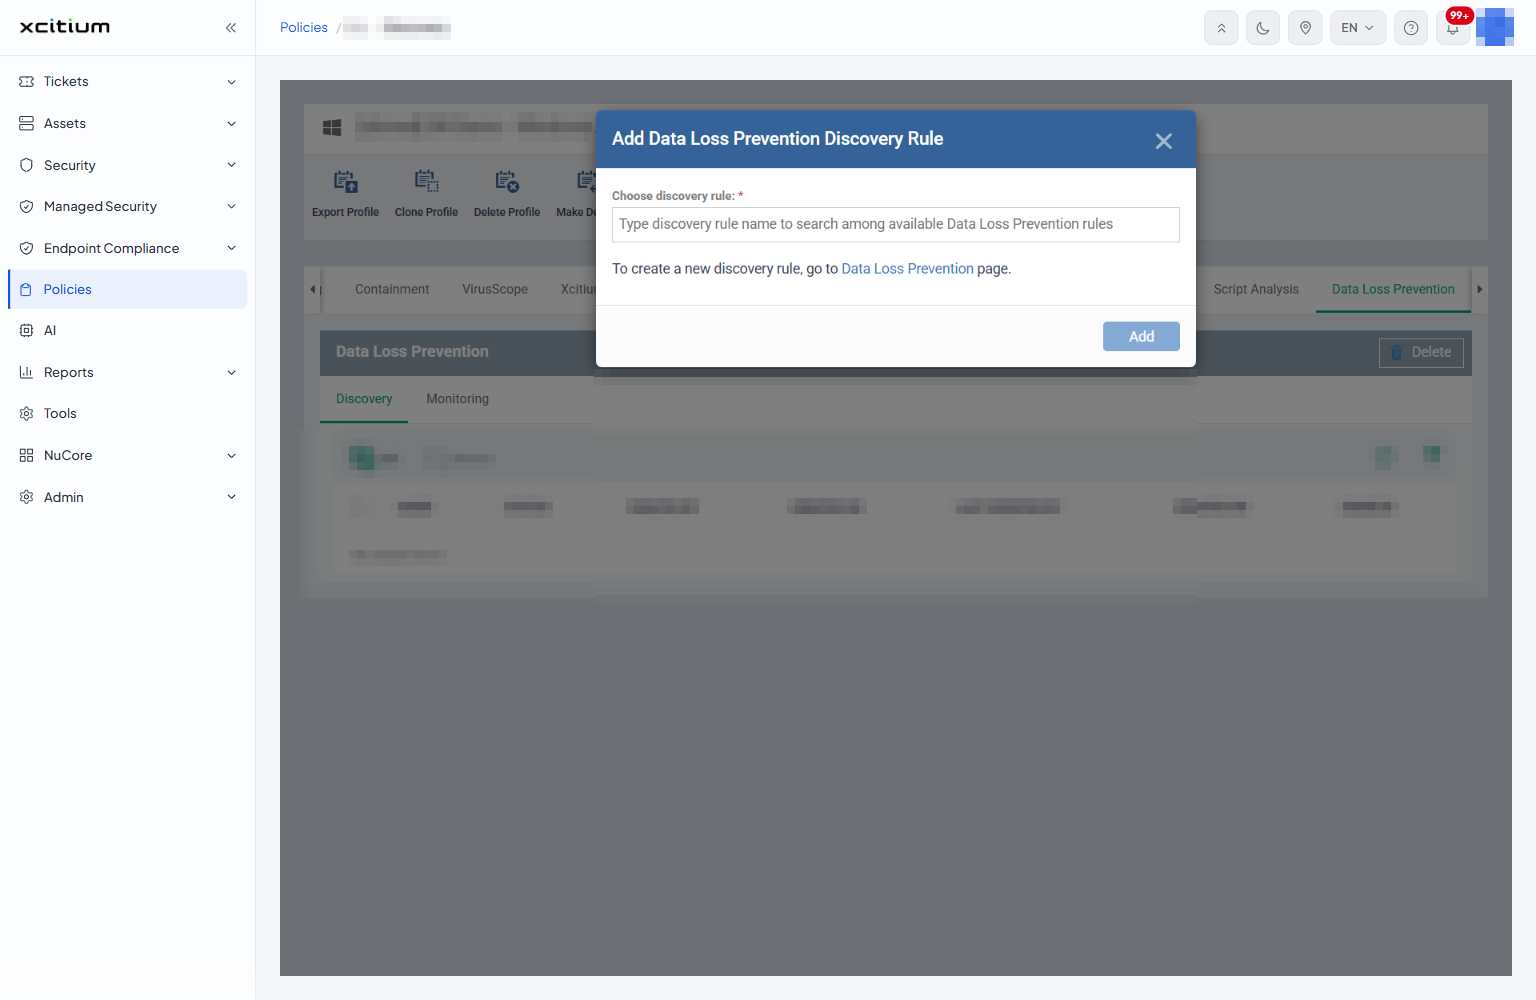
| Field | Description |
| Choose discovery rule: | The rule you want to attach. This field is required. |
- Click 'Policies' in the left navigation bar and open the profile.
- Click the 'Data Loss Prevention' tab and stay on 'Discovery'.
- Click 'Add'.
- Choose the rule under 'Choose discovery rule:'.
- Click 'Add'.
Monitoring
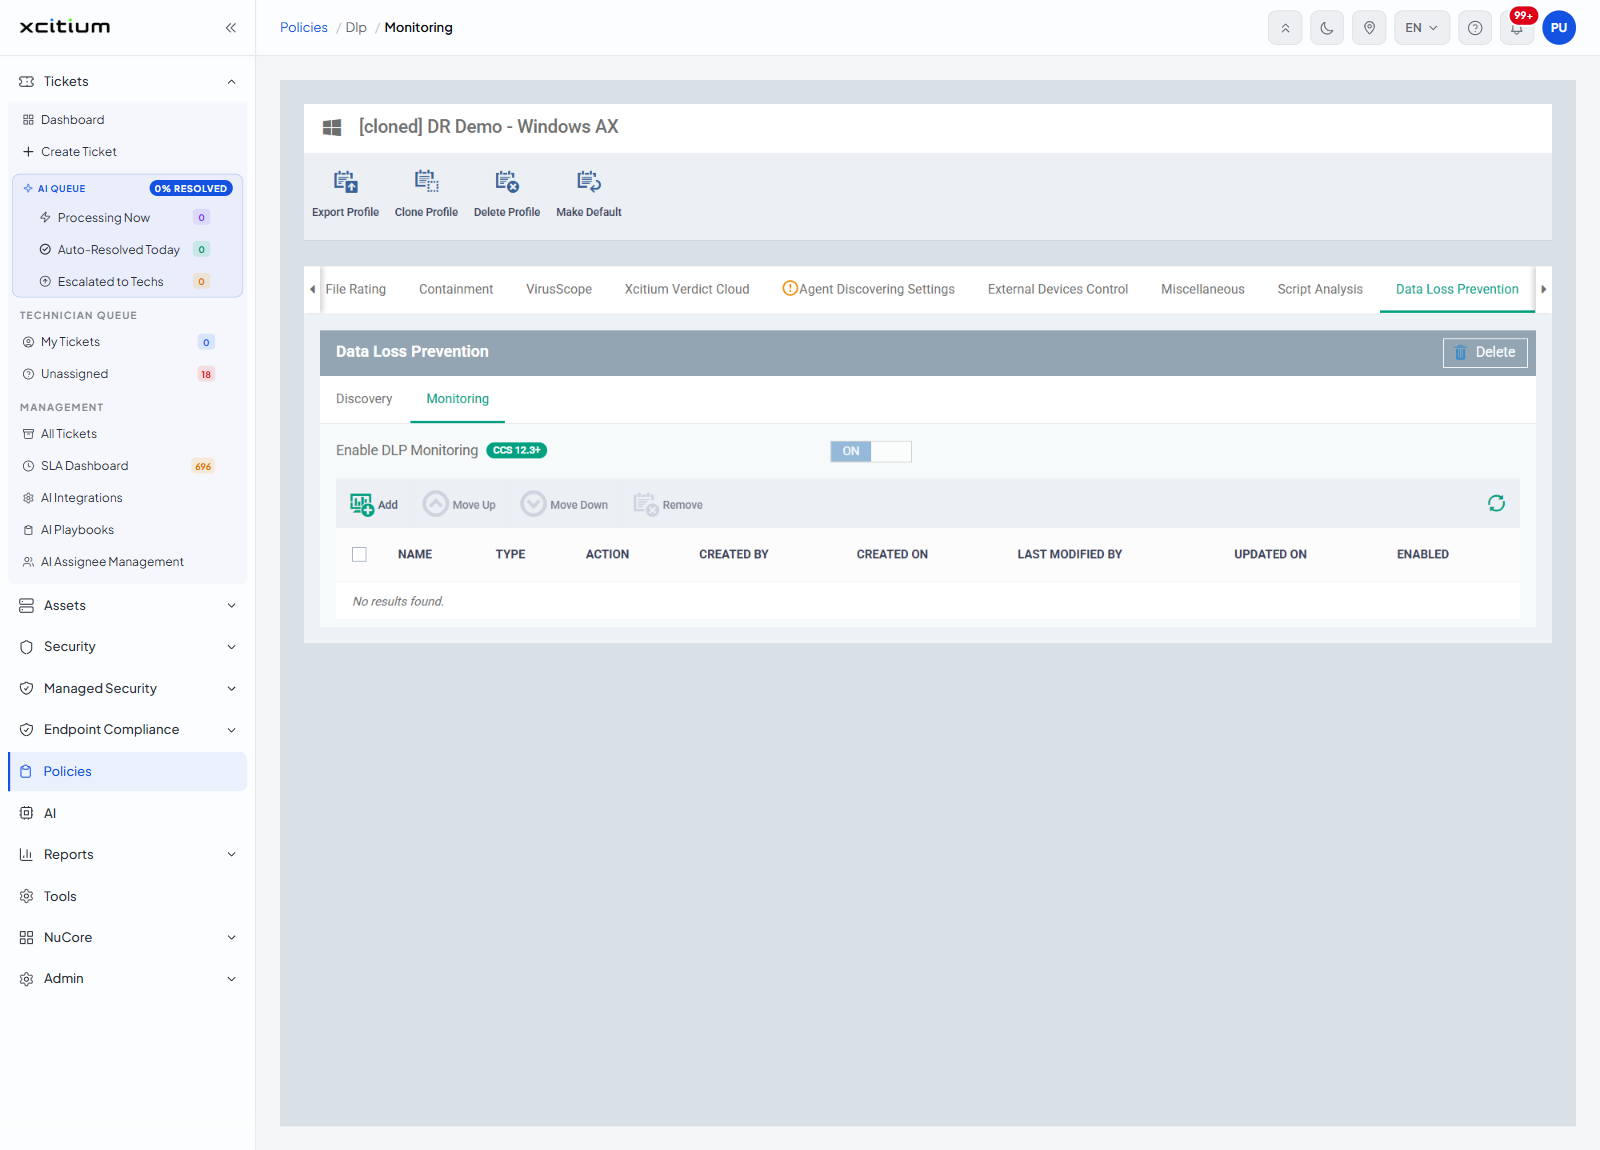
Rules that watch what is done with sensitive data. The sub-tab begins with an ON/OFF toggle, 'Enable DLP Monitoring', carrying the badge 'CCS 12.3+'.
| Button | Description |
| Add | Attaches a monitoring rule to the profile. |
| Move Up | Moves the selected rule earlier in the order. |
| Move Down | Moves the selected rule later in the order. |
| Remove | Takes the ticked rule off the profile. |
| Column | Description |
| Check box (first column) | Ticks the row for 'Remove'. |
| NAME | The name of the rule. |
| TYPE | What kind of monitoring rule it is. |
| ACTION | What the rule does when it matches. |
| CREATED BY | Who made the rule. |
| CREATED ON | Date and time it was made. |
| LAST MODIFIED BY | Who last changed it. |
| UPDATED ON | Date and time it was last changed. |
| ENABLED | Whether the rule is in force. |
This list stays empty until you add an entry to it.
Add a monitoring rule
'Add' opens the 'Add Data Loss Prevention Monitoring Rule' dialog, which works the same way. It carries the line 'To create a new monitoring rule, go to Data Loss Prevention page.'
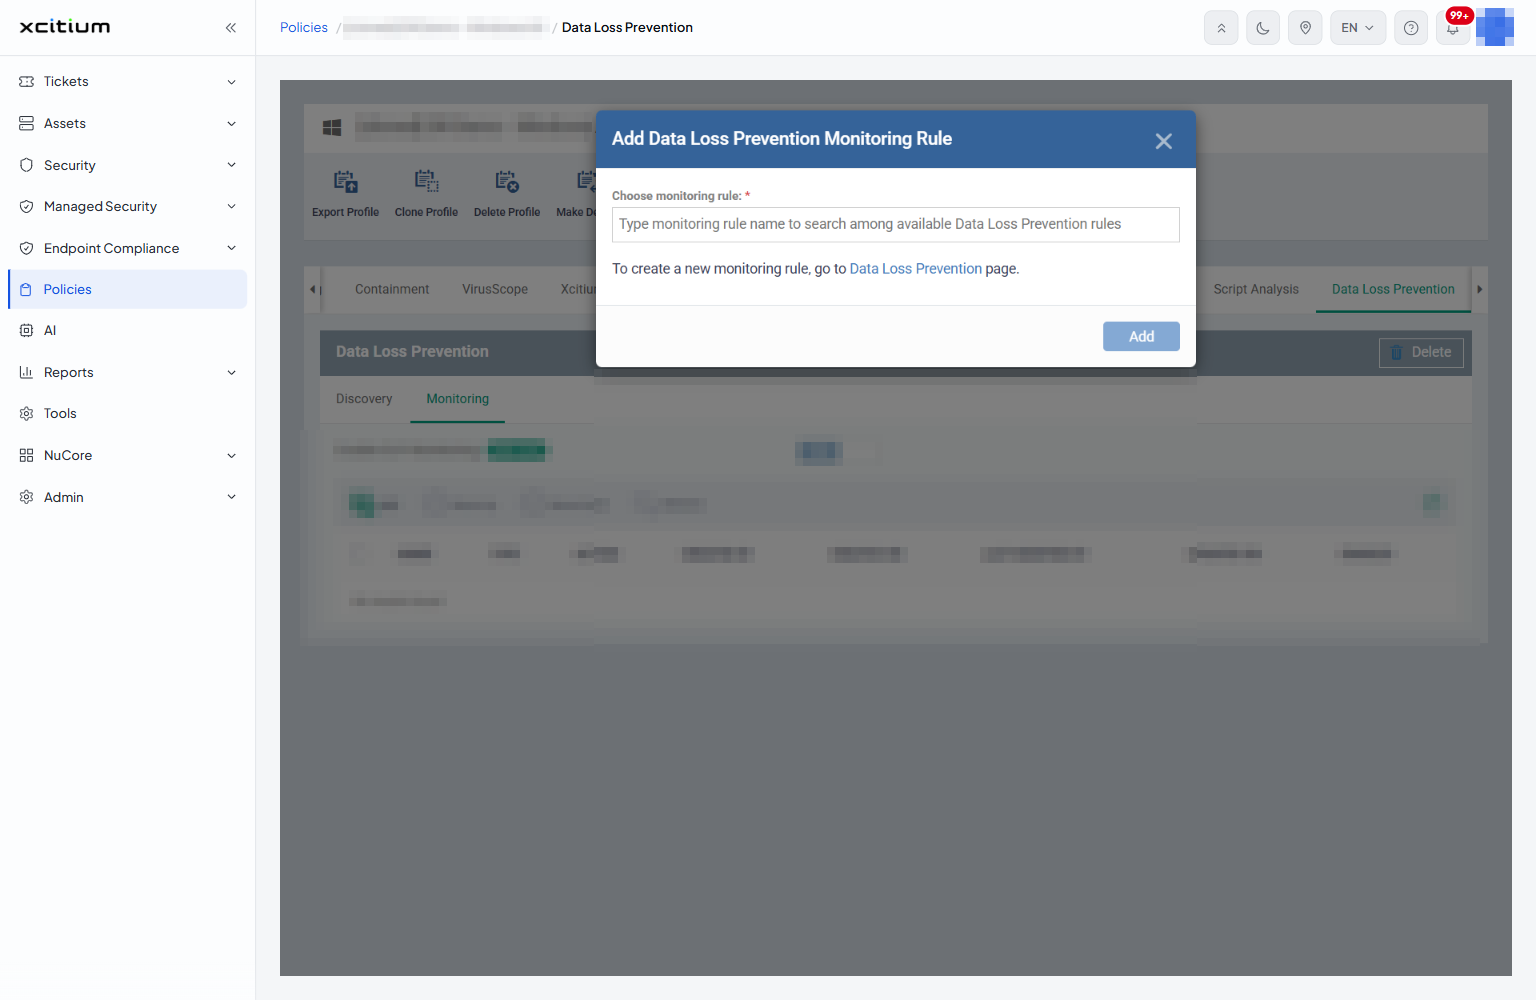
| Field | Description |
| Choose monitoring rule: | The rule you want to attach. This field is required. |
- Click 'Policies' in the left navigation bar and open the profile.
- Click the 'Data Loss Prevention' tab, then click 'Monitoring'.
- Turn on 'Enable DLP Monitoring'.
- Click 'Add' and choose the rule under 'Choose monitoring rule:'.
- Click 'Add', then use 'Move Up' and 'Move Down' to set the order.
Attach a data loss prevention rule
- Click 'Policies' in the left navigation bar and open the profile.
- Click the 'Data Loss Prevention' tab.
- On 'Discovery', click 'Add' and choose the rules that should search the device.
- Click 'Monitoring', turn on 'Enable DLP Monitoring', and click 'Add' to choose the rules that should watch what happens to the data.
- Use 'Move Up' and 'Move Down' to set the order the monitoring rules are read in.
Note: the rules themselves are written elsewhere in the platform. This tab only chooses which of them the profile carries.