


Network Settings
- Click 'Security' > 'SIEM - X' > 'Token Management' > 'Network Settings' to open this interface.
A network is the identity a sensor reports under. Each one has a network token and a sensor activation key, both generated by the platform when the network is created. This tab lists the networks and holds the instructions for pointing NxLog at a sensor.
You can add a network, rename one, delete one, and read the token and activation key you need when you install a sensor.
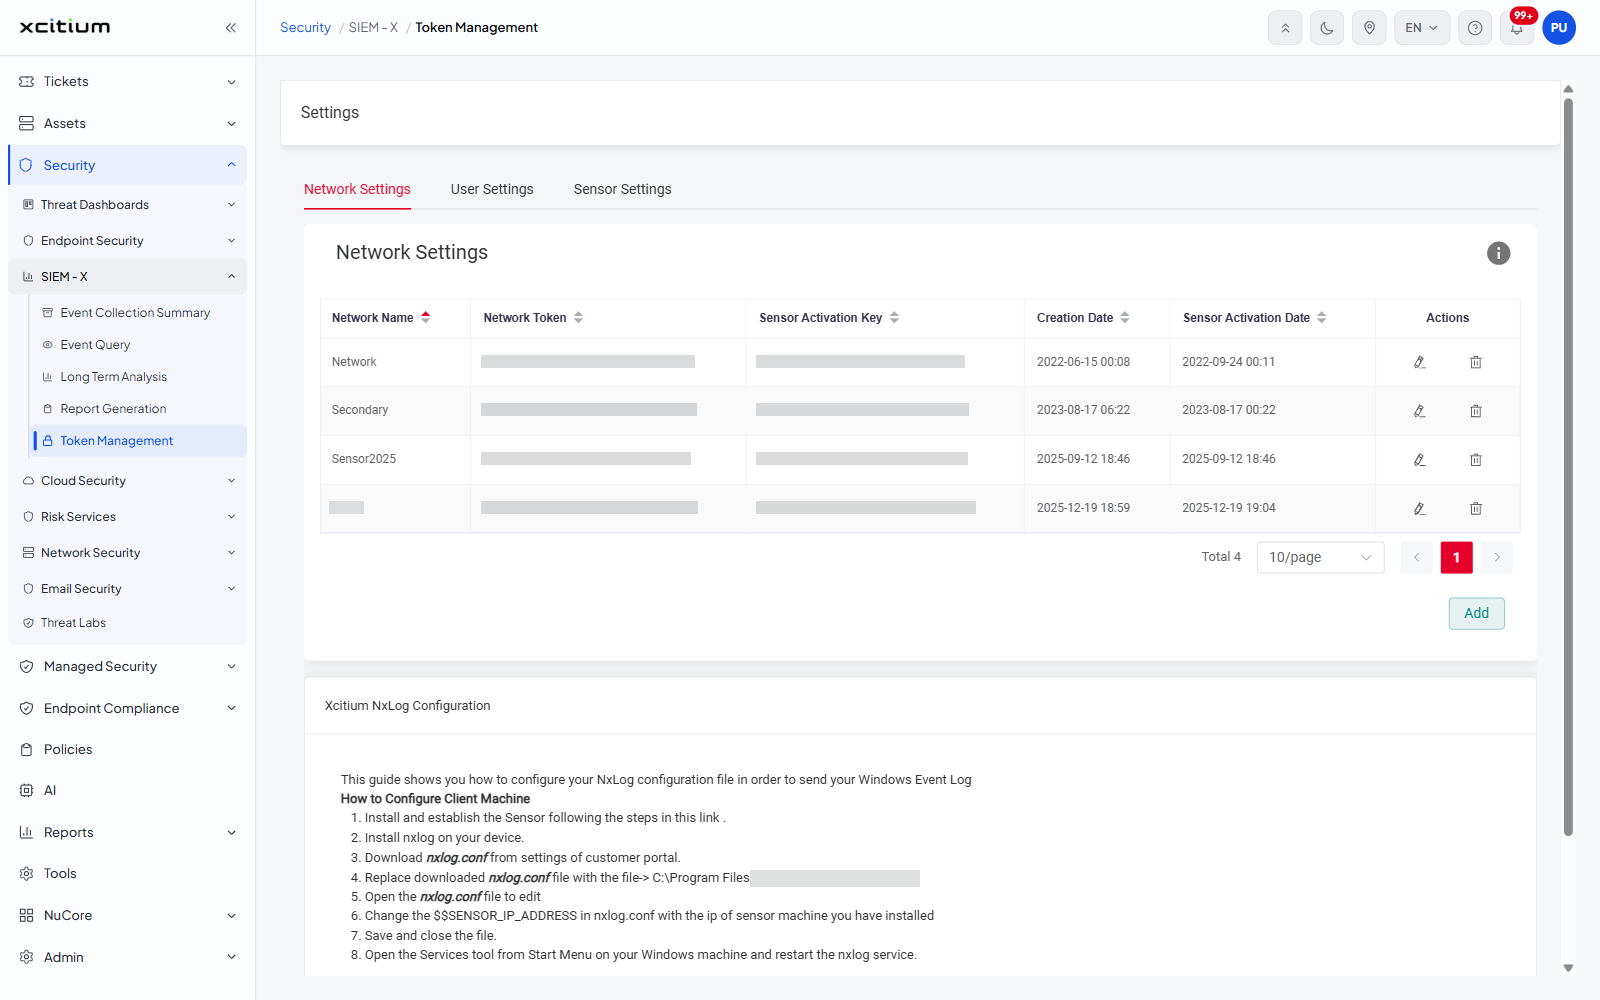
Column descriptions
| Column | Description |
| Network Name | The label you gave the network. Sortable; this is the column the list is sorted on when it opens. |
| Network Token | The token that identifies the network to the SIEM. Sortable. |
| Sensor Activation Key | The key a sensor presents when it activates against this network. Sortable. |
| Creation Date | When the network was created, as date and time. Sortable. |
| Sensor Activation Date | When a sensor last activated against the network. Sortable. |
| Actions | Two icons per row: a pencil that renames the network and a waste bin that deletes it. |
Controls on this tab
| Control | Description |
| Information icon | A round icon in the top right corner of the 'Network Settings' panel. |
| Total <n> | The number of networks defined. |
| Rows per page | A drop-down showing '10/page'. |
| Page buttons | A previous arrow, the numbered pages, and a next arrow. |
| Add | A button under the pager. Opens the inline form that creates a network. |
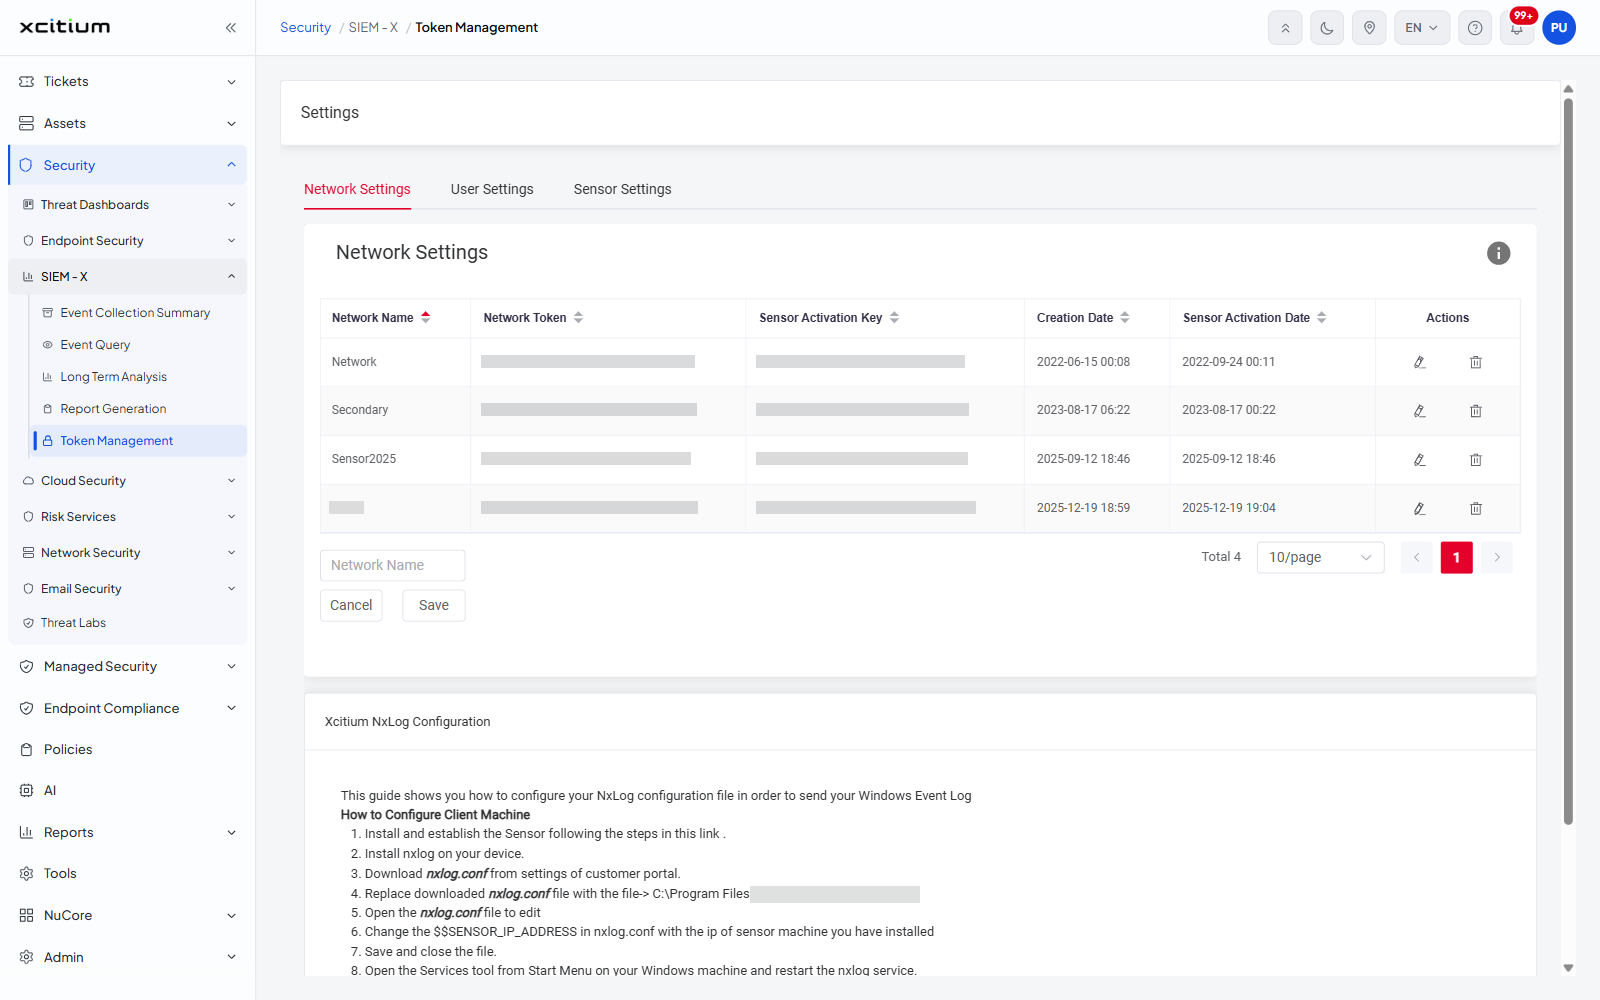
Add a network
- Click 'Add' under the table.
- An inline form appears beneath the last row with a single box, placeholder 'Network Name'.
- Type the name and click 'Save', or click 'Cancel' to leave the list unchanged.
Note: the form has one field only. The network token and the sensor activation key are generated by the platform; you do not type them.
Xcitium NxLog Configuration
A second panel under the table, headed 'Xcitium NxLog Configuration', carries the instructions for forwarding Windows Event Log through NxLog. The text on screen reads:
'This guide shows you how to configure your NxLog configuration file in order to send your Windows Event Log'
'How to Configure Client Machine'
- Install and establish the Sensor following the steps in this link .
- Install nxlog on your device.
- Download nxlog.conf from settings of customer portal.
- Replace downloaded nxlog.conf file with the file-> C:Program Files (x86)nxlogconfnxlog.conf
- Open the nxlog.conf file to edit
- Change the $$SENSOR_IP_ADDRESS in nxlog.conf with the ip of sensor machine you have installed
- Save and close the file.
- Open the Services tool from Start Menu on your Windows machine and restart the nxlog service.
A link at the foot of the panel reads 'nxlog.conf' and downloads the configuration file.
Note: 'nxlog.conf' downloads as soon as you click it. 'Save', the row pencil and the row waste bin all change live data.