


Add a New AI Agent
- Click 'AI' > 'AI Agent' > 'Add New AI Agent' to open this interface.
The 'Add New AI Agent' screen is where you choose what kind of agent to build. You can start from a blank template, or take a ready-made agent from the Xcitium marketplace.
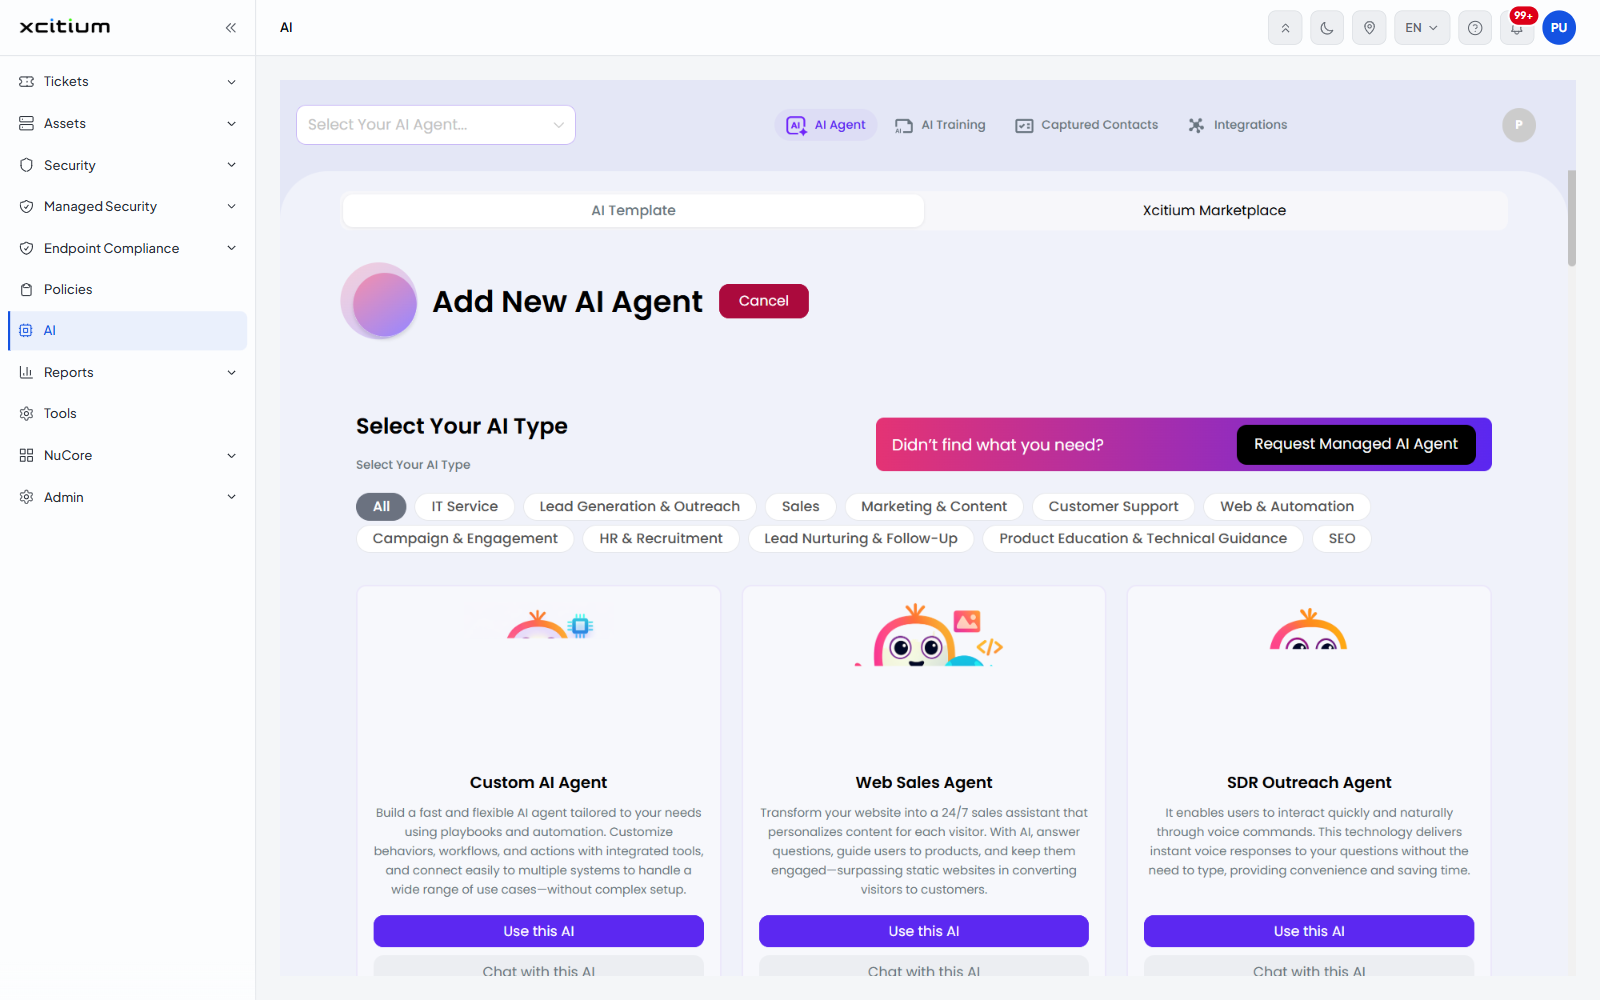
The screen has two tabs: 'AI Template' and 'Xcitium Marketplace'. A 'Cancel' button next to the heading closes the screen without creating anything.
The 'AI Template' tab
This tab is headed 'Add New AI Agent' and shows a 'Select Your AI Type' panel. A banner on the right reads 'Didn't find what you need?' with a 'Request Managed AI Agent' button that opens the managed request screen.
Filter chips above the templates narrow the list by category: 'All' (selected by default), 'IT Service', 'Lead Generation & Outreach', 'Sales', 'Marketing & Content', 'Customer Support', 'Web & Automation', 'Campaign & Engagement', 'HR & Recruitment', 'Lead Nurturing & Follow-Up', 'Product Education & Technical Guidance' and 'SEO'.
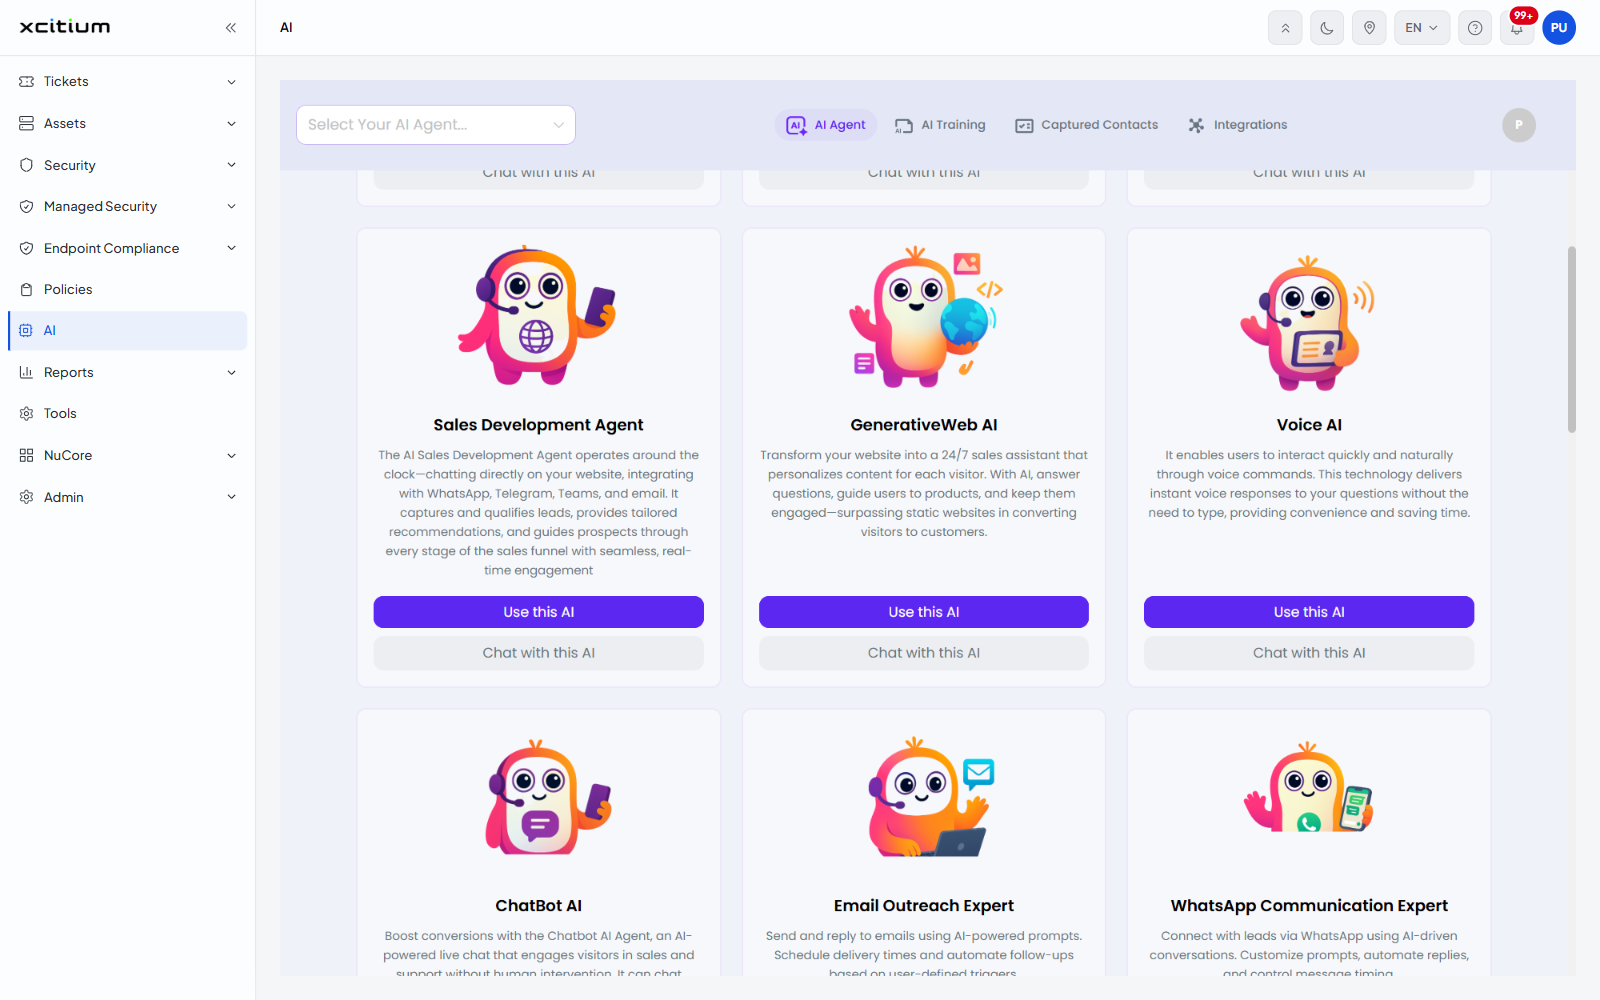
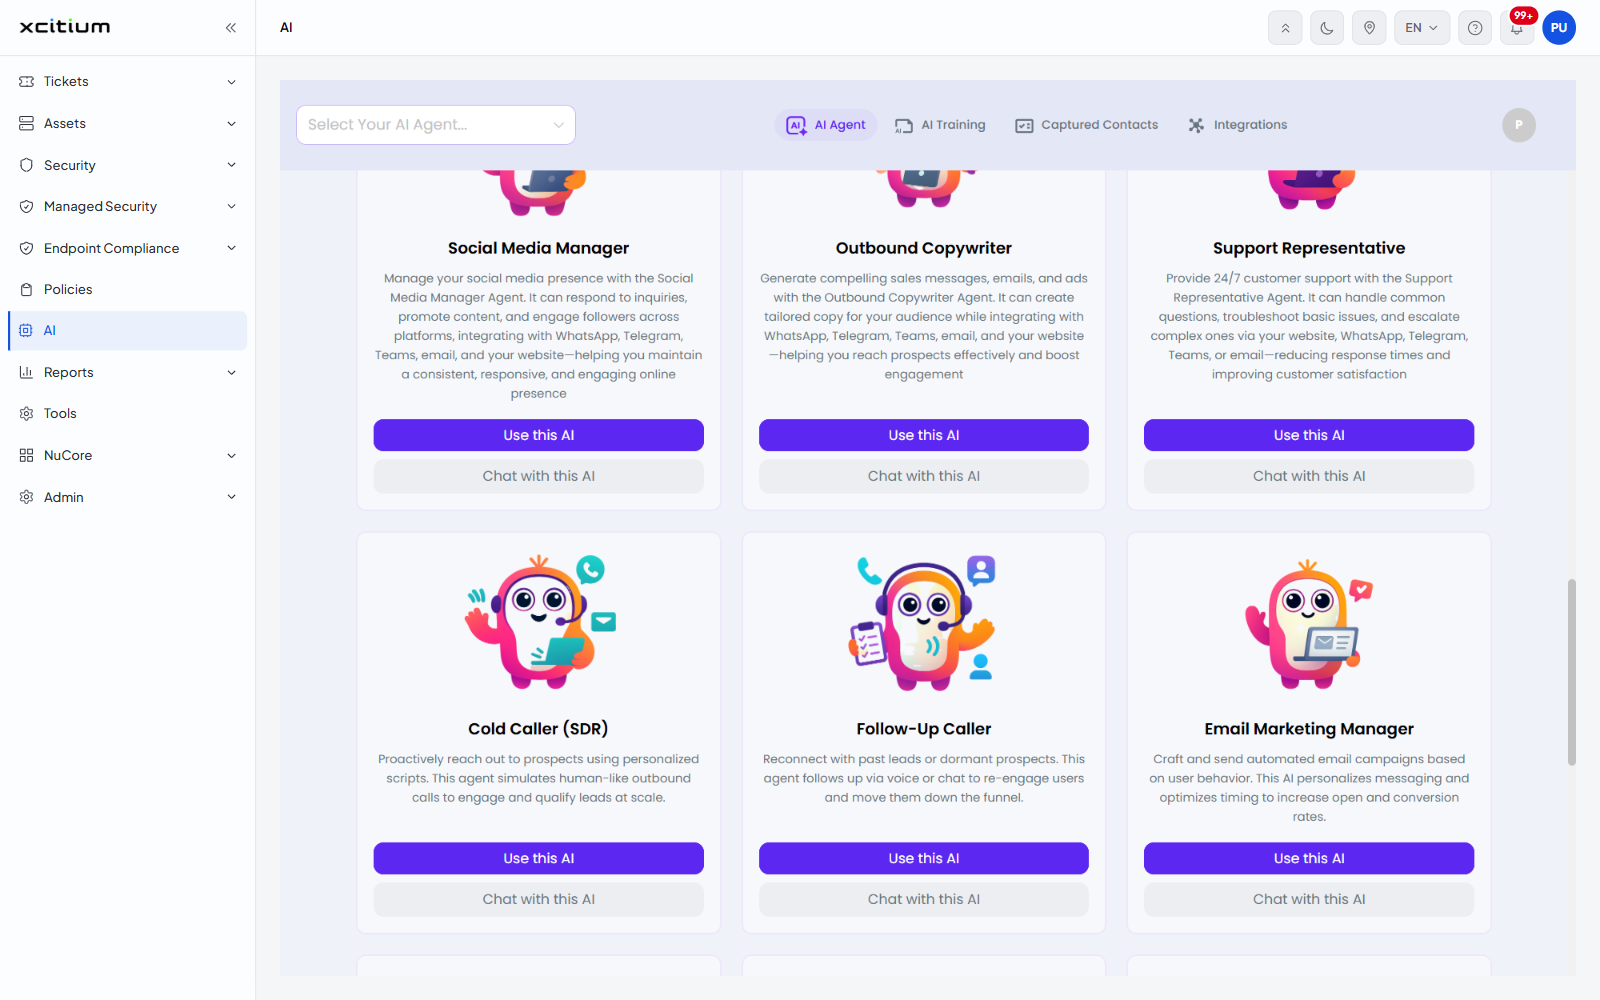
Each template is a card with a name, a description, a 'Use this AI' button and a 'Chat with this AI' button.
The templates
| Template | Description shown on the card |
| Custom AI Agent | Build a fast and flexible AI agent tailored to your needs using playbooks and automation. Customize behaviors, workflows, and actions with integrated tools, and connect easily to multiple systems to handle a wide range of use cases - without complex setup. |
| Web Sales Agent | Transform your website into a 24/7 sales assistant that personalizes content for each visitor. With AI, answer questions, guide users to products, and keep them engaged - surpassing static websites in converting visitors to customers. |
| SDR Outreach Agent | It enables users to interact quickly and naturally through voice commands. This technology delivers instant voice responses to your questions without the need to type, providing convenience and saving time. |
| Sales Development Agent | The AI Sales Development Agent operates around the clock - chatting directly on your website, integrating with WhatsApp, Telegram, Teams, and email. It captures and qualifies leads, provides tailored recommendations, and guides prospects through every stage of the sales funnel with seamless, real-time engagement. |
| GenerativeWeb AI | Transform your website into a 24/7 sales assistant that personalizes content for each visitor. With AI, answer questions, guide users to products, and keep them engaged - surpassing static websites in converting visitors to customers. |
| Voice AI | It enables users to interact quickly and naturally through voice commands. This technology delivers instant voice responses to your questions without the need to type, providing convenience and saving time. |
| ChatBot AI | Boost conversions with the Chatbot AI Agent, an AI-powered live chat that engages visitors in sales and support without human intervention. It can chat directly on your website and integrate with WhatsApp, Telegram, Teams, and email - capturing leads, offering tailored recommendations, and guiding users through the sales funnel anytime. |
| Email Outreach Expert | Send and reply to emails using AI-powered prompts. Schedule delivery times and automate follow-ups based on user-defined triggers. |
| WhatsApp Communication Expert | Connect with leads via WhatsApp using AI-driven conversations. Customize prompts, automate replies, and control message timing. |
| Voice Contact Expert | Enable voice-based interactions through AI. Use prompts to generate call scripts, automate voice responses, and schedule outreach. |
| Sales Engineer | Provide technical insights and personalized support during the sales process with the Sales Engineer Agent. It can chat directly on your website, integrate with WhatsApp, Telegram, Teams, and email - explaining complex products, answering detailed questions, and supporting customers in making informed decisions. |
| Content Marketing Specialist | Educate and engage users by sharing blog posts, guides, and content offers. Perfect for nurturing leads and boosting SEO-driven content strategies. |
| Social Media Manager | Manage your social media presence with the Social Media Manager Agent. It can respond to inquiries, promote content, and engage followers across platforms, integrating with WhatsApp, Telegram, Teams, email, and your website. |
| Outbound Copywriter | Generate compelling sales messages, emails, and ads with the Outbound Copywriter Agent. It can create tailored copy for your audience while integrating with WhatsApp, Telegram, Teams, email, and your website. |
| Support Representative | Provide 24/7 customer support with the Support Representative Agent. It can handle common questions, troubleshoot basic issues, and escalate complex ones via your website, WhatsApp, Telegram, Teams, or email. |
| Cold Caller (SDR) | Proactively reach out to prospects using personalized scripts. This agent simulates human-like outbound calls to engage and qualify leads at scale. |
| Follow-Up Caller | Reconnect with past leads or dormant prospects. This agent follows up via voice or chat to re-engage users and move them down the funnel. |
| Email Marketing Manager | Craft and send automated email campaigns based on user behavior. This AI personalizes messaging and optimizes timing to increase open and conversion rates. |
| Sales Inquiry Rep | Handle product or service inquiries instantly with the Sales Inquiry Rep Agent. It can respond directly on your website and integrate with WhatsApp, Telegram, Teams, and email. |
| HR Recruitment Agent | Generate tailored interview questions for job applicants, view response-based scores instantly, and share a unique chat link where candidates can answer questions directly. |
| Relevant Page Finder | This agent searches across all trained URLs for the keywords you enter, calculates relevance scores, and highlights the exact pages and content where those keywords appear. |
| IT Service Agent | The IT Service Agent connects with IT ecosystems such as Service Desk V2 platforms and cloud offices like Microsoft 365. It detects and troubleshoots technical issues, creates IT tasks or support tickets automatically, and tracks resolutions in real time. |
The five wizard steps
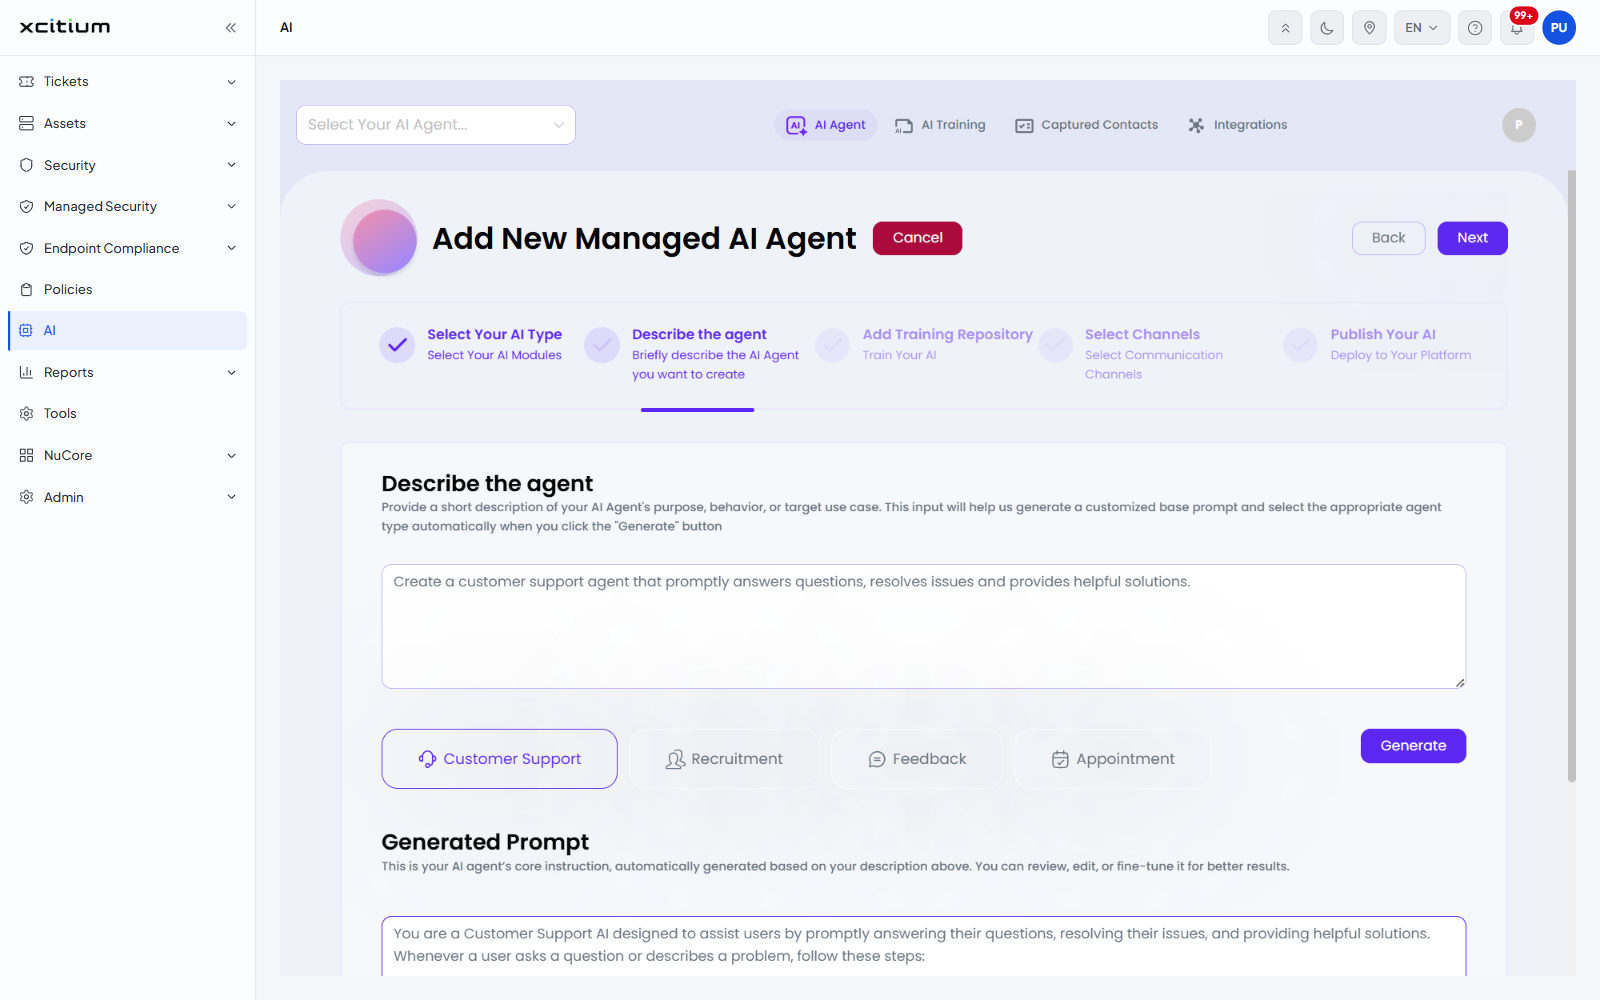
Clicking 'Use this AI' on a template opens a five-step wizard headed 'Add New Managed AI Agent'. The steps are shown as a progress bar across the top, and the buttons 'Cancel', 'Back' and 'Next' sit next to the heading.
| Step | Sub-title | What you do |
| Select Your AI Type | Select Your AI Modules | Choose the template. This step is already complete when you arrive from a template card. |
| Describe the agent | Briefly describe the AI Agent you want to create | Describe the agent in your own words and generate its prompt. |
| Add Training Repository | Train Your AI | Pick the repository the agent will be trained on. |
| Select Channels | Select Communication Channels | Choose where the agent talks to people. |
| Publish Your AI | Deploy to Your Platform | Name the agent and create it. |
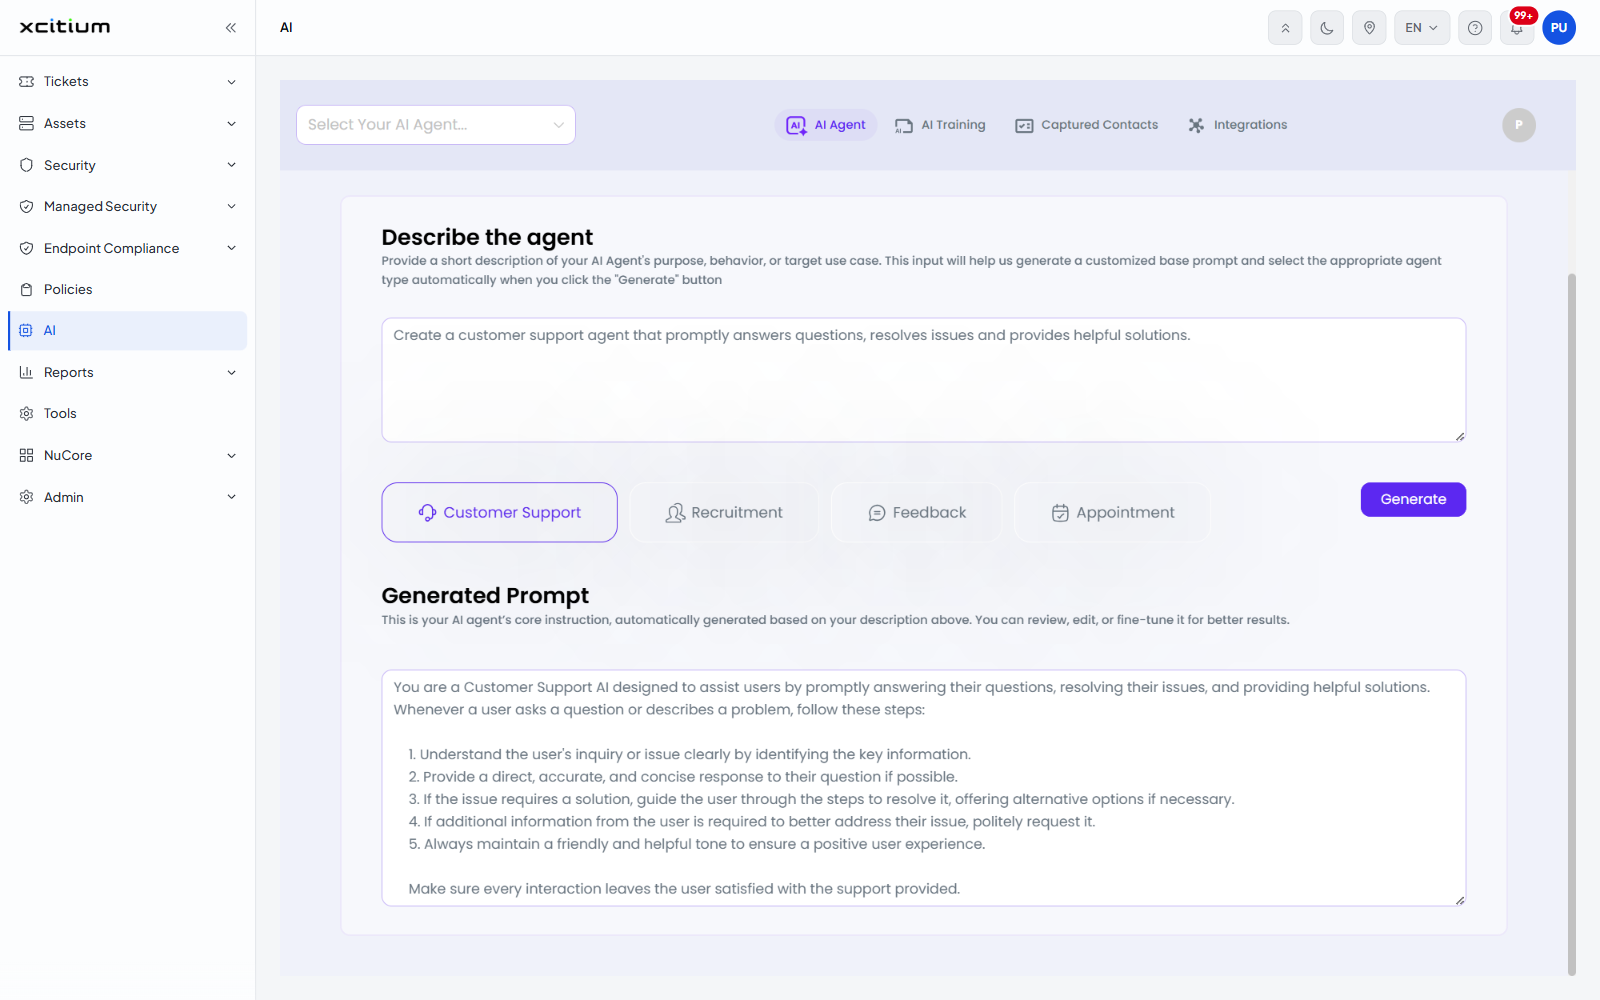
Step 2 - Describe the agent
'Provide a short description of your AI Agent's purpose, behavior, or target use case. This input will help us generate a customized base prompt and select the appropriate agent type automatically when you click the "Generate" button.'
| Field | Control | Description |
| Description | Multi-line text box | Your own description of the agent. It opens with an example, 'Create a customer support agent that promptly answers questions, resolves issues and provides helpful solutions.' |
| Quick starters | Buttons | 'Customer Support', 'Recruitment', 'Feedback' and 'Appointment' fill the description box with a ready-made example. 'Customer Support' is highlighted to begin with. |
| Generate | Button | Writes the agent's core instruction into 'Generated Prompt' from your description. |
| Generated Prompt | Multi-line text box | 'This is your AI agent's core instruction, automatically generated based on your description above. You can review, edit, or fine-tune it for better results.' |
Step 3 - Add Training Repository
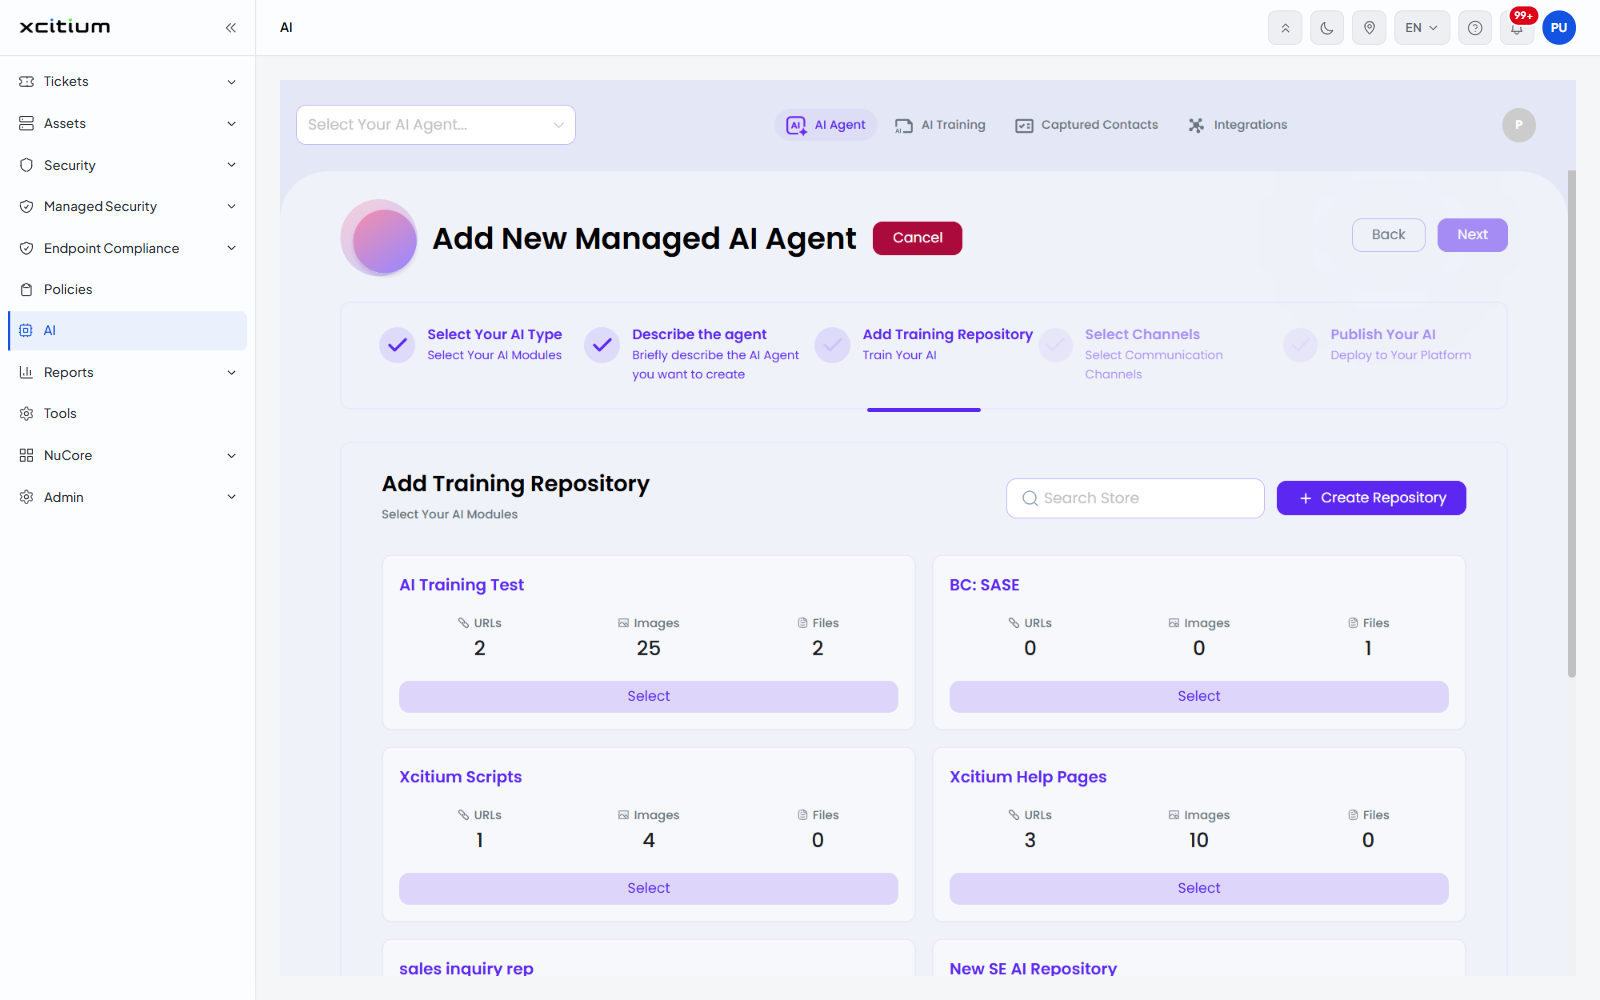
The step is headed 'Add Training Repository' with the sub-title 'Select Your AI Modules'. It lists your training repositories as cards, each showing the number of 'URLs', 'Images' and 'Files' it holds and a 'Select' button. A 'Search Store' box narrows the list, and '+ Create Repository' makes a new one without leaving the wizard. 'Next' stays unavailable until you select a repository.
Step 4 - Select Channels
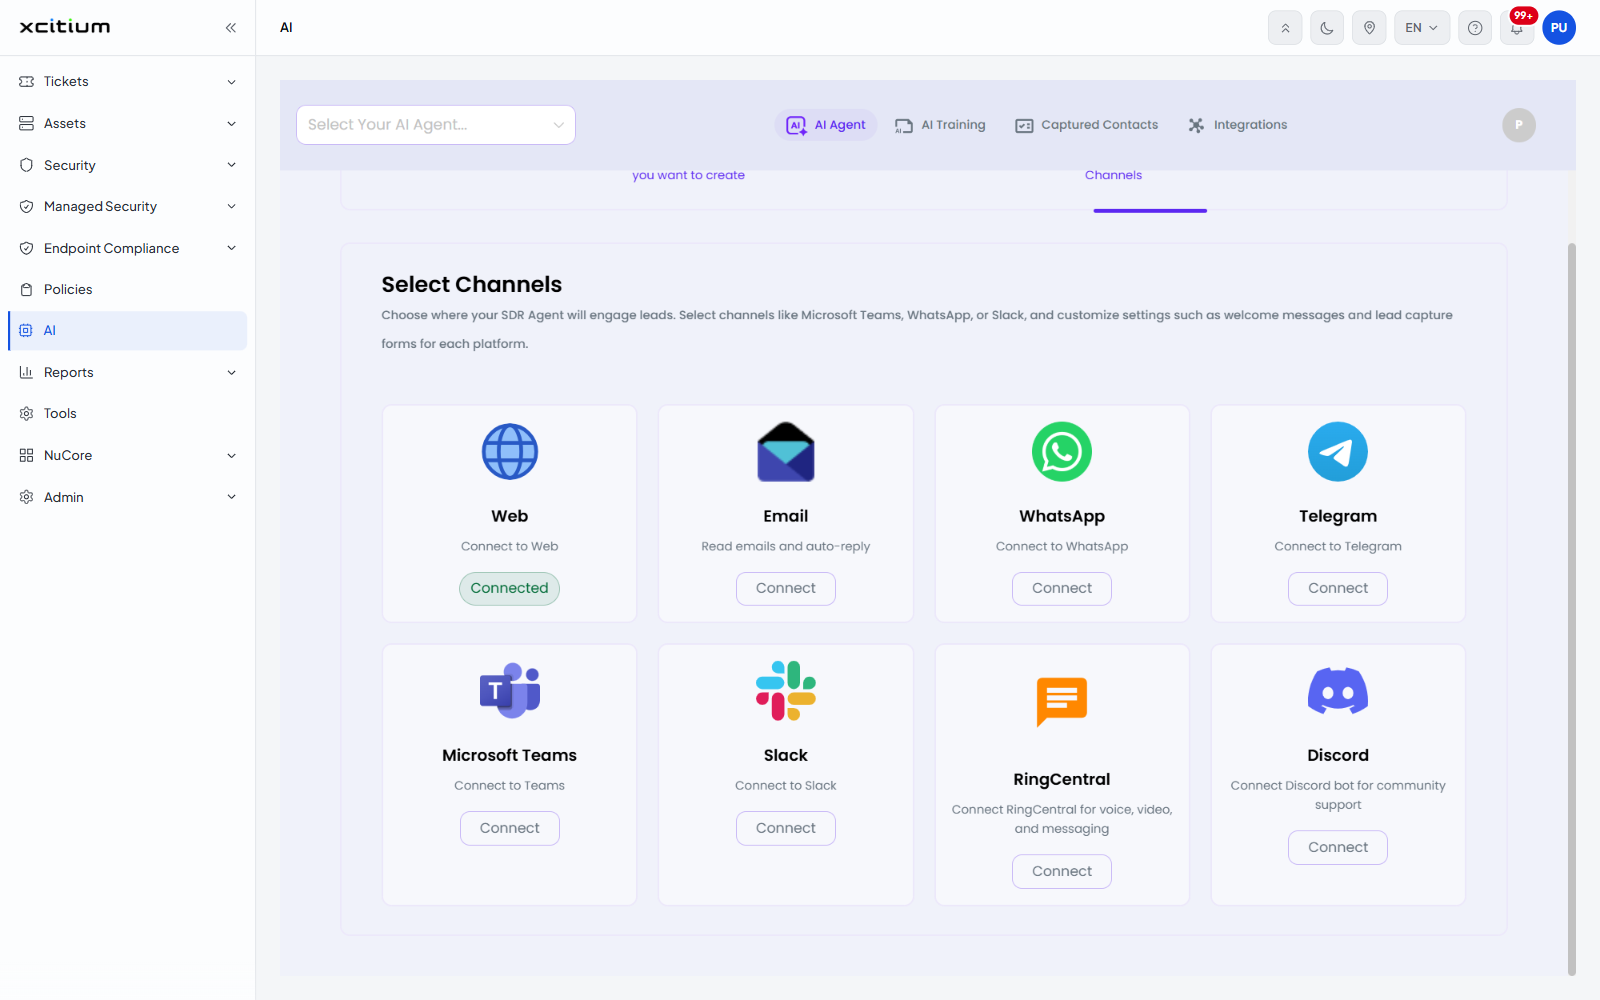
'Choose where your SDR Agent will engage leads. Select channels like Microsoft Teams, WhatsApp, or Slack, and customize settings such as welcome messages and lead capture forms for each platform.'
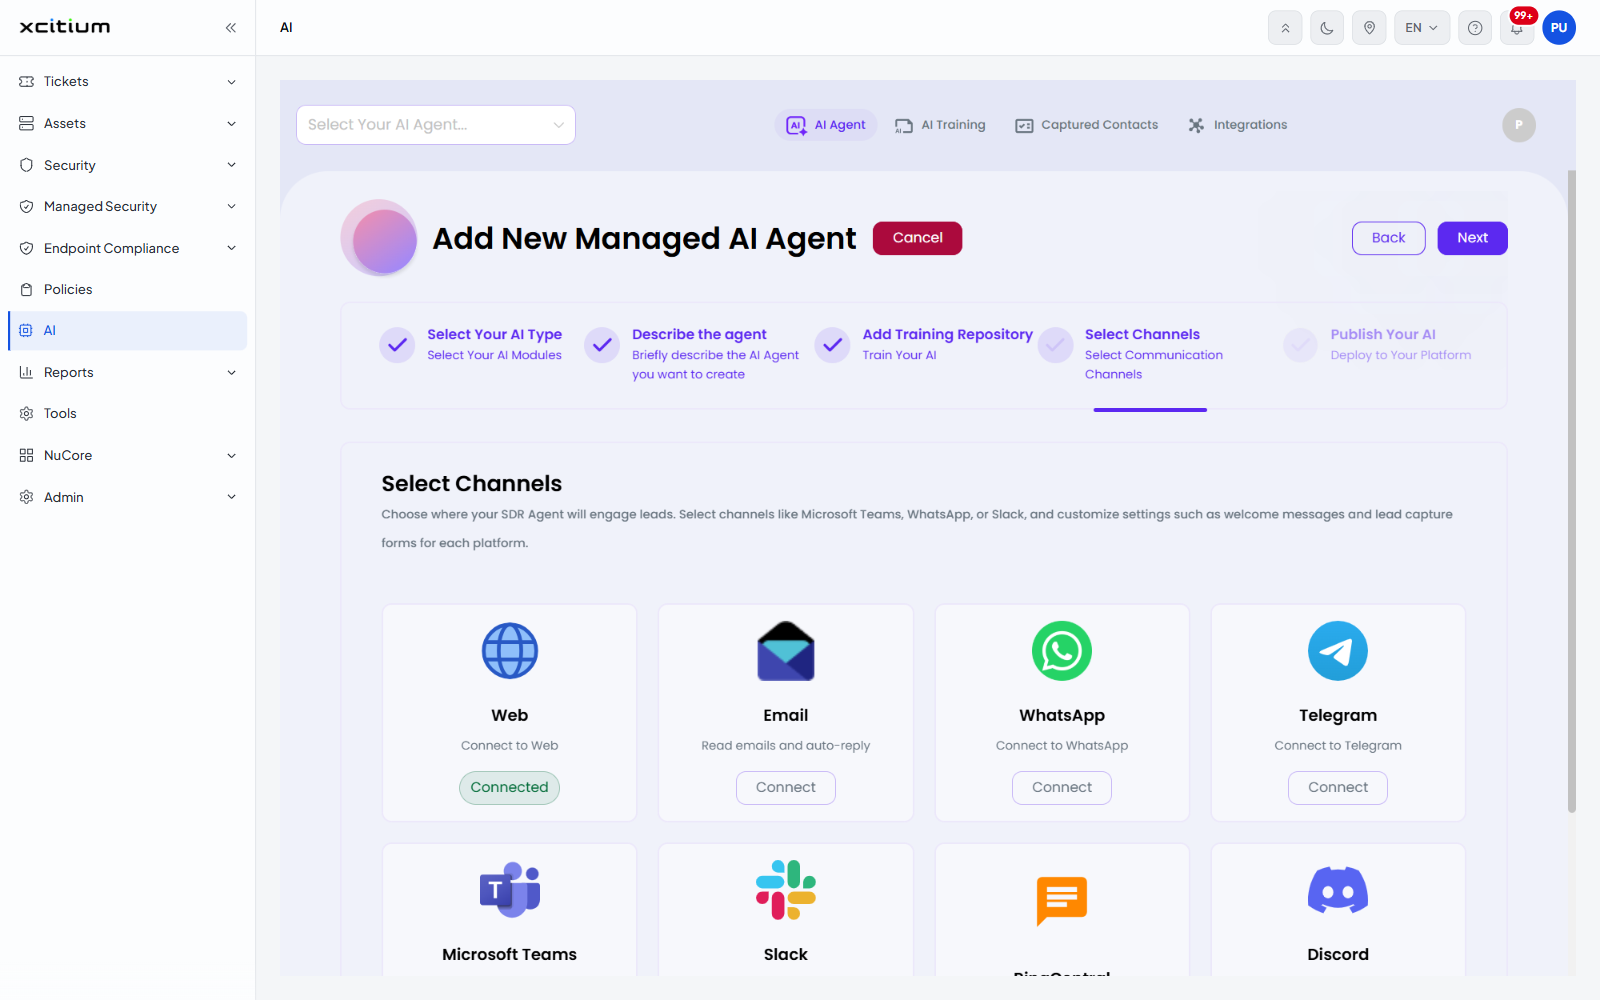
| Channel | Card text | Button |
| Web | Connect to Web | Connected |
| Read emails and auto-reply | Connect | |
| Connect to WhatsApp | Connect | |
| Telegram | Connect to Telegram | Connect |
| Microsoft Teams | Connect to Teams | Connect |
| Slack | Connect to Slack | Connect |
| RingCentral | Connect RingCentral for voice, video, and messaging | Connect |
| Discord | Connect Discord bot for community support | Connect |
Step 5 - Publish Your AI
The last step asks for one field.
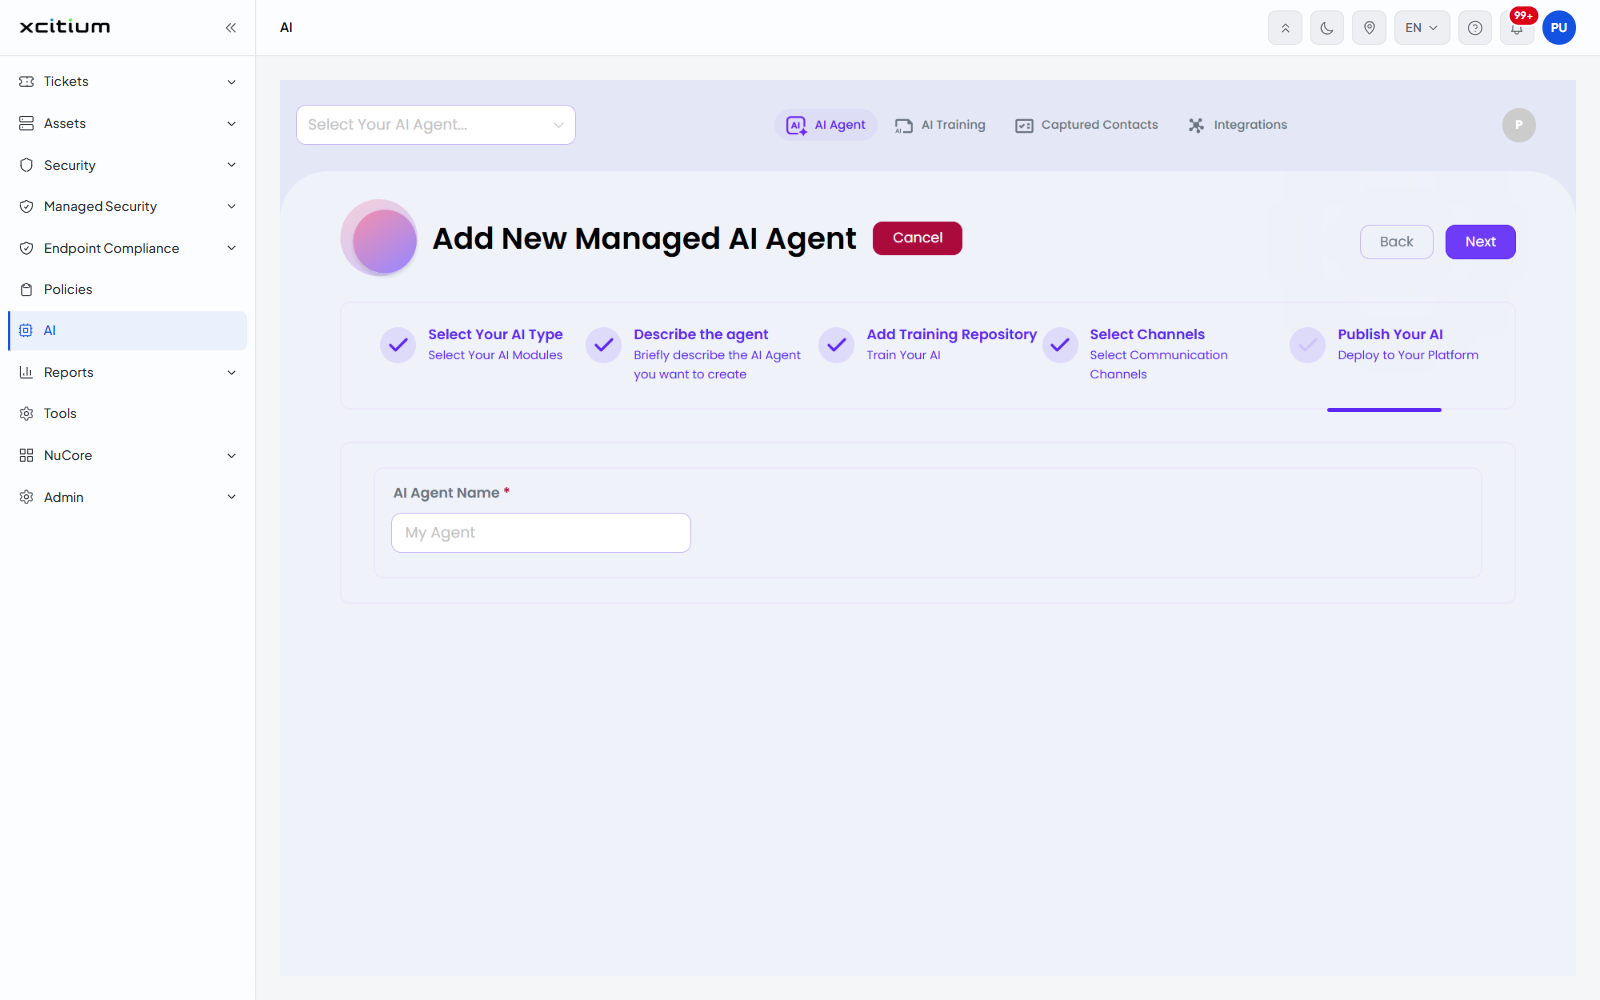
| Field | Control | Description |
| AI Agent Name | Text box, required | The name the agent will be listed under. The placeholder is 'My Agent'. |
Add an agent from a template
- Click 'AI' > 'AI Agent' > 'Add New AI Agent'.
- Stay on the 'AI Template' tab and use the category chips to find the template you want.
- Click 'Use this AI' on the template card.
- On 'Describe the agent', describe the agent and click 'Generate', then review the text in 'Generated Prompt'. Click 'Next'.
- On 'Add Training Repository', click 'Select' on the repository the agent should use, or click '+ Create Repository' to make a new one. Click 'Next'.
- On 'Select Channels', click 'Connect' on each channel the agent should use. Click 'Next'.
- On 'Publish Your AI', type the name in 'AI Agent Name' and click 'Next' to create the agent.
Click 'Cancel' at any step to leave the wizard without creating the agent.
Note: 'Chat with this AI' on a template card lets you try the template before you build an agent from it.