Configuring Rules for Auto-Sandbox
The 'Auto-Sandbox' interface allows you to add and define rules for programs that should be run in the sandboxed environment. A sandboxed application has much less opportunity to damage your computer because it is run isolated from your operating system and your files. This allows you to safely run applications that you are not 100% sure about. Auto-sandbox rules allow you to determine whether programs should be allowed to run with full privileges, ignored, run restricted or run in fully virtualized environment. For easy identification, Comodo Antivirus for Servers will show a green border around programs that are running in the sandbox.
-
The 'Auto-Sandbox' panel can be accessed by clicking 'Tasks > Sandbox Tasks > Open Advanced Settings > Security Settings > Defense+ > Sandbox > Auto-Sandbox
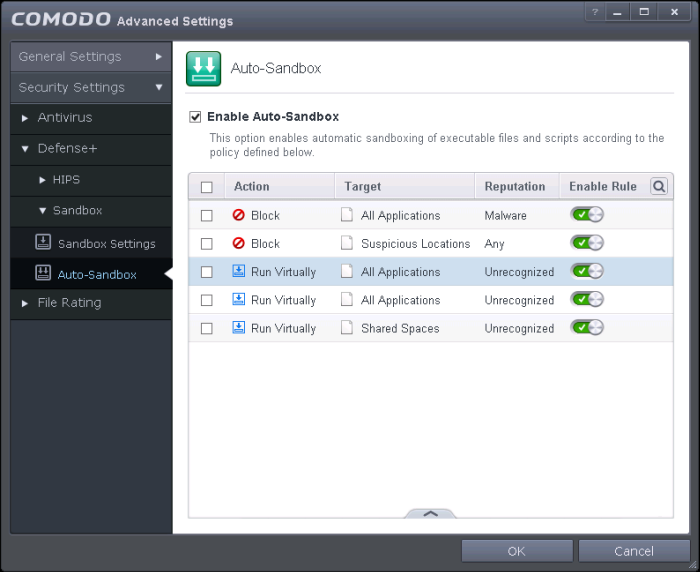
- Enable Auto-Sandbox - Allows you to enable or disable the Sandbox. If enabled, the applications are run inside the sandbox as per the rules defined. (Default = Enabled)
The interface displays the configured rules:
- Action – Displays the operation that the sandbox should perform on the target files if the rule is triggered.
- Target –The files, file groups or specified locations on which the rule will be executed.
- Reputation – The trust status of the files to which the rule should apply. Can be ‘Malware’, ‘Trusted’ or ‘Unrecognized’
- Enable Rule – Allows you to enable/disable the rule.
CAVS ships with a set of pre-defined auto-sandbox rules that are configured to provide maximum protection for your system. The table provides the configuration settings for these pre-defined rules:
|
Rule |
Action |
Target |
Restriction Level |
Rating |
Source |
Log Action |
Limit Maximum memory |
Limit Program Execution Time |
Quarantine |
||
|---|---|---|---|---|---|---|---|---|---|---|---|
|
Created by |
Located on |
Downloaded from |
|||||||||
|
1 |
Block |
File Group - All Applications |
N/A |
Malware |
Any |
Any |
Any |
On |
N/A |
N/A |
On |
|
2 |
Block |
File Group - Suspicious Locations |
N/A |
Any |
Any |
Any |
Any |
On |
N/A |
N/A |
Off |
|
3 Applicable only for Windows 8.0 and 8.1 |
Ignore |
All Metro Apps |
Off |
Any |
Any |
Any |
Any |
On |
N/A |
N/A |
N/A |
|
4 |
Run Virtual |
File Group - All Applications |
Off |
Unrecognized |
Any |
Any |
Internet |
On |
Off |
Off |
N/A |
|
Any |
Network Drive |
Any |
|||||||||
|
Any |
Removable Drive |
Any |
|||||||||
|
5 |
Run Virtual |
File Group - All Applications |
Off |
Unrecognized |
File Group – Web Browsers |
Any |
Any |
On |
Off |
Off |
N/A |
|
File Group – Email Clients |
Any |
Any |
|||||||||
|
File Group –File Downloaders |
Any |
Any |
|||||||||
|
File Group –Pseudo-File Downloaders |
|
|
|||||||||
|
6 |
Run Virtual |
File Group – Shared Spaces |
Off |
Unrecognized |
Any |
Any |
Any |
On |
Off |
Off |
N/A |
Clicking the handle at the bottom of the interface opens a rule configuration panel:

- Add - Allows you to add a new sandbox rule. See the section 'Adding a Auto-Sandbox Rule' for guidance on creating a new rule.
- Edit - Allows you to modify the selected sandbox rule. See the section 'Editing a Auto-Sandbox Rule' for more details.
- Remove - Deletes the selected rule.
- Reset to Default – Resets to default the rule.
Users can also re-prioritize the sandbox rules by using the 'Move Up' and 'Move Down' buttons.
Auto-sandbox rules can be created for a single application, for all applications in a folder or file group, from running processes or for applications based on their file or process hash. ‘Source’, ‘Reputation’ and ‘Options’ allow you to add detailed filters to your rule. They are, however, optional, so you can create a very simple rule to run an application in the sandbox just by specifying the action and the target application.
- Click the Add button from the options.
The Managed Sandboxed Program screen will be displayed:
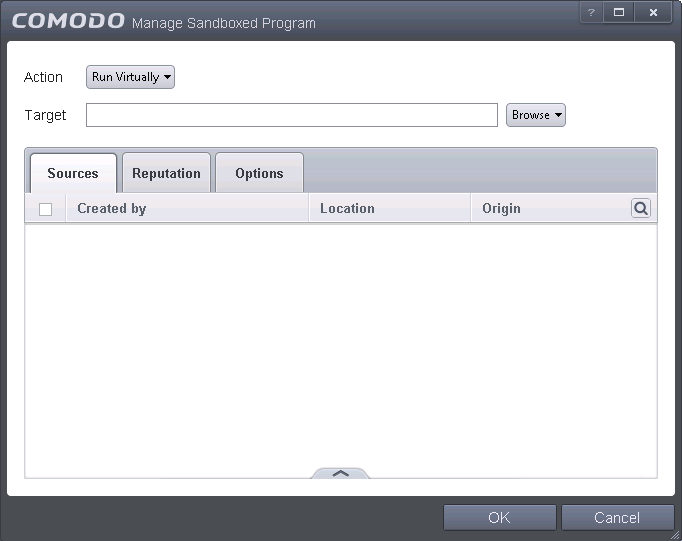
The Manage Sandboxed Program screen will be displayed.
- Step 1 – Select the Action
- Step 2 – Select the Target
- Step 3 – Select the Sources
- Step 4 – Select the File Reputation
- Step 5 – Select the Options
The options under the Action drop-down button combined with the Set Restriction Level setting in the Options tab determine the amount of privileges an auto-sandboxed application has access to other software and hardware resources on your computer.
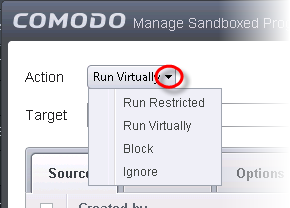
The options available under the Action button are:
- Run Virtually - The application will be run in a virtual environment completely isolated from your operating system and files on the rest of your computer.
- Run Restricted - The application is allowed to access very few operating system resources. The application is not allowed to execute more than 10 processes at a time and is run with very limited access rights. Some applications, like computer games, may not work properly under this setting.
- Block - The application is not allowed to run at all.
- Ignore - The application will not be sandboxed and allowed to run with all privileges.
The next step is to select the target to which the auto-sandbox rule is to be applied. Click the Browse button beside the Target field.
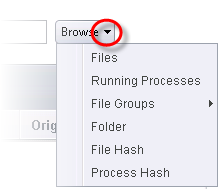
You have five options available to add the target path.
- Files – Allows to add individual files as target
- Running Processes – As the name suggests, this option allows you to add any process that is currently running on your computer
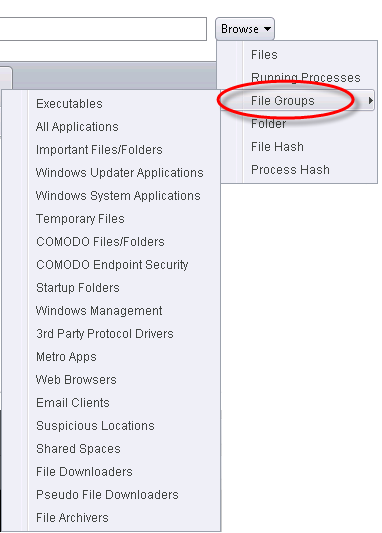
- File Groups – Allows to add predefined File Groups as target. To add or modify a predefined file group refer to the section File Groups for more details.
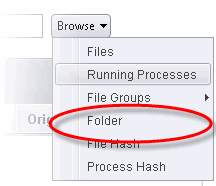
- Folder – Allows you to add a folder or drive as the target
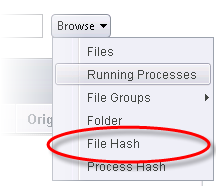
- File Hash – Allows you to add a file as target based on its hash value
- Process Hash - Allows you to add any process that is currently running on your computer as target based on its hash value
- Choose 'Files' from the 'Browse' drop-down.
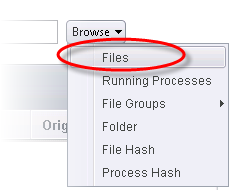
-
Navigate to the file you want to add as target in the 'Open' dialog and click 'Open'
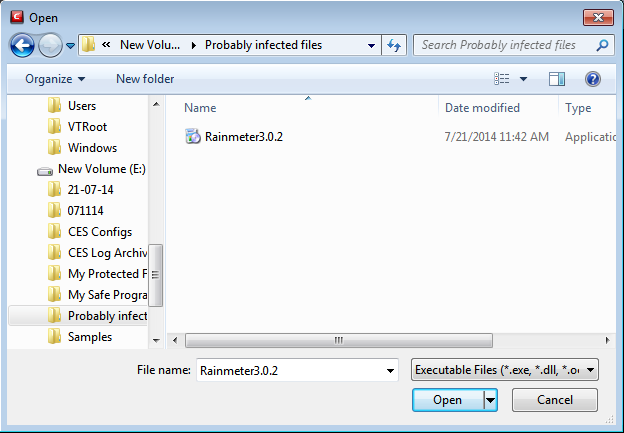
The file will be added as target and will be run as per the action chosen in Step 1.
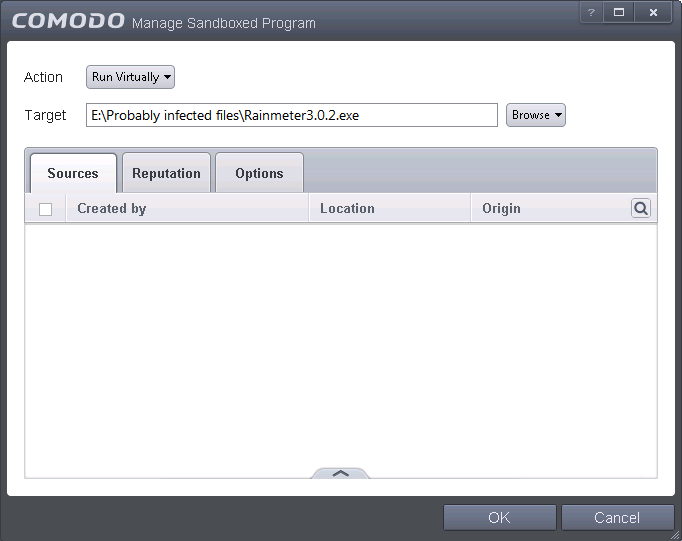
If you want to just add an application for a particular action as selected in Step 1 without specifying any filters or options, then click 'OK'. The default values for Sources and Reputation will be 'Any' and for Options it will be 'Log when this action is performed'. If required you can configure Source and Reputation filters and Options for the rule.
Adding an application from a running processes
-
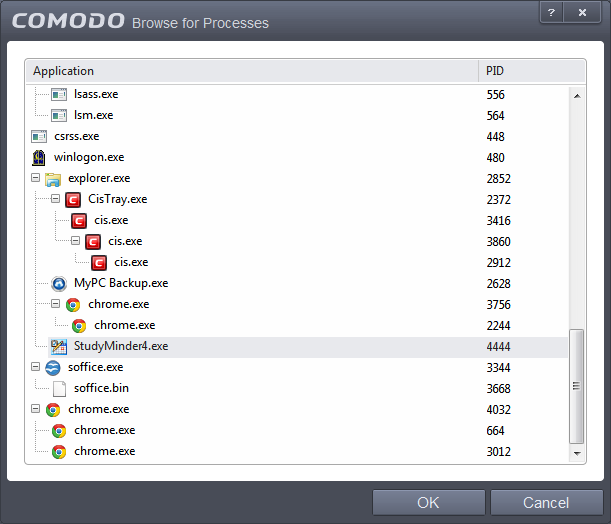
Choose 'Running Processes' from the 'Browse' drop-down.
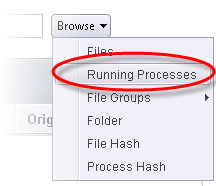
A list of currently running processes in your computer will be displayed.
-
Select the process, whose target application is to be added to target and click 'OK' from the Browse for Process dialog.
The file will be added as target and will be run as per the action chosen in Step 1.
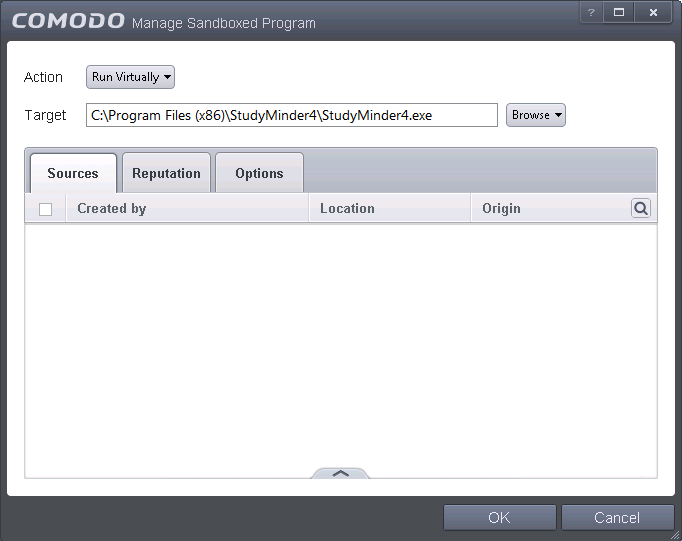
If you want to just add an application for a particular action as selected in Step 1 without specifying any filters or options, then click 'OK'. The default values for Sources and Reputation will be 'Any' and for Options it will be 'Log when this action is performed'. If required you can configure Source and Reputation filters and Options for the rule.
-
Choose 'File Groups' from the 'Browse' drop-down. Choosing File Groups allows you to include a category of pre-set files or folders. For more details on how to manage file groups refer to the section File Groups.
-
Select the preset file group from the options.
-
The file group will be added as target and the applications inside it will be run as per the action chosen in Step 1.
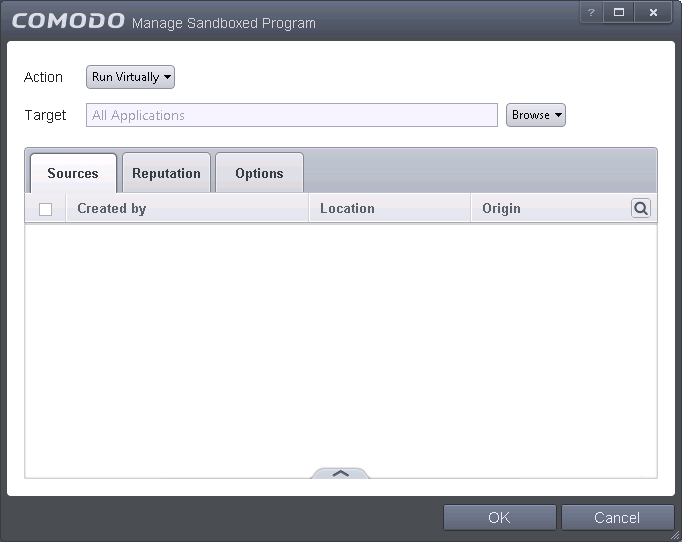
If you want to just add the applications in the file group for a particular action as selected in Step 1 without specifying any filters or options, then click 'OK'. The default values for Sources and Reputation will be 'Any' and for Options it will be 'Log when this action is performed'. If required you can configure Source and Reputation filters and Options for the rule.
Adding a Folder/Drive Partition
-
Choose 'Folder' from the 'Browse' drop-down.
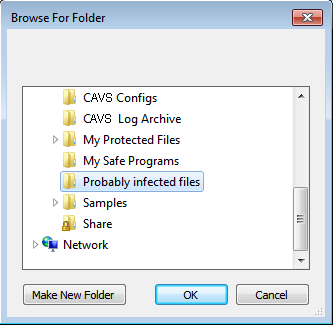
The 'Browse for Folder' dialog will appear.
-
Navigate to the drive partition or folder you want to add as target and click OK
The drive partition/folder will be added as target and will be run as per the action chosen in Step 1.
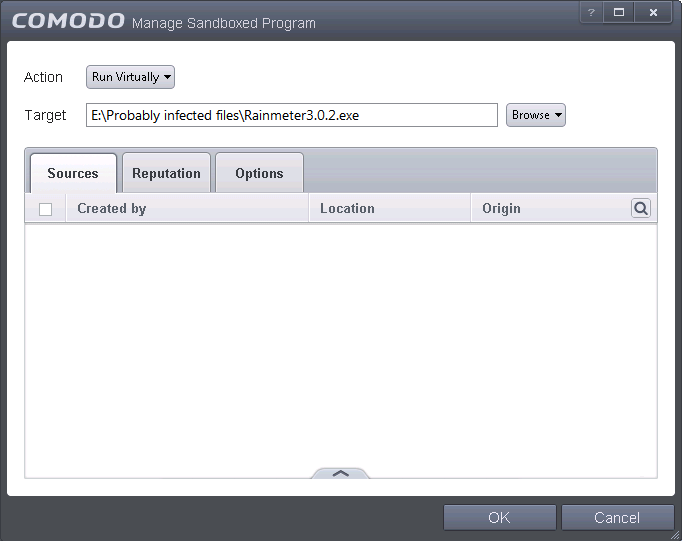
If you want to just add the applications in the drive partition/folder for a particular action as selected in Step 1 without specifying any filters or options, then click 'OK'. The default values for Sources and Reputation will be 'Any' and for Options it will be 'Log when this action is performed'. If required you can configure Source and Reputation filters and Options for the rule.
Adding a file based on its hash value
-
Choose 'File Hash' from the 'Browse' drop-down.
-
Navigate to the file whose hash value you want to add as target in the 'Open' dialog and click 'Open'

The file will be added as target and will be run as per the action chosen in Step 1.
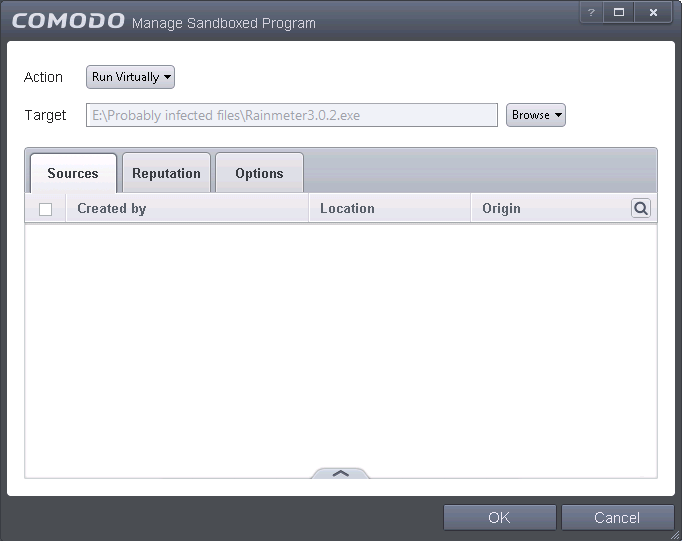
If you want to just add the hash value of an application for a particular action as selected in Step 1 without specifying any filters or options, then click 'OK'. The default values for Sources and Reputation will be 'Any' and for Options it will be 'Log when this action is performed'. If required you can configure Source and Reputation filters and Options for the rule.
Adding an application from a running process based on its hash value
-
Choose 'Process Hash' from the 'Browse' drop-down.
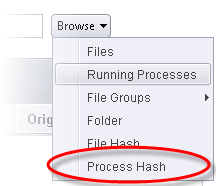
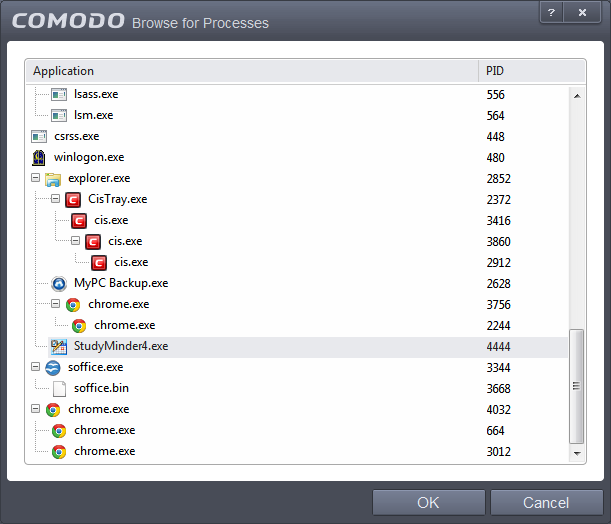
A list of currently running processes in your computer will be displayed.
-
Select the process, whose hash value of the target application is to be added to target and click 'OK' from the Browse for Process dialog.
The file will be added as target and will be run as per the action chosen in Step 1.
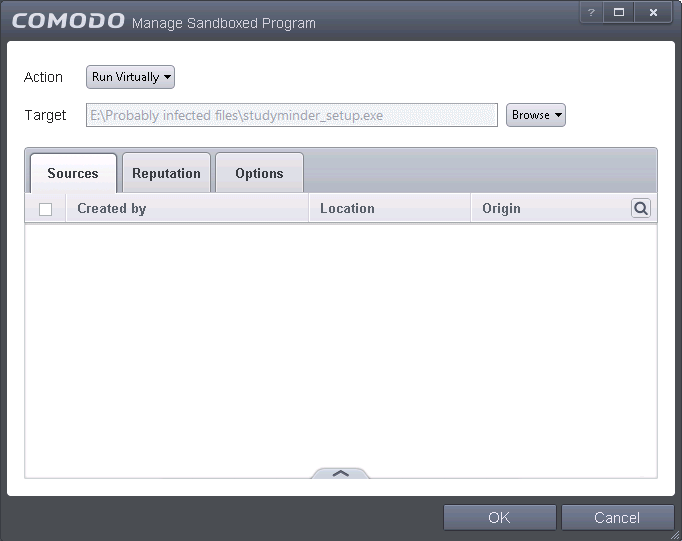
If you want to just add the process hash value of an application for a particular action as selected in Step 1 without specifying any filters or options, then click 'OK'. The default values for Sources and Reputation will be 'Any' and for Options it will be 'Log when this action is performed'. If required you can configure Source and Reputation filters and Options for the rule.
If you want to include a number of items for a rule but want the rule to be applied for certain conditions only, then you can do this in this step. For example, if you include all executables in the Target but want the rule to be applied for executables that were downloaded from the internet only, then the filter can be applied in the Sources. Another example is if you want to run unrecognized files from network share, you have to create an ignore rule with All Applications as target and source located on network drives.
To add a source
-
Click the handle at the bottom and then click Add from the options.
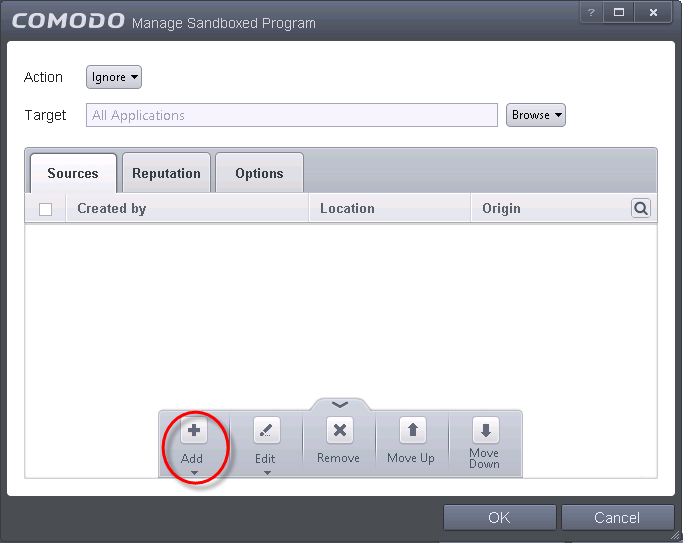
The options available are available are same as available under the Browse button beside Target as explained in Step 2. Refer to previous section for each of options for more details.
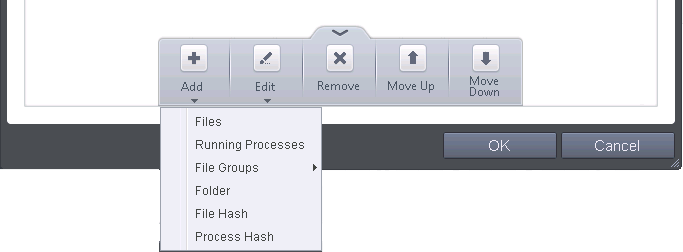
The following example describes how to add a Ignore rule for Unrecognized files from a network source:
- In Step 1, select the action as Ignore
- In Step 2, select the Target as All Applications in File Groups
- In Step 3, click Folder from the Add options.
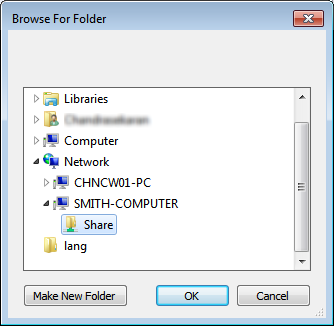
The Browse For Folder dialog will be displayed.
-
Navigate to the source folder in the network, select it and click 'OK'.
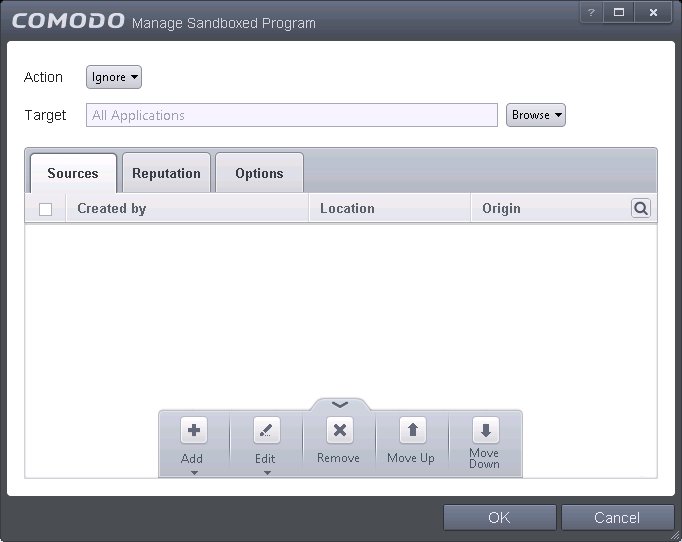
The selected network source folder will be added under the 'Created by' column and the screen displays the options to specify the location and from where the files were downloaded.
- Location– The options available are:
- Any
- Local Drive
- Removable Drive
- Network Drive
Since the source is located in a network, select Network Drive from the options.
- Origin – The options available are:
- Any – The rule will apply to files that were downloaded to the source folder from both Internet and Intranet.
- Internet – The rule will apply to files that were downloaded to the source folder from Internet only.
- Intranet – The rule will apply to files that were downloaded to the source folder from Intranet only.
Repeat the process to add more source folders.
- Click the Edit button to change the source path from the options:
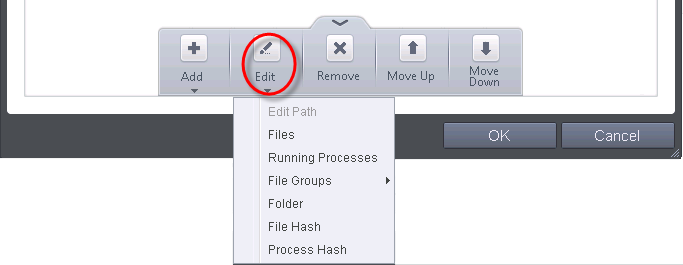
- To remove a source from the list, select it and click the Remove button.
- Use the 'Move Up' and 'Move Down' buttons to specify the order of source path.
If you want to just add the Sources for a particular action as selected in Step 1 without specifying rating of the file or options, then click 'OK'. The default values for Reputation will be 'Any' and for Options it will be 'Log when this action is performed'. If required you can configure Reputation filters and Options for the rule.
Since the example rule is created for files that are categorized as Unrecognized, the same has to be selected from the rating options in Step 4.
Step 4 – Select the File Reputation
-
Click the Reputation tab in the Manage Sandboxed Program interface.
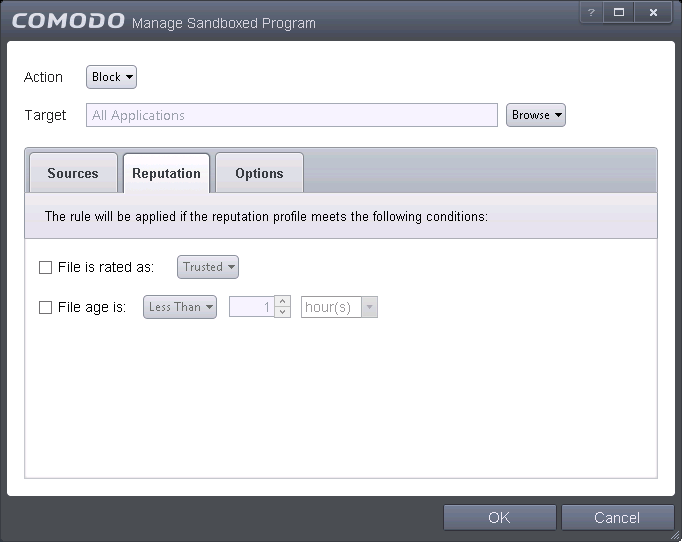
By default, the file rating is not selected meaning the rating could be Any. The options available are:
- Trusted – Applications that are signed by trusted vendors and files installed by trusted installers are categorized as Trusted files by Defense+. Refer to the sections File Rating Settings and Files List for more information.
- Unrecognized – Files that are scanned against the Comodo safe files database not found in them are categorized as Unrecognized files. Refer to the section File List for more information.
- Malware – Files are scanned according to a set procedure and categorized as malware if not satisfying the conditions. Refer the section Unknown Files – The Scanning Process for more information.
By default, file age is not selected, so the age could be Any. The options available are:
- Less Than – CAVS will check for reputation if a file is younger than the age you set here. Select. Select the interval in hours or days from the first drop-down combo box and set hours or days in the second drop-down box. (Default and recommended = 1 hours)
- More Than - CAVS will check for reputation if a file is older than the age you set here. Select the interval in hours or days from the first drop-down combo box and set hours or days in the second drop-down box. (Default and recommended = 1 hours)
Select the category from the options. Since the example rule is created for files that are categorized as Unrecognized, the same has to be selected from the rating options.
If you want to just add the Sources and Reputation for a particular action as selected in Step 1 without specifying the options, then click 'OK'. The default values for Options will be 'Log when this action is performed'. If required you can configure Options for the rule.
- Click the Options tab in the Manage Sandboxed Program interface.
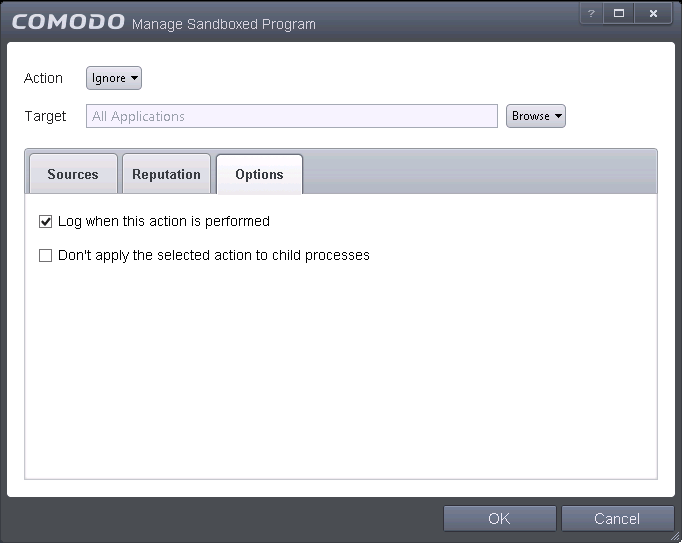
By default, the 'Log when this action is performed' The options available for Ignore action are:
- Log when this action is performed – Whenever this rule is applied for the action, it will be logged.
- Don't apply the selected action to child processes – Child processes are the processes initiated by the applications, such as launching some unwanted app, third party browsers plugins / toolbars that was not specified in the original setup options and / or EULA. CAVS treats all the child processes as individual processes and forces them to run as per the file rating and the Sandbox rules.
- By default, this option is not selected and the ignore rule is applied also to the child process of the target application(s).
- If this option is selected, then the Ignore rule will be applied only for the target application and all the child processes initiated by it will be checked and Sandbox rules individually applied as per their file rating.
The 'Skip child processes' option is available for the Ignore action only. For actions – Run Restricted and Run Virtually – the following options are available:
- Log when this action is performed – Whenever this rule is applied for the action, it will be logged.
- Set Restriction Level – When Run Restricted is selected in Action, then this option is automatically selected and cannot be unchecked while for Run Virtually action the option can be checked or unchecked. The options for Restriction levels are:
- Partially Limited - The application is allowed to access all operating system files and resources like the clipboard. Modification of protected files/registry keys is not allowed. Privileged operations like loading drivers or debugging other applications are also not allowed.(Default)
- Limited - Only selected operating system resources can be accessed by the application. The application is not allowed to execute more than 10 processes at a time and is run without Administrator account privileges.
- Restricted - The application is allowed to access very few operating system resources. The application is not allowed to execute more than 10 processes at a time and is run with very limited access rights. Some applications, like computer games, may not work properly under this setting.
- Untrusted - The application is not allowed to access any operating system resources. The application is not allowed to execute more than 10 processes at a time and is run with very limited access rights. Some applications that require user interaction may not work properly under this setting.
- Limit maximum memory consumption to – Enter the memory consumption value in MB that the process should be allowed.
- Limit program execution time to – Enter the maximum time in seconds the program should run. After the specified time, the program will be terminated.
For Block action, the following options are available:
- Log when this action is performed – Whenever this rule is applied for the action, it will be logged.
- Quarantine program – If checked, the programs will be automatically quarantined. Refer to the section Manage Quarantined Items for more information.
Choose the options and click 'OK'. The rule will be added and displayed in the list.
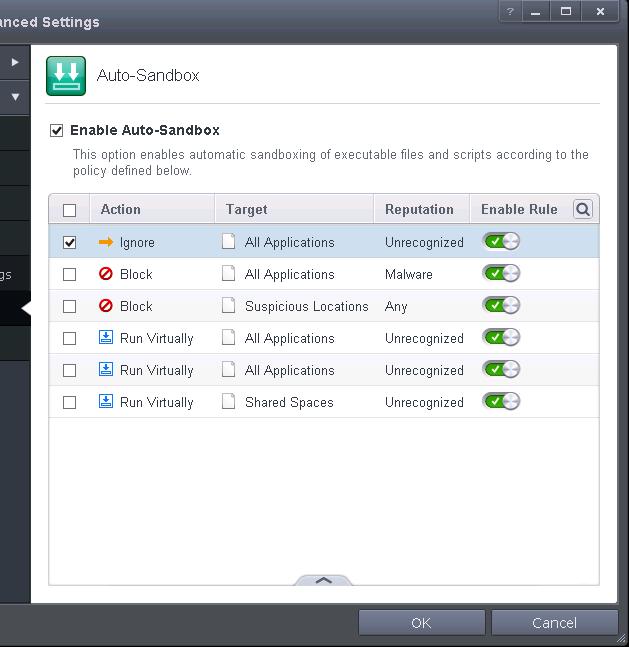
-
To edit an auto-sandbox rule, select it from the list and click 'Edit' from the options.
The Manage Sandboxed Program interface will be displayed. The procedure is similar to adding Adding an Auto-Sandbox Rule.
-
Click 'OK' to save the changes to the rule.
|
Important Note: Please make sure the auto-sandbox rules do not conflict. If it does conflict, the settings in the rule that is higher in the list will prevail. |


