


Step 3 - Deploy Nxlog, Rsyslog and Network Monitoring Sensors
- After adding customers and their endpoints as explained in Step 2, you have to configure them to send logs to cWatch.
- cWatch features agent-less log collection from Windows/Linux endpoints via the NXLog and Rsyslog utilities
- NXLog (Windows) and Rsyslog (Linux) need to be configured to send logs to the cWatch Network server. Click here for more details about deploying script files.
You can also deploy Comodo sensors on the network to enlarge the scope of log collection. Click here for more details on this option.
Scripts can be configured and deployed in two ways:
- Pre-configured script files – The 'Hard Assets' area contains ready-made scripts pre-configured for a specific customer/network. This is the most convenient way to configure NXLog and RSYSLOG to send logs to cWatch.
- Manually configure NXLOG and RSYSLOG scripts - Download scripts for Rsyslog and NXLog and manually set network token, source product and so on. These scripts can be used to configure Rsyslog and NXLog utilities on Linux and Windows machines.
The following sections explain more about:
Please make sure NXLOG utility is installed on the machine which is to be configured to send logs to cWatch.
To download the NXLOG Configuration File
- Open the 'Asset Management' interface by clicking the 'Menu' button, then 'Assets' > 'Asset Management'.
- Select the customer from the left hand side pane.
The 'Customer Details' pane will open at the right.
- Click 'Manage' at the bottom left of the right pane and choose the 'Hard Assets' tab.
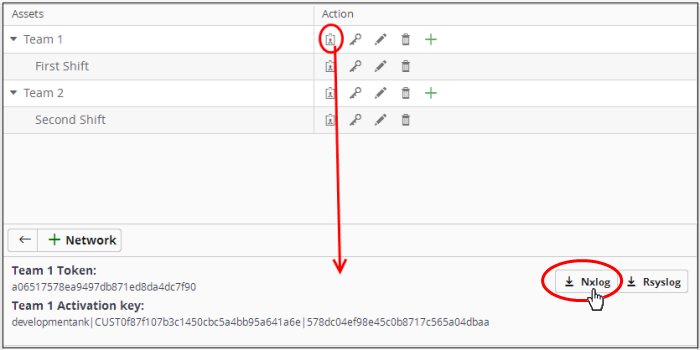
- Choose the network/zone you wish to configure from the right hand side pane and click the button in the row of the network/zone.
The authentication token, the authentication key and the download buttons for the NXLOG and RSYSLOG configuration script files for the selected network/zone will be displayed at the bottom of the right pane.
- Click the NXLOG configuration file download button as shown in the screenshot below and save the file:
- Replace the NXLOG configuration file at the location C:/Program Files (x86)/nxlog/conf/nxlog.conf or C:/Program Files/nxlog/confnxlog.conf in the endpoints/webservers with the downloaded configuration file.
All settings in the configuration
file including network token for the selected network/zone are
pre-configured and will instruct the NXLOG utility to send logs to
the cWatch Network server. cWatch will receive and store the logs
under the respective customer/network for monitoring and incident
reporting.
- You can download a pre-configured RSYSLOG config script from the admin console. Each script is generated for a specific customer/network.
- The script will configure RSYSLOG utilities installed on Linux machines to send logs to the cWatch Network.
- Please make sure the RSYSLOG utility is installed on the target machine.
To download the RSYSLOG Configuration File
- Open the 'Asset Management' interface by clicking the 'Menu' button, then 'Assets' > 'Asset Management'.
- Select a customer from the left hand pane.
The 'Customer Details' pane will open at the right.
- Click 'Manage' at the bottom left of the right pane and choose the 'Hard Assets' tab.
- Choose
the network/zone whose endpoints are to be configured, from the
right hand side pane and click the
 button in the row of the
network/zone.
button in the row of the
network/zone.
The authentication token, the authentication key and the download buttons for the NXLOG and RSYSLOG configuration script files for the selected network/zone will be displayed at the bottom of the right pane.
- Click the RSYSLOG configuration file download button as shown below and save the file.
- Run the script file on all required endpoints.
The script will configure the RSYSLOG utility to
send logs to cWatch Network. cWatch will receive and store the logs
under the respective customer/network for monitoring and incident
reporting.
Manually configure Nxlog and Rsyslog
- Click the 'Menu' button from the top right, choose 'Administration' and then click 'Event Collection'
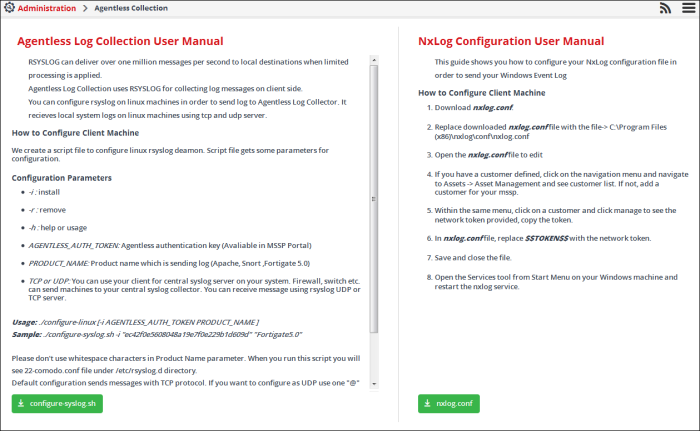
The 'Event Collection' page contains instructions about downloading the scripts, setting the parameters and configuring the RSYSLOG/NxLOG utilities using the scripts.
Alternatively, you can download the script file for configuring the RSYSLOG utility from 'Administration' > 'Event Collection' interface, manually enter the parameters for the customer network to be monitored and run the script at the endpoints. See Event Log Collection for more details.
- In addition to event log collection, cWatch Network is capable of collecting log information from Comodo Network Monitoring Sensors.
- These sensors listen on the customer's network using span/tap technologies.
- Sensor deployment is customized according to a customers network topology. Please contact Comodo to arrange sensor deployment.
Deploy
Comodo Network Monitoring Sensors
In addition to agentless log collection, cWatch can also collect logs from sensors placed in your network. These sensors listen to network activity using span/tap technologies. Comodo staff will work with your team to deploy the sensors according to your specific requirements. Please contact your Comodo account manager for help to deploy sensors on your network.