Comodo Help
Find the desired product help
Xcitium SIEM

Xcitium SIEM

cWatch Network Admin Guide

English

Print Help Download Help
Incidents > Incident Category Management
  • Introduction To Comodo CWatch Network
    • Purchase A License
    • Log-in To The Admin Console
  • The Main Interface
  • The Dashboard
  • Customer Asset Management
    • Add Customers
    • Add Assets For Monitoring
      • Hard Assets
      • Soft Assets
    • Configure Nxlog And Rsyslog To Send Logs To CWatch Network Server
    • Edit Customers
  • Query Management
    • Configure Event Queries
    • Long Term Analysis
    • Configure Custom Dashboards
    • Event Field Selection Settings
  • Manage Rules
    • Manage Correlation Rules
    • Manage Tagged Rules
    • Manage Aggregation Rules
  • Incidents
    • Manage Incidents
    • Incident Category Management
    • Category Action Management
  • Lists
    • Manage Live Lists
    • Manage Live List Content
    • Manage Range List Content
    • Manage IP Range List Content
    • Manage Multiple Column List Content
  • Manage Reports
  • Administration
    • Event Collection
    • Phantom Settings
    • Manage Users
    • View License And Subscription Details
  • Appendix 1 – Field Groups And Event Items Description
  • Appendix 2 – CWatch Supported Logs
  • About Comodo Security Solutions

Incident Category Management


  • Incident categories let you classify events based on their impact on the endpoint or network.
  • You can assign colors to identify each category.
  • There are predefined, default categories for managing essential incidents.
  • You can add and edit categories as required.


  • The default incident categories are: 
     
  • Authentication Anomalies 
     
  • Anomalies in privileged user account activities
  • Anomalies specific to endpoint and backend
  • Check for known APS
  • Correlated
  • DNS Request Anomalies
  • Malware Activity
  • Malware
  • Manual
  • Scheduled Query
  • Unusual Network Traffic
  • Unpatched for Vulnerable Systems or applications  
     
  • Web traffic anomalies 

Incident Category Management List - Table of Column Descriptions

Column Header

Description

Category Name

Label of the category.

Auto Assigned User

The user who is assigned to deal with incidents which belong to this category.

Manual Assigned Users

Users assigned when the category was created or edited.


Color

Represents the category type.


Note: 

  • Users take action on incidents.
  • When an incident is created, it is automatically assigned to a user who is present in the 'Auto Assigned Users' list.
  • You can reassign an incident to a user who is on the 'Manually Assigned Users' list. If the list is empty, you cannot assign the incident manually to a user.
  • To add users to the existing list available see 'Managing Users'. 


Add a Incident Category

  • To monitor and manage the types of incidents detected based on the correlation rules
  • Once a category is added, the incidents will be grouped to the specified category based on the correlation results
  • Based on the severity/priority the incident category is either auto-assigned or manually assigned to users for performing required action.

To add a new category

  • Click the 'Add' button on the bottom right of the interface


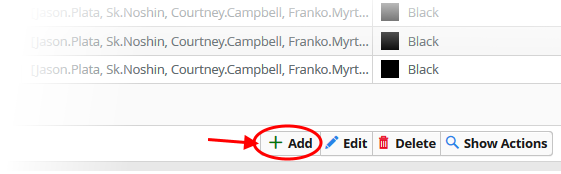
The 'Add Category' dialog will open.


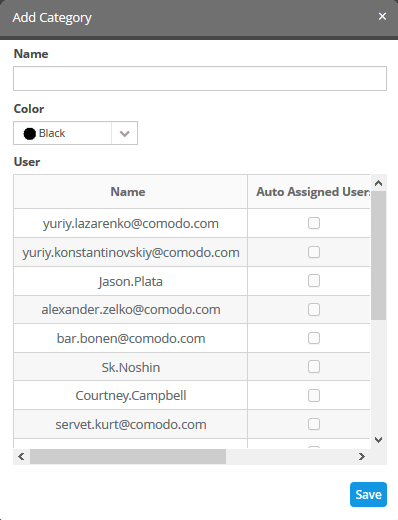
  • Enter a name to identify the detected incident type
  • Select a color code from the 'Color' drop down, to indicate the category
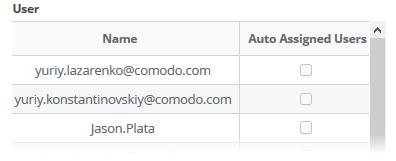
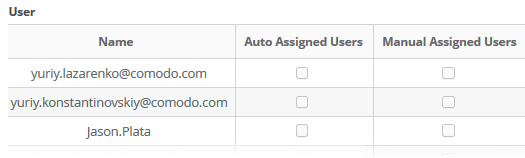
  • Select the user to whom you want the incident alerts to be sent
  • You can choose to assign users automatically or manually by selecting the options 'Auto-Assigned User' or 'Manual Assigned Users' columns against the user
  • Click 'Save' to create an incident category

Edit the incident category


You can edit the created incident category for reassigning users or changing category names.


To edit a category

  • Click the 'Edit' button on the bottom right of the interface


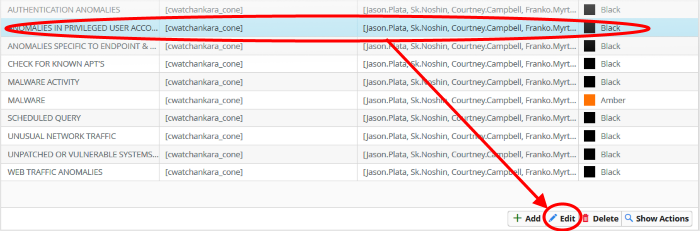
The 'Update Category' dialog will open.


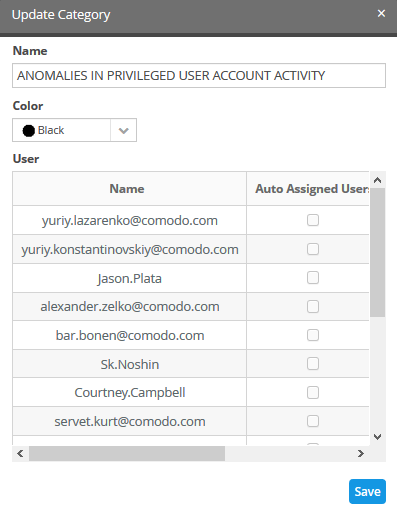
  • Modify the fields as required and click 'Save' to update an incident category
     

To Remove a Category

  • Click 'Delete' on the bottom right


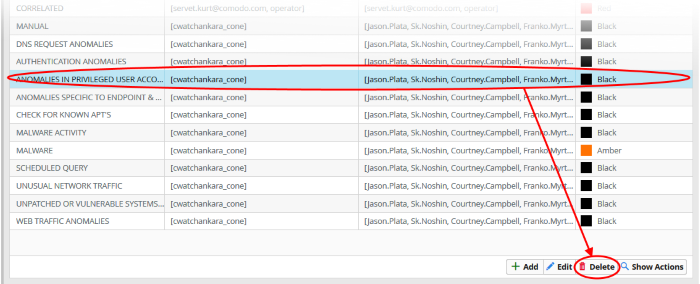
A confirmation dialog will be shown as follows:


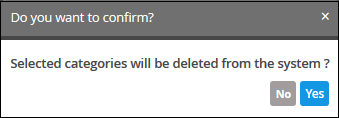
  • Click 'Yes' to confirm removal of the incident category from the list.
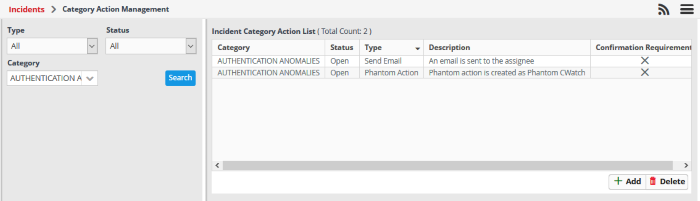
  • To view and manage the actions performed on an incident category, select a category and click 'Show Actions' on the bottom right

The 'Category Action Management' screen will open.


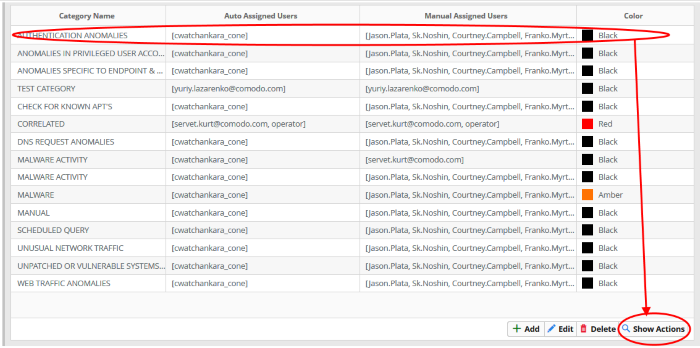
The 'Category' will be selected by default and the right hand panel will show the list of incidents that belong to the specified category.


Our Products
  • Free Antivirus
  • Free Internet Security
  • Website Malware Removal
  • Free Anti-Malware
  • Anti-Spam (Free Trial)
  • Windows Antivirus
  • Antivirus for Windows 7
  • Antivirus for Windows 8
  • Antivirus for Windows 10
  • Antivirus for MAC
  • Antivirus for Linux
  • Free Endpoint Security
  • Free ModSecurity
  • Free RMM
  • Free Website Malware Scanner
  • Free Device Manager for Android
  • Free Demo
  • Network Security
  • Endpoint Protection
  • Antivirus for Android
  • Comodo Antivirus
  • Wordpress Security
Cheap CDN
  • Bootstrap CDN
  • Semantic UI CDN
  • Jquery CDN
  • CDN Plans
  • CDN
  • Free CDN
Enterprise
  • Patch Management Software
  • Patch Manager
  • Service Desk
  • Website Down
  • Endpoint Protection Solutions
  • Website Security Check
  • Remote Monitoring and Management
  • Website Security
  • Device Manager
  • ITSM
  • CRM
  • MSP
  • Android Device Manager
  • MDR Services
  • Managed IT Support Services
  • Free EDR
Free SSL Certificate
Support Partners Terms and Conditions Privacy Policy

© Comodo Group, Inc. 2025. All rights reserved.