Step 1 - Setup Firewall Central Manager and Login to Console
The trial version of Dome Firewall Central Manager covers unlimited users for one year. The license can be upgraded at anytime for continued usage.
There are two ways to sign-up for a central manager license:
- New customers - Sign-up for a free license at https://cdome.comodo.com/firewall.
- Comodo One MSP/Enterprise customers - Sign-up for a free license at https://one.comodo.com/. See https://help.comodo.com/topic-289-1-716-12358-Purchase-Comodo-Dome-Firewall-Central-Manager-License.html.
- Login to your C1 account
- Click 'Store' then go to the firewall central manager tile.
- Click the 'Free' button to begin setup.
- After adding to C1, you can open it by clicking 'Applications' > 'Dome Firewall Central Manager'. See Step 2 - Integrate Dome Firewall Central Manager with Comodo One for more details.
After sign up, there are two modes in which you can setup central manager:
- Virtual Appliance – Download the setup file and install central manager as a virtual appliance on your local network
- Cloud Mode – Comodo will host your central manager instance on our secure cloud servers
- The virtual appliance setup file is available in two formats:
- Download the .ova file from https://download.comodo.com/dome-repo/dome-fw-image/domefirewallcm.ova or from the final instructions dialog while adding CM to your C1 account.
- Import the virtual appliance into VMs such as Virtualbox or Vmware.
- Assign a public IP address to the virtual appliance
- Once installed, you can access the central manager console at https://[IP address of the virtual appliance]
- UN = 'admin', password = 'comodo' (both without quotes). You should change the password after first login.
- Download the .iso file from https://download.comodo.com/dome-repo/dome-fw-image/domefirewallcm.iso
- Create a Ubuntu virtual machine on a VM such as Virtualbox or Vmware.
- Install central manager from the .iso file
- Once installed, you can access the central manager console at https://[IP address of the virtual appliance]
- UN = 'admin', password = 'comodo' (both without quotes). You should change the password after first login.
- Contact Comodo at provisiondome@comodo.com with your license key to setup the service.
- Once setup, we will send you the address where the service is hosted.
- You can access your central manager instance at the address provided.
- The default username is 'admin' and password is 'comodo' (without quotes). You can change these credentials anytime after your first login.
|
Tip: Comodo One customers can integrate the central manager with their Comodo One accounts. See Step 2- Integrate Dome Firewall Central Manager to Comodo One for guidance on this. |
Login to the Console
Dome Firewall Stand-alone Customers
Once setup, you can login to the Dome Firewall Central Manager administrative console using any web browser.
- Enter the URL https://[ip address of the central manager]:8000 in the address bar of the browser
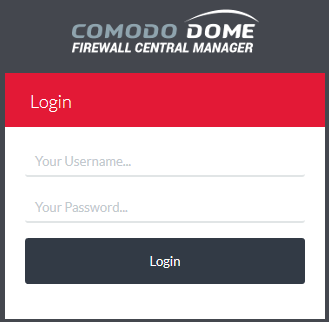
The login screen will be displayed.

You can login with the default credentials:
Username = admin
Password = comodo
After first login, Dome Firewall Central Manager requires that you change the default password. Please choose a strong password that contains a mix of upper and lower case letters, numbers and special characters. We also recommend regularly changing your password as a best security practice.
- If you have setup central manager as a virtual appliance, you will be asked to enter the license key on your first login:

- Enter your license key and click 'Submit'.
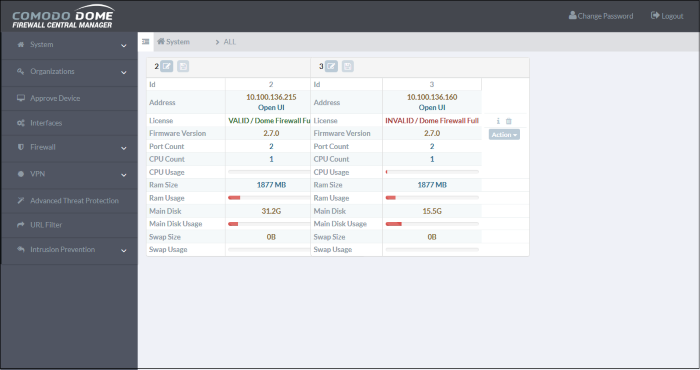
The interface will open at the dashboard by default:

- After you have enrolled firewall devices, each device will be shown as a tile on the dashboard.
- Each tile displays hardware, software and licensing details about the device.
- The open UI link lets you login to the firewall itself to perform actions like backup data, edit network configuration and configure SSH access.
- You can also edit the name of the device and remove a device from the dashboard.
- Click 'Please select an organization or device' to filter which devices are shown on the dashboard.
Comodo One MSP/Enterprise Customers
You can login to the administrative console in two ways:
- Login to stand-alone Central Manager Console
- Enter the given URL or https://
ip address of the central manager> in the address bar of the browser
- Use the default credentials:
Username = admin
Password = comodo
- You can change these credentials anytime after your first login. Click 'Change Password' at top-right and reset your password.
- Comodo One Console – You can integrate your Dome Firewall Central Manager to your Comodo One account and access the administrative console from the Comodo One portal. See Step 2 - Integrate Dome Firewall Central Manager with Comodo One for more details.
- After integration, you can access the administrative console at anytime by clicking 'Applications' > 'Dome Firewall Central Manager' from the Comodo One console.


