Run a Quick Scan
- Click 'Tasks' > 'General Tasks' > 'Scan' > 'Quick Scan'
- The quick scan profile scans important areas of your computer which are most prone to attack.
- This includes system files, auto-run entries, hidden services, boot sectors, and important registry keys.
- These areas are of great importance to the health of your computer, so it is essential to keep them free of infection.
Run a Quick Scan
- Note - You can change the settings of a quick scan in 'Settings' > 'Antivirus' > 'Scans'. See Antivirus Configuration > Scan Profiles for help with this.e
- Click the 'Scan' tile on the XCS home screen
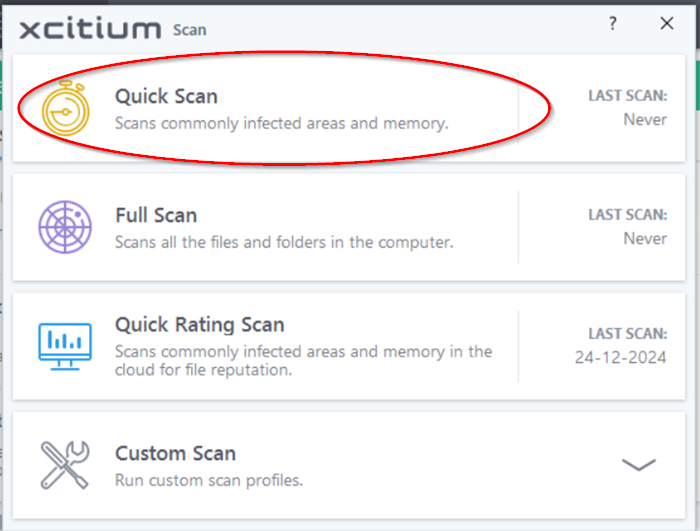
- Select 'Quick Scan' from the 'Scan' interface

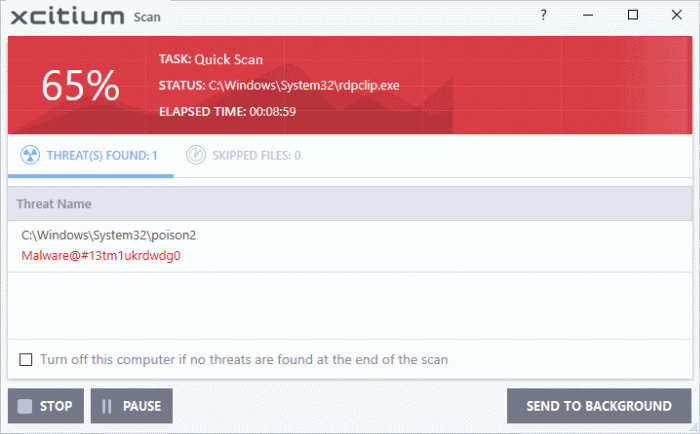
- The scanner will start and first check whether your virus database is up-to-date:

- The scans starts after any updates have been installed:

|
Note - XCS skips files which are larger than the max. size, and those that take longer to scan than the max time allowed. Click 'Settings' > 'Antivirus' > 'Scans' to view these thresholds. |
- You can pause, resume or stop the scan by clicking the appropriate button
- Send to Background – Runs the scan as a background process which consumes fewer resources. You can still keep track of the scan in the task manager - 'Tasks' > 'Advanced Tasks' > 'Open Task Manager'
Scan results are shown when the scan finishes:

The results window contains two tabs:
- Threats Found: The number of files scanned and the number of viruses found.
- Use the drop-down to choose whether to clean, quarantine or ignore the threat.
- See 'Process infected files' if you need help with these options.
- Skipped Files: Files that were not checked for viruses. The scanner skipped these files as they took longer than the scan time limit (default = 9 mins).
|
Note: You will only see the drop-down menus if 'Automatically clean threats' is disabled for quick scans in 'Settings' > 'Antivirus' > 'Scans'. See Scan Profiles for help with this. |


