Protected Files
The Protected Files tab displays a list of files and file groups that are protected from access by other programs, especially malicious programs such as virus, Trojans and spyware. It is also useful for safeguarding very valuable files (spreadsheets, databases, documents) by denying anyone and any program the ability to modify the file - avoiding the possibility of accidental or deliberate sabotage. If a file is 'Protected' it can still be accessed and read by users, but not altered. A good example of a file that ought to be protected is your 'hosts' file (c:\windows\system32\drivers\etc\hosts). Placing this in the 'Protected Files and Folders' area would allow web browsers to access and read from the file as per normal. However, should any process attempt to modify it then Comodo Internet Security blocks this attempt and produce a 'Protected File Access' pop-up alert.
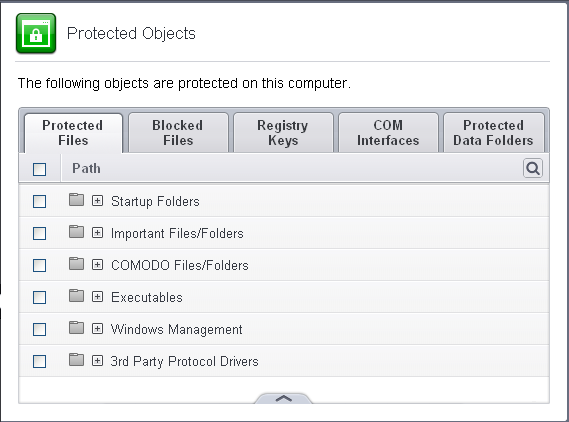
Clicking the handle at the bottom of the interface opens an options panel with the following options:

- Add – Allows you to add individual files, programs, applications to Protected Files.
- Edit – Allows you to edit the path of the file or group of a selected item in the Protected Files interface.
- Remove - Deletes the currently highlighted file or file group.
- Groups – Opens the Manage Groups interface that allows you to edit pre-defined file groups and define new file groups for inclusion in Protected Files list
- Purge - Runs a system check to verify that all the files listed are actually installed on the host machine at the path specified. If not, the file or the file group is removed, or 'purged', from the list.
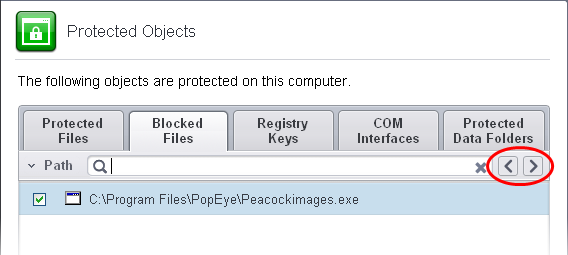
You can use the search option to
find a specific file or file group in the list by clicking the search
icon  at the far right in the column header and entering the
file/group name in full or part. You can navigate through the
successive results by clicking the left and right arrows.
To manually add an individual file, folder, file group or process
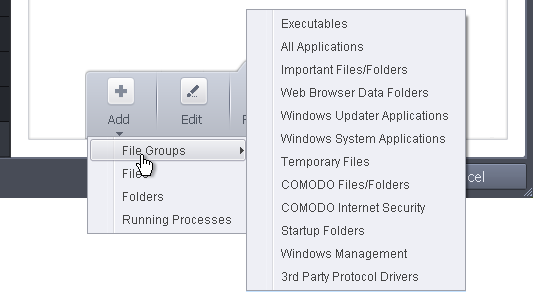
- Click the handle from the bottom center and select 'Add'.
You can add the files by following methods:
To edit an item in the Protected Files list
-
Select the item from the list, click the handle from the bottom and select Edit. The 'Edit Property' dialog will appear.

-
Edit the file path, if you have relocated the file and click OK
To delete an item from Protected Files list
-
Select the item from the list, click the up arrow from the bottom and select 'Remove'.
The selected item will be deleted from the protected files list. CIS will not generate alerts, if the file or program is subjected to unauthorized access.
File groups are handy, predefined groupings of one or more file types. Creating a file group allows you to quickly deploy a ruleset across multiple file types and applications.
To open the Manage File Groups interface
-
Click the handle from the bottom center of Protected Files interface and select 'Groups'.
The Manage File Groups interface will open.
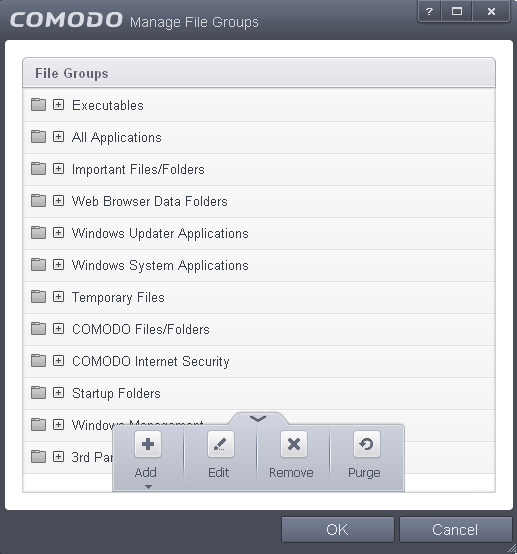
This interface allows you to
|
Note: This area is for the creation and modification of file groups only. You are not able to modify the security policy of any applications or files from here. To do that, you should use the HIPS Rules interface or the Predefined Rules Interface. |
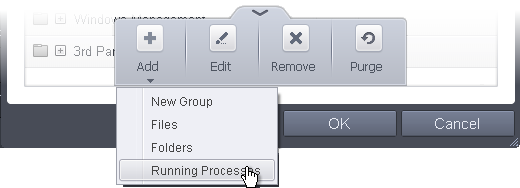
- To add a new group or add files to an existing group, click the handle from the bottom and click 'Add'.
-
Add a new group - Select 'New Group' from the 'Add' drop-down, enter a name for the group in the 'Edit property' dialog and click OK

- Add files to a group - Select the Group, click the handle and click Add. Choose from 'Files', 'Folders' or 'Running Processes' to add files by browsing to the file or folder or from currently running processes.
- To edit an existing group, select the group, click the handle and choose Edit. Edit the name of the group in the Edit Property dialog
- To remove an individual file from a group, click + at the left of the group to expand the group, select the file to be removed, click the handle and choose 'Remove'.
Exceptions
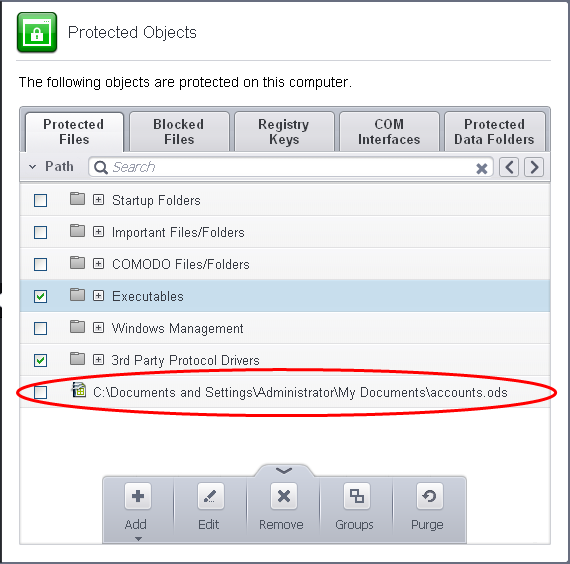
Users can choose to selectively allow another application (or file group) to modify a protected file by affording the appropriate Access Right in 'Active HIPS Rules' interface. A simplistic example would be the imaginary file 'Accounts.ods'. You would want the Open Office Calc program to be able to modify this file as you are working on it, but you would not want it to be accessed by a potential malicious program. You would first add the spreadsheet to the 'Protected Files' area. Once added to 'Protected Files', you would go into 'Active HIPS Rules' and create an exception for 'scalc' so that it alone could modify 'Accounts.ods'.
-
First add Accounts.odt to Protected Files area.
-
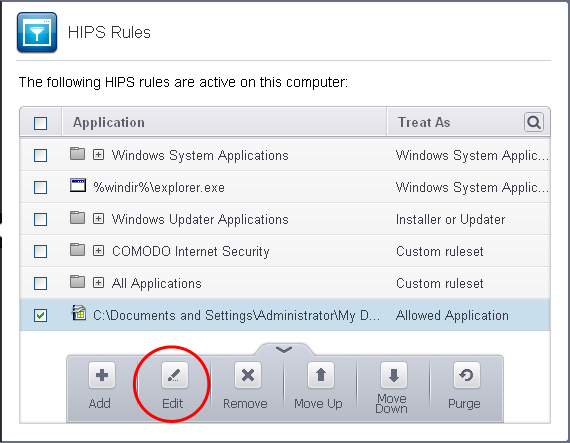
Then go to HIPS Rules interface and add it to the list of applications. Click the handle at the bottom and choose 'Edit' after selecting the checkbox beside it.
-
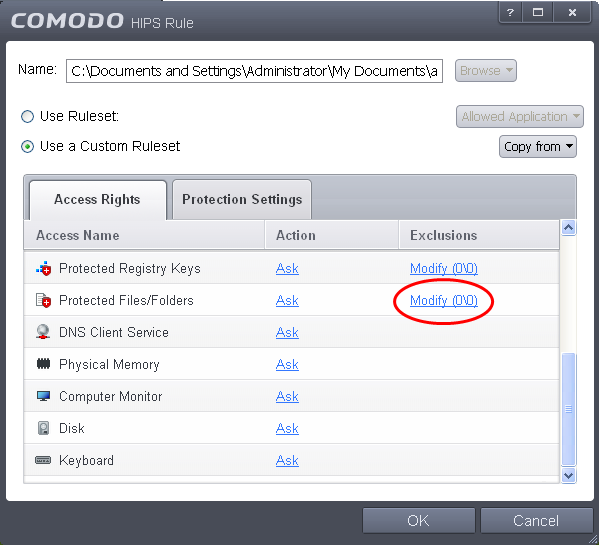
In the HIPS Rule interface, select 'Use a custom rule set'.
-
Under the 'Access Rights' tab, click the link 'Modify' beside the entry Protected Files/Folders. The Protected Files and Folders interface will appear.
-
Under the 'Allowed Files/Folders' tab, click the handle, choose 'Add' > 'Files' and add scalc.exe as exceptions to the 'Ask' or 'Block' rule in the 'Access Rights'.
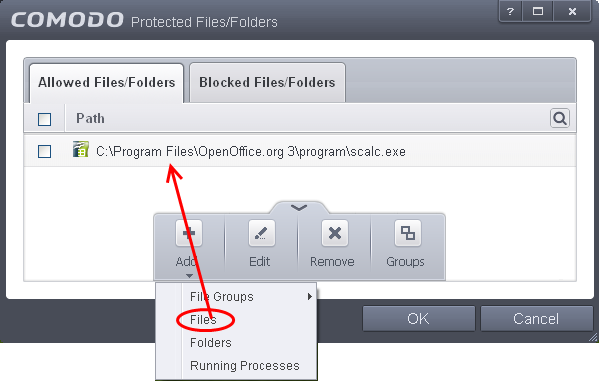
Another example of where protected files should be given selective access is the Windows system directory at 'c:\windows\system32'. Files in this folder should be off-limits to modification by anything except certain, Trusted, applications like Windows Updater Applications. In this case, you would add the directory c:\windows\system32\* to the 'Protected Files area (* = all files in this directory). Next go to 'HIPS Rules', locate the file group 'Windows Updater Applications' in the list and follow the same process outlined above to create an exception for that group of executables.


