


How to Set up TrustConnect on Windows
TrustConnect is designed to eliminate many types of data hijacks by preventing criminals from attacking or scanning your system from the local network that you are using to connect to the Internet. It also encrypts all of your traffic destined for the Internet (including Web site addresses, instant messaging conversations, personal information, plain text usernames and passwords and other important information).
The following sections provide step-by-step guidance on how to:
1. Download and Install the TrustConnect Windows Client
To connect to the TrustConnect service you must first download and install the TrustConnect Windows client software:
-
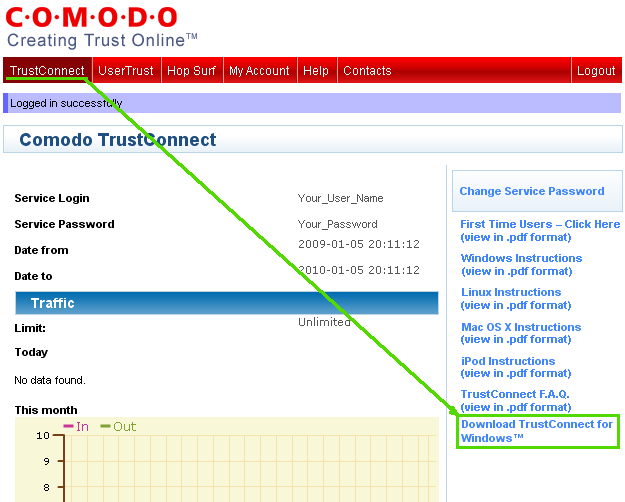
Firstly, log into your Comodo Account at https://accounts.comodo.com/ with the user name and password that you created during the TrustConnect or CIS Pro enrollment process.
-
Click the 'TrustConnect' tab on the top navigation bar.
-
Click 'Download TrustConnect for Windows':
Alternatively, the TrustConnect Windows client can be downloaded direct from the following URL:
https://accounts.comodo.com/download/trustconnect/ComodoTrustConnectClient.exe
After downloading the TrustConnect Windows setup file to your local hard drive, double click on ComodoTrustConnect.msi to start the installation wizard.
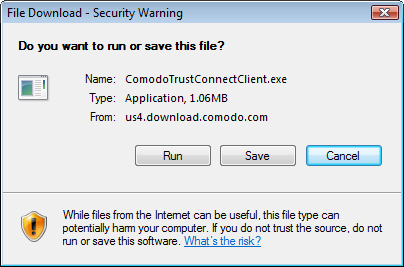
Step1: Click 'Run'
- Simply click 'Run' at the file download dialog to launch the installer.
Step 2: Welcome dialog
- Simply click 'Next'.

Step 3: End User License Agreement
The End-User License Agreement dialog box will be displayed.
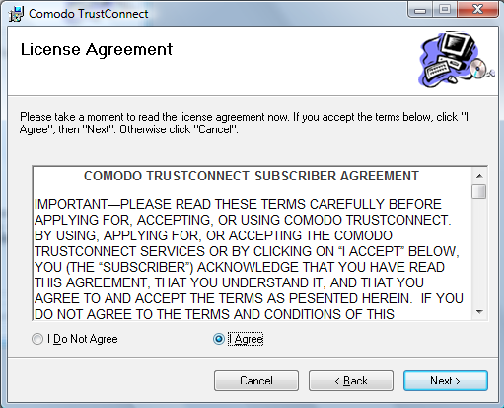
To continue with the installation, you must read and then accept the End User License Agreement (EULA). Click 'I accept' to continue the installation. If you want to cancel the installation at this stage, click 'Cancel'.
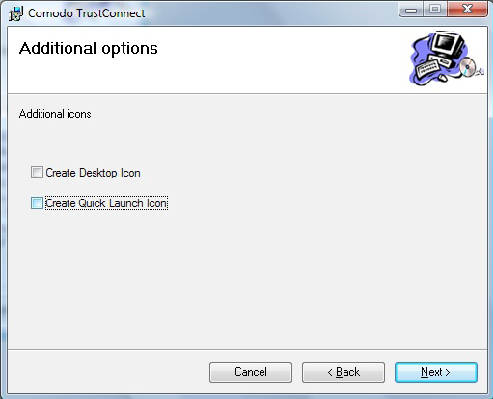
Step 4: Select the additional options to install
Step 5: Select Installation Folder
The next screen allows you to select the folder in your hard drive for installing Comodo TrustConnect. The default path is C:Program FilesComodoTrustConnect.

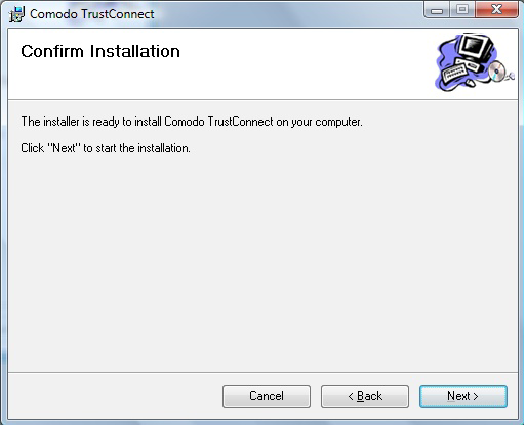
Step 6: Confirm Installation window
After completing the additional options to your satisfaction the setup wizard will ask for confirmation before commencing the installation procedure.
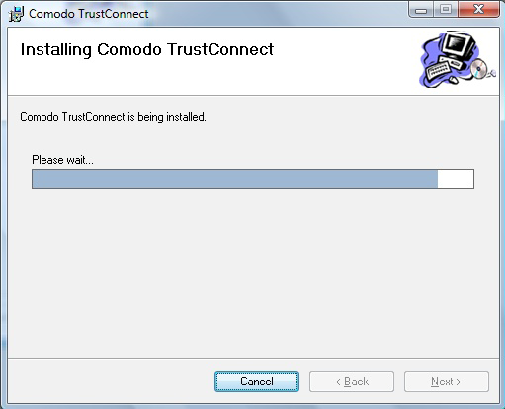
Step 7: Installation Progress
The installation progress will be indicated...
… and on completion, the finish dialogue will be displayed.
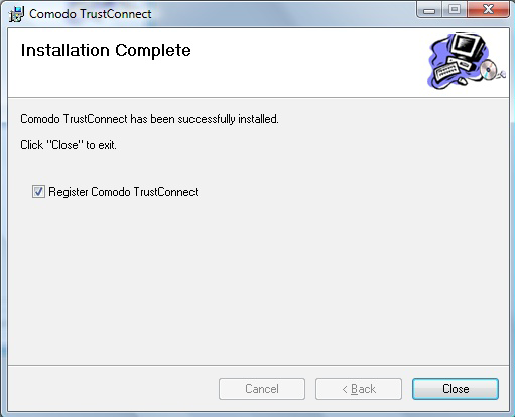
- Click 'Close'.
Step 8: License key window
- Enter your serial number if you have one, otherwise click the link 'I Do Not Have a License Key' and go on site and buy one.
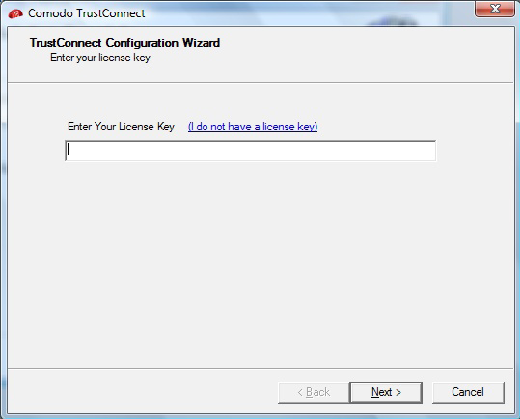
-
Enter your License Key and click 'Next'.
Your key will be validated and a registration confirmation dialog will be displayed.
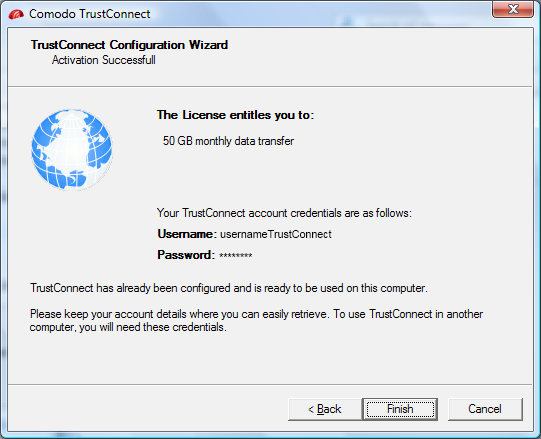
Comodo 'TrustConnect' is now successfully installed in your system. Click Finish to exit the wizard and start using TrustConnect.
Your key will be validated and a registration confirmation dialog will be displayed.
Comodo TrustConnect' is now successfully installed in your system. Click Finish to exit the wizard and start using TrustConnect.
2. Establish a connection to TrustConnect
Once installation is complete, TrustConnect can be launched in one of the following ways:
Via the Windows 'Start' menu.
Click 'Start > Programs > Comodo > Trust Connect > Trust Connect'
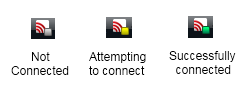
By double clicking the 'TrustConnect' Tray Icon:
![]()
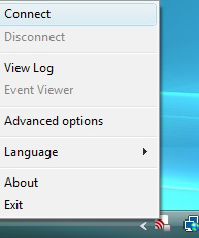
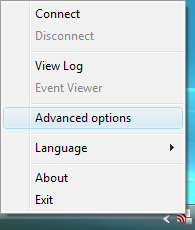
By right clicking on the TrustConnect Tray icon and selecting 'Connect':
By default, your TrustConnect client will automatically select the best TrustConnect access server from the servers distributed all over the world depending on your location, distance between you and the servers and their load. You can change the server you want to connect to, through Advanced Options explained below. Also TrustConnect is available in multiple languages. You can change the interface language through the Language option, explained at the foot of the page.
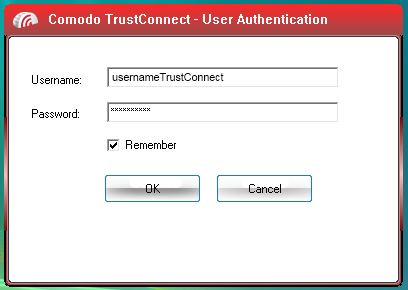
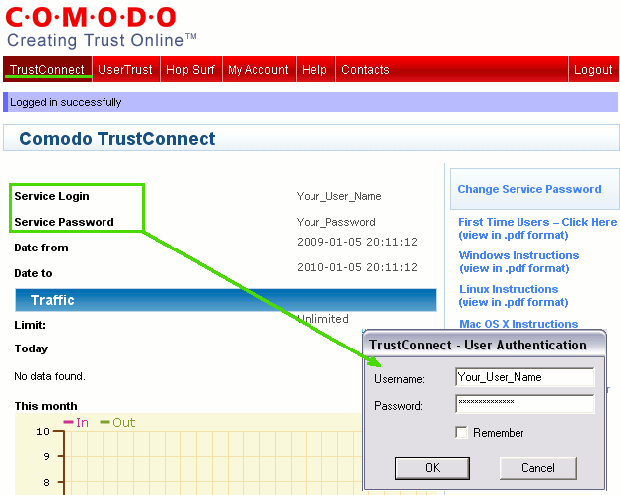
After starting TrustConnect you should enter your TrustConnect Service Login and Service Password at the client login box.
|
Note: This is not the same password as your Comodo Account password. It is a unique, random password that was generated during account creation to authenticate you to the TrustConnect servers. If required, you can change this password to something more memorable by using the 'Change Service Password' button on the right. |
- Click 'OK' to confirm and connect. After successful authentication of your user-name and password, the tray icon will turn green to indicate that you are successfully connected to TrustConnect:
3. TrustConnect System Configuration
Advanced Options
Comodo TrustConnect allows you to select the TrustConnect access server you want to connect to, through its advanced options. You can set TrustConnect to automatically select the best server, set a default server or choose to select the server manually every time.
To access the Advanced options panel, right click on the TrustConnect Tray icon and select 'Advanced Options'.
The panel displays your current location with the IP address.
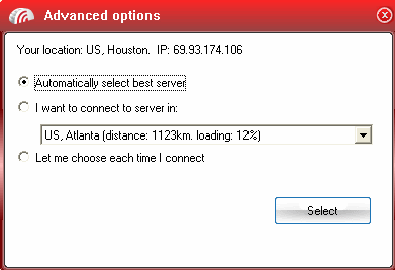
You can configure the server selection from the options:
- Select the option and click the 'Select' button for your settings to take effect.
Automatically select the best server
Instructs TrustConnect to select the best access server with optimal load and distance to connect to. Your TrustConnect client will automatically find a server nearest to your location and with optimal connection load. This is the default option and is recommended for all users.
I want to connect to server in
Allows you to choose a server and to set it as default, so that every time you start TrustConnect service, you will be connected to the selected server irrespective of your location. The drop-down box displays a list of TrustConnect access servers located at different places, all over the world. Each server is indicated with its location (country, state), distance from your current location and the load of the server in percentage.
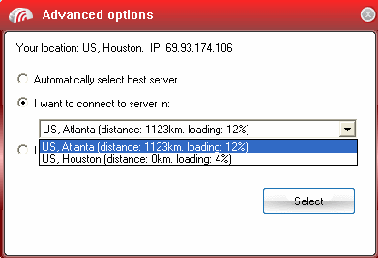
- Select the server which you want to set as default and click the 'Select' button.
|
Note: It is always recommended to choose a server nearest to your location for quicker access. |
A connection to the selected server will be established every time you connect to TrustConnect . You can change this setting at anytime you want, by accessing the Advanced Options in TrustConnect.
Let me choose each time I connect
Allows you to select a different server each time you are establishing a connection with TrustConnect. Every time you start TrustConnect service, you will be prompted to select the server which you wish to connect. On establishing a connection to TrustConnect, a 'Select access server' dialog will appear.
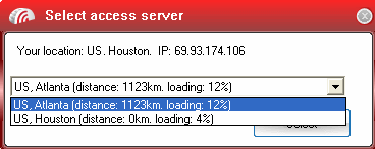
The drop-down box displays a list of TrustConnect access servers located at different places, all over the world. Each server is indicated with its location (country, state), distance from your current location and the load of the server in percentage.
Select the server to which you want to connect and click the 'Select' button. A connection with the selected access server will be established.
|
Note:It is always recommended to choose a server nearest to your location for quicker access. |
Language Options
TrustConnect is available in multiple languages. You can change the interface language of the TrustConnect client at any time by right clicking on the system tray icon. To change the interface language:
- Right click on the system tray icon.
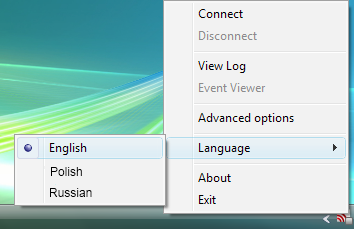
- Point the cursor to 'Language' and the select the language you want from the list of languages listed beside.