


Manual Backup and Restore
An on-demand backup is one that you run at any time as circumstances demand. For example, you might want to run an on-demand backup just prior to putting some website changes live. cWatch creates an incremental backup of your existing full backup.
Both website
files and database are included. You can run two on-demand backups
per-day.
See the following for more help:
- Select the target website from the menu at top-left
- Click the 'Backup' tab
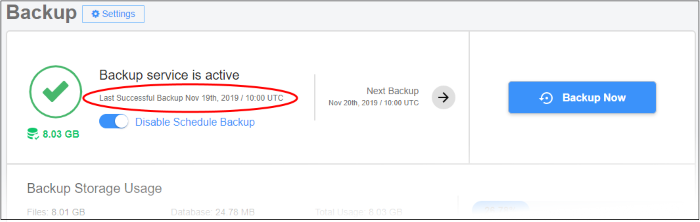
- Click the 'Backup Now' button:

- Note -
You will be prompted to upgrade your license if the backup size
exceeds your quota.
The date of the most recent backup is refreshed when the operation finishes:
- You can restore your site from any backup you have taken in the past.
- You can restore all files or selected files
There are two parts to a complete restore:
-
Restore website files
- Select the target website from the menu at top-left
- Click the ‘Backup’ tab
- Scroll to the table at the bottom of the page.
- Click ‘Options’ in the ‘Restore’ column of the backup you want to use.
- Select ‘Auto-restore All Files’ or ‘Selective Auto Restore’.
- This restores your site files, but does not overwrite your current database.
2. Restore database. You must do this manually. You can download the database from the ‘Restore’ options. You can get the database from a different backup-row if required.
The options above offer you flexibility when restoring a website. For example, you can restore your site to the ‘last-known-working’ version, while keeping a database which has your most recent transactions.
Run a restore operation
- Scroll down to the backup history table:

- Locate the row of the backup you want to use
- Click 'Options' in the ‘Restore’ row:
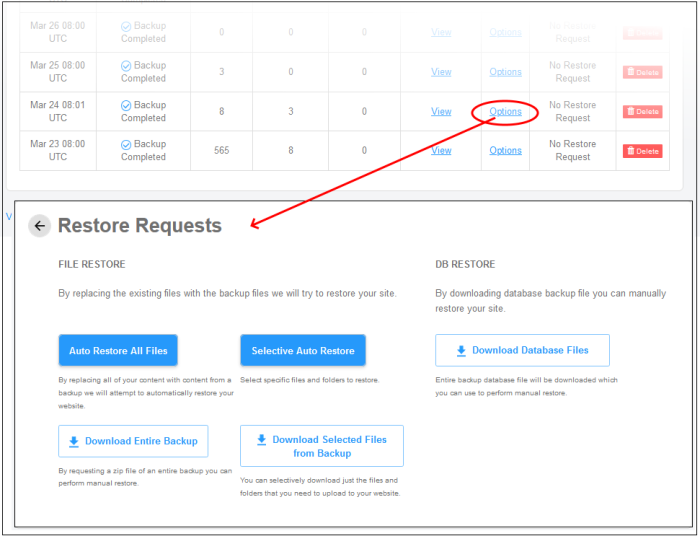
- Auto Restore all Files - Starts the full restore process. Files in the destination will be replaced by those from the backup.
- Selective Auto Restore - Restore specific files and folders.
- Download Entire Backup - You can use this to manually restore all files, run a partial restore, or simply retrieve some lost / older versions of files.
Download Selected Files from Backup - Retrieve specific files from the backup. This is a simple download of files, rather than restoring them to their original location.DB Restore:
- Download Database Files - Download a .zip file which contains all database records. You can manually unzip and restore the database as required.
The rest of this section illustrates the processes above with screenshots.
- Click ‘Options’ in the row of the backup you want to use
- Click ‘Auto Restore All Files’:
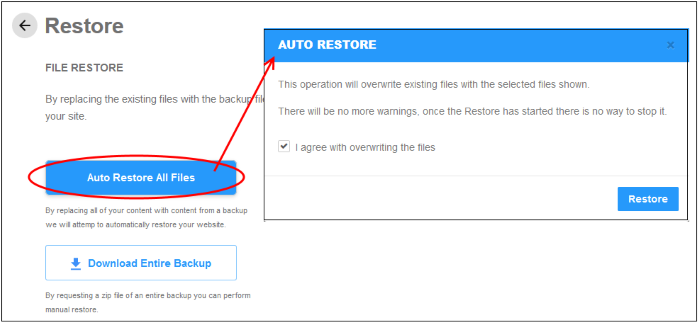
- Agree to overwriting files and click 'Restore'
- You will see the following confirmation:
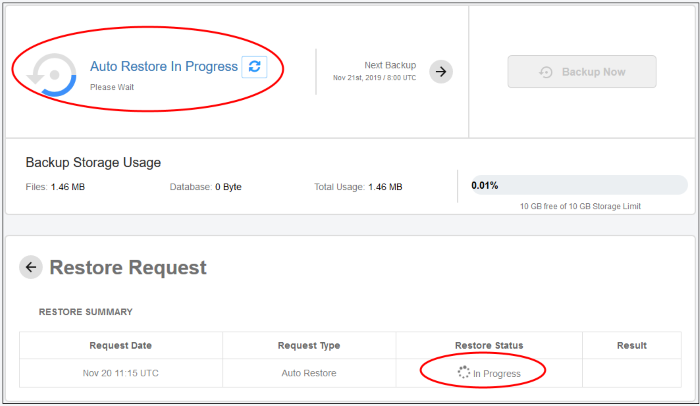
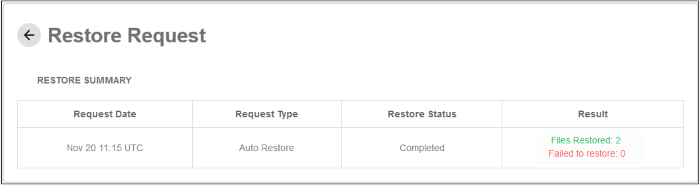
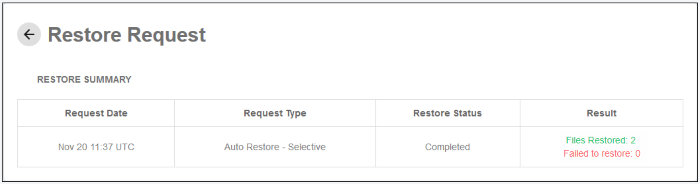
- Results are shown at the end of the operation:
- Click ‘Options’ in the row of the backup you want to use
- Click ‘Selective Auto Restore’:
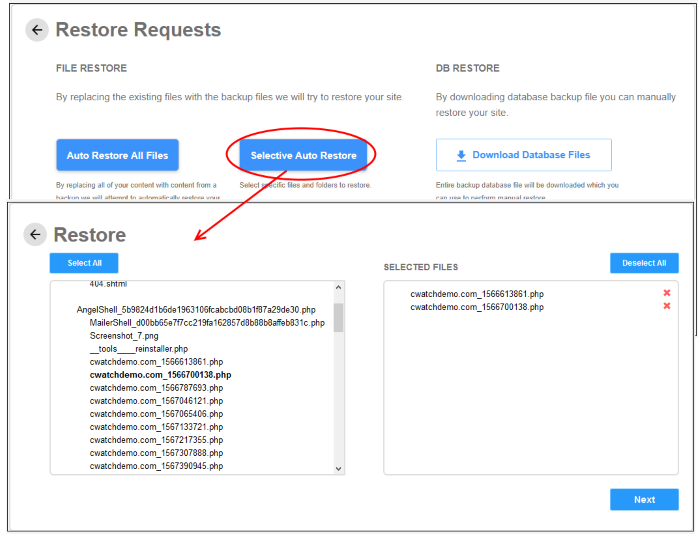
- Select the backed up file(s) on the left and click ‘Next’
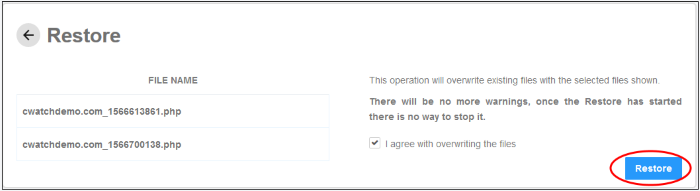
- Check the selected files detail on the left, agree to overwrite the files and click ‘Restore’.
- You will see the following confirmation:
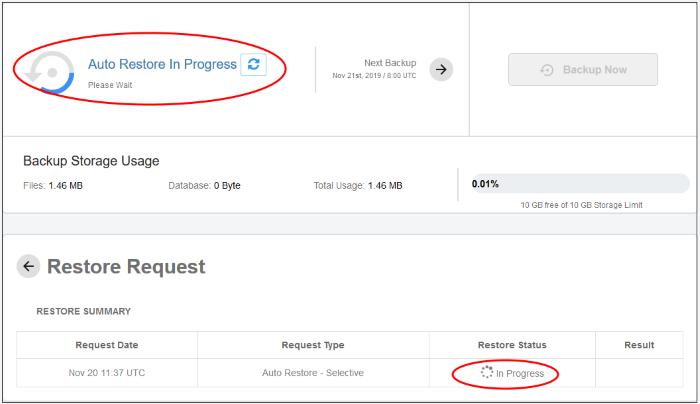
- Results are shown at the end of the operation:
- Click ‘Options’ in the row of the backup you want to use
- Click ‘Download Entire Backup’ > ‘Confirm Download’:
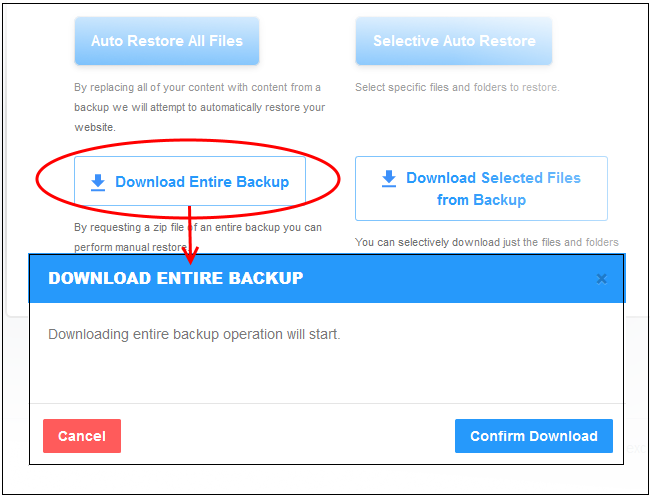
- cWatch will retrieve your files and create a zip file of them. This process may take a few seconds.
- Once complete, click ‘Download’ in the ‘Result’ column:
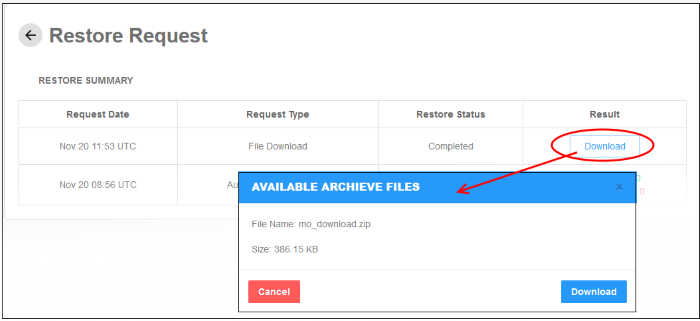
-
Click ‘Download’ to save the zip file
Download Selected Files from Backup
- Click ‘Options’ in the row of the backup you want to use
- Click ‘Download Selected Files from Backup’
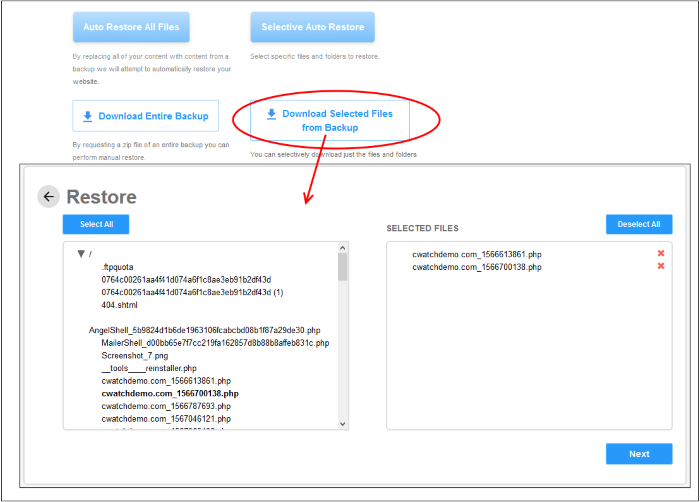
- Select the backed up file(s) on the left and click ‘Next’
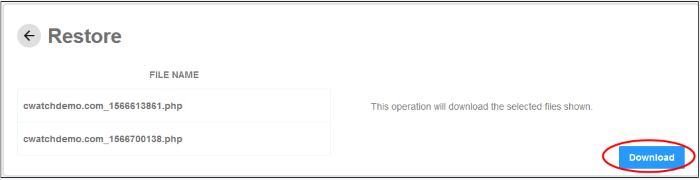
- Check the selected files detail on the left and click ‘Download’.
- cWatch will retrieve your files and create a zip file of them. This process may take a few seconds.
- Once complete, click ‘Download’ in the ‘Result’ column:
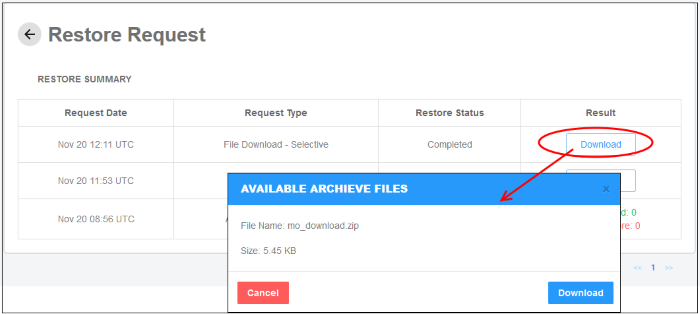
- Click
‘Download’ to save the zip file
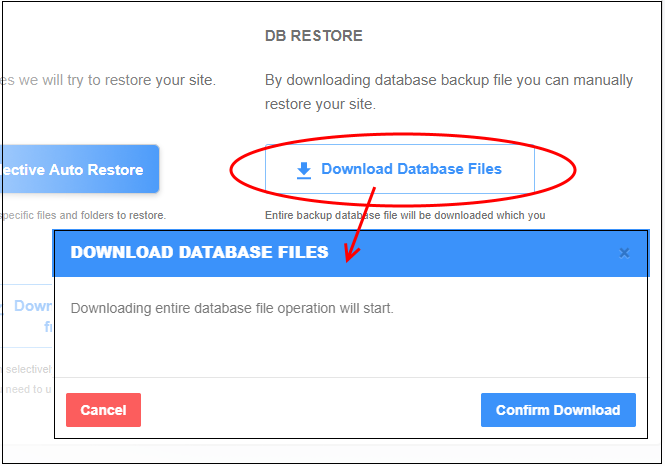
- Click ‘Options’ in the row of the backup you want to use
- Click ‘Download Database Files’ > ‘Confirm Download’:
- cWatch will create a zip file containing your database. This process may take a few seconds.
- Once complete, click the 'Download' in the ‘Result’ column:
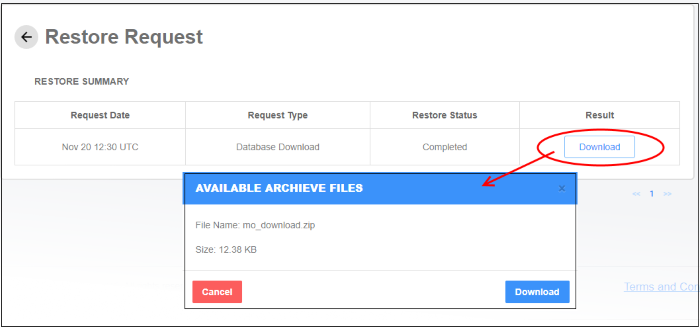
- Click ‘Download’ to save the zip file
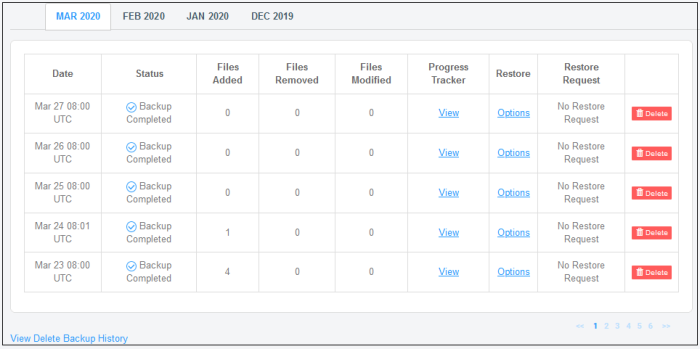
The table at the bottom of the backup screen shows a full history of your previous backups. Details about each include the date, the success or failure of the operation, and the exact files involved. You can restore your site from any backup you have taken in the past.
The table groups backups by month:
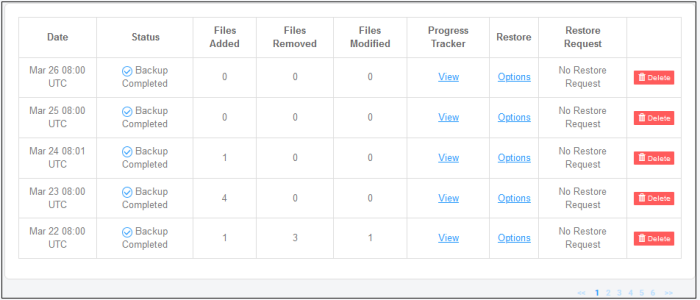
- Click 'View' in a backup record
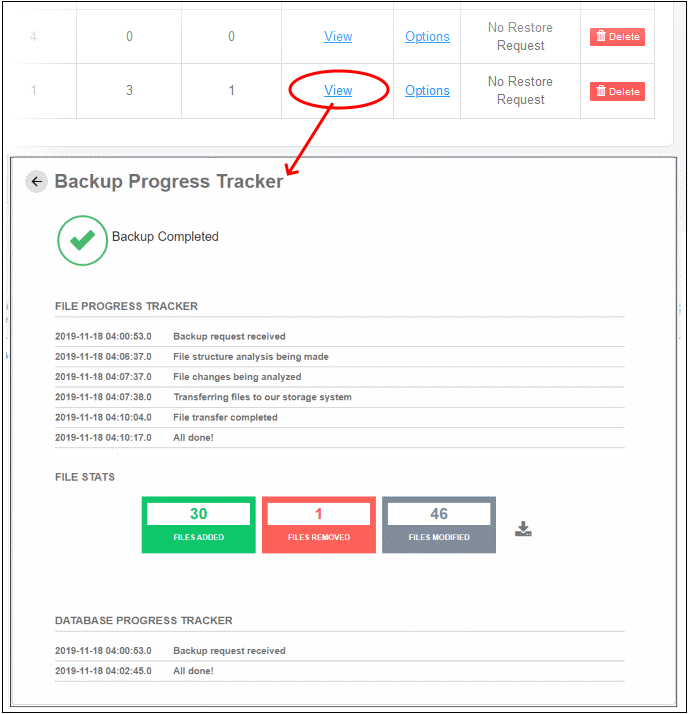
- File Progress Tracker - Step-by-step details of website files transferred to the backup server.
- Database Progress Tracker - Step-by-step details about the database backup operation.
- File Stats - The number of files added, removed or modified. Click the download button to view the exact files involved:
Click here for more information about backup records and file statistics.
- You can remove backups that you no longer require to free up space for new backups
- You may want to do this for older backups which are substantially different from the current iteration
- Backups shown here include full backups (scheduled backups) and incremental backups (on-demand backups)
- By deleting a backup, you delete both the website files and the database
Scroll down to the backup history table:
- Locate the row containing the backup you want to remove.
- Click the ‘Delete’ button at the end of the row.
A warning dialog is shown:
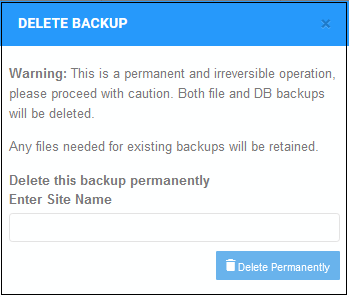
- Enter the website name in the filed and click ‘Delete Permanently’
View deletion history
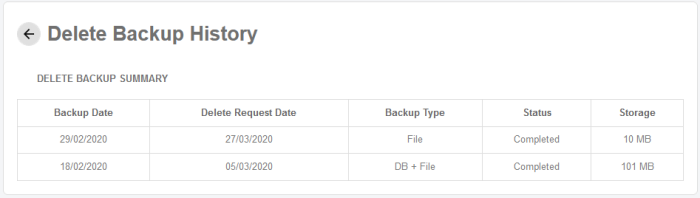
Deletion history shows the date of the removal, the type of backup removed, whether the operation was successful or not, and the space freed up by the removal.
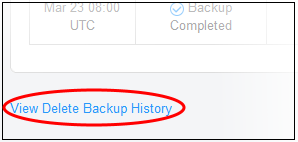
- Scroll down and click ‘View Delete Backup History’ at the bottom:
Removal history is shown as follows:
- Click ‘Delete Backup History’ to return to backup home page.
Click here for more information about backups removal.