


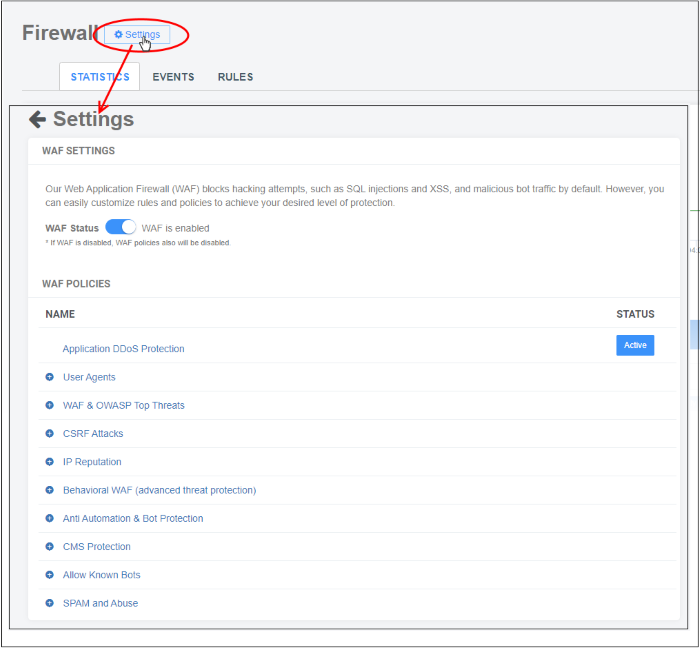
Setup Firewall Policies
- Select a website from the drop-down at top-left and choose 'Firewall'
- Click the 'Settings' button
- cWatch ships with built-in firewall policies to deal with a wide range of attacks, including SQL injections, bot traffic and more
- Each policy contains a set of firewall rules to filter traffic and take preventative measures when required. These rules are non-editable
You can enable or disable individual rules as required.
Configure WAF settings
- Open the cWatch dashboard
- Select the target website from the menu at top-left
- Click the 'Firewall' tab
- Click 'Settings' to open the 'WAF Settings' page
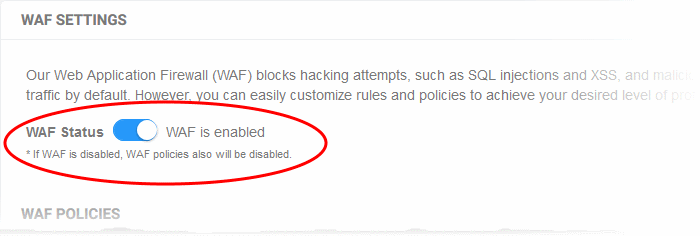
WAF Status
- Use the switch beside 'WAF Status' to enable or disable the firewall:
WAF
- This area shows all firewall policies that have been saved on your account.
- Click the '+' symbol to view the constituent rules in a policy. You can enable / disable rules as required.
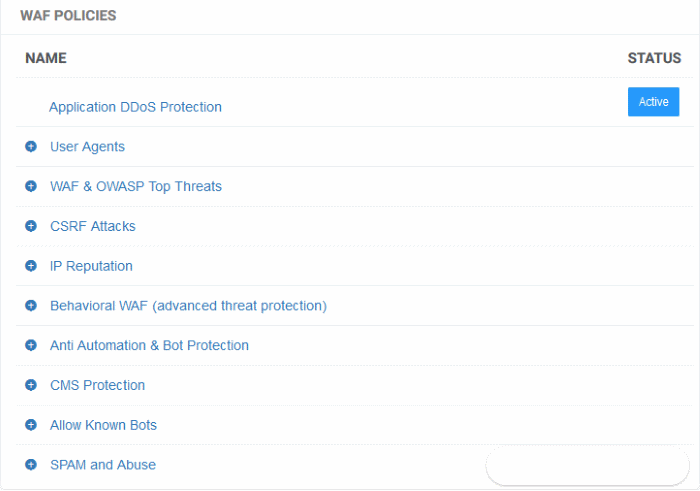
- Status - Indicates whether the firewall is enabled or not. 'Passive' indicates the firewall is disabled.
Enable / disable firewall rule(s)
- Click a firewall category to
expand / collapse its subcategories:
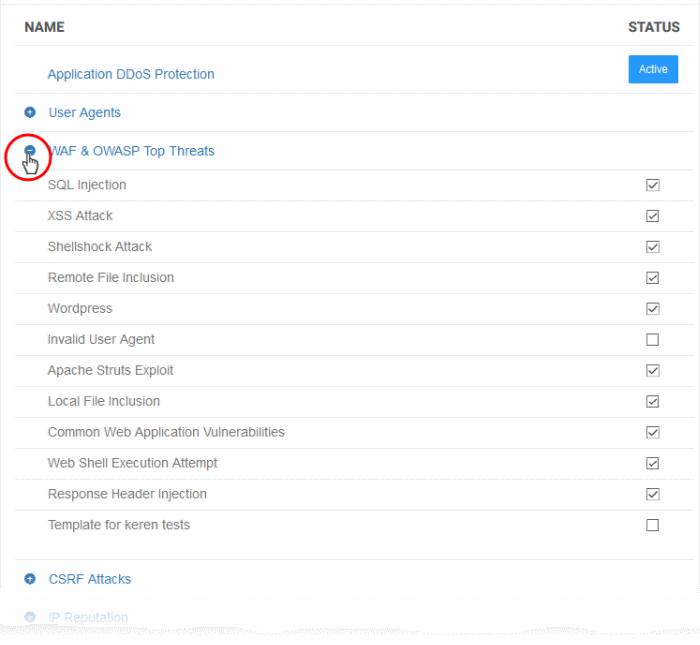
- Use the check-boxes to enable or disable a particular rule
- Changes are auto-saved and deployed to the site in approximately a minute.