


Installation
Comodo Client Security (CCS) provides best-in-class threat prevention for Windows endpoints. The product is part of Comodo Endpoint Manager and is deployed from the Endpoint Manager console.
This section covers how to:
Subscribe for Endpoint Manager
You can use the Endpoint Manager
(EM) interface to deploy Comodo Client Security (CCS) to your
endpoints. You can purchase EM as stand-alone application, or as a
part of the Comodo Dragon/C1 platforms.
- Dragon - Sign up for Dragon at https://platform.comodo.com/signup
- Comodo One - Customers who already purchased Advanced Endpoint Protection (AEP) licenses from Comodo or its resellers can sign-in to C1 at https://one.comodo.com/app/login
Use your username / password of your Comodo account created during purchase of AEP licenses
Set-up your C1 MSP / Enterprise account
- After sign-up, login to the portal then click 'Applications > 'Endpoint Manager'.
- Visit https://secure.comodo.com/home/purchase.php?pid=98&license=try for the trial version, or https://secure.comodo.com/home/purchase.php?pid=98 for the full version.
- You can access your EM instance at the URL provided during setup.
Enroll Users
You must add users to Endpoint Manager before you can deploy CCS to their endpoints.
Add a user
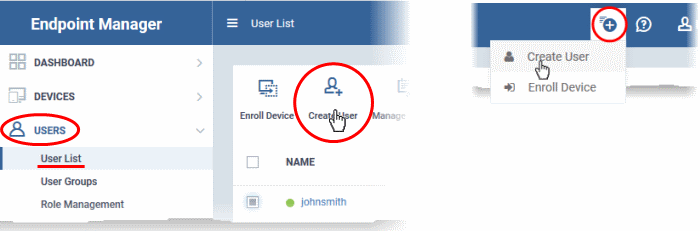
- Click 'Users' > 'User List' > 'Create User'
or
-
Click the 'Add' button
 on the menu bar and choose 'Create User'.
Complete the new user form:
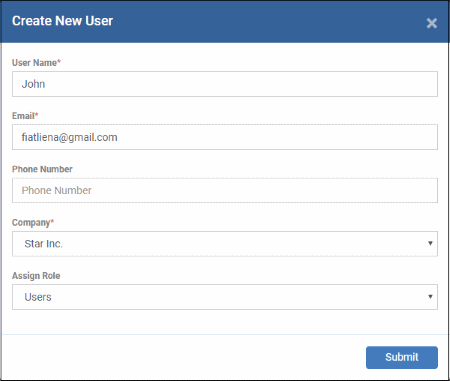
- Type a login username (mandatory), email address (mandatory) and phone number for the user
- Company - Choose the organization to which you want to enroll the user
- Role
A 'role' determines user permissions within the Endpoint Manager console itself. Endpoint Manager ships with two default roles:
- Administrator - Full privileges in the Endpoint Manager console. The permissions for this role are not editable.
- User - In most cases, a 'user' is simply an owner of a managed device. They shouldn't require elevated privileges in the management console. Under default settings, users cannot login to Endpoint Manager.
- Click 'Submit' to add the user to
Endpoint Manager.
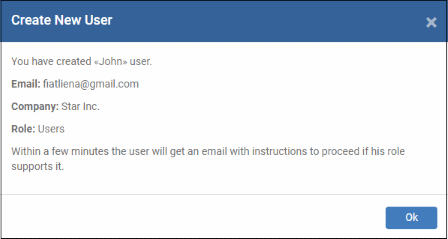
A confirmation message is shown:
- Repeat the process to add more users
- New users are added to the 'Users' interface (click 'Users' > 'User List')
|
Tip: You can also bulk import users from a .csv file. See https://help.comodo.com/topic-399-1-786-12973-Import-Users-from-a-CSV-File.html for more details. |
Step 2 - Enroll Devices
The next step is to enroll user devices so you can manage them with
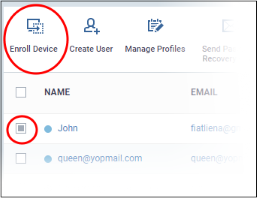
- Click 'Users' > 'User List'
- Select the users for whom you want to enroll devices
- Click the 'Enroll Device' button above the table
OR
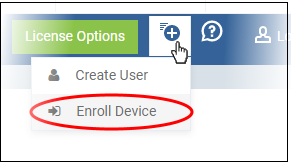
- Click the 'Add'
button 
on the menu bar and choose 'Enroll Device'.
This starts step 1 of the device enrollment wizard:
Step 1 - Device Options
- Current device - Enrolls the device you are currently using. You may disregard this option at this stage as we are adding multiple devices with the 'Other device' option.
- Other device - Add devices owned by the users you selected previously. Those users should already be listed in the 'Specify User' box:
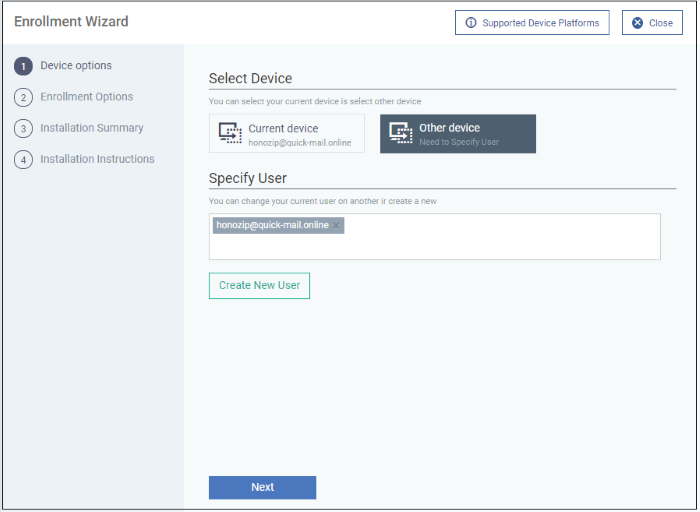
- You can add additional, existing users by simply typing their email address in the box. Endpoint Manager will auto-suggest users that have already been created.
- Create New User - Click if you want to add a new user to Endpoint Manager. You cannot add devices unless you have first added the users that own them.
- Click 'Next' to proceed to step 2.
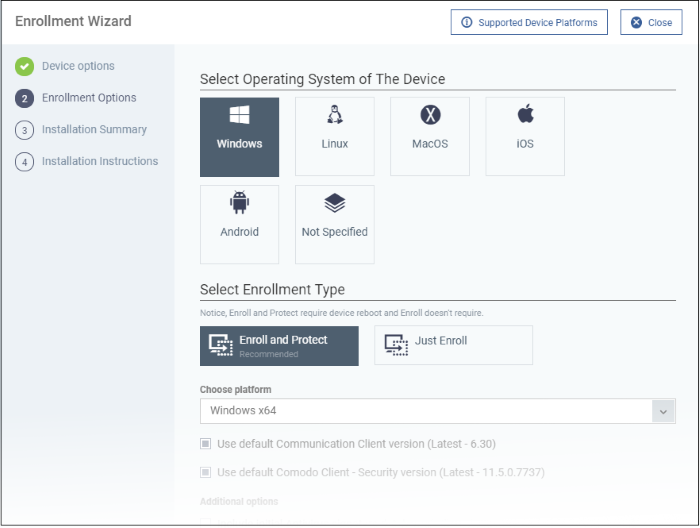
Step 2 - Enrollment Options
Enrollment Type
Applies to Windows, Mac and Linux devices.
- Enroll and Protect - Installs both the communication client and the security client.
- Just Enroll - Installs only the communication client.
Background. There are two types of client:
- Communication Client - Connects the device to Endpoint Manager for central management. It is mandatory to install this client.
- Security Client - This is the security software. Depending on the operating system, it includes antivirus, firewall, threat-containment, web-filtering, and more. It is optional to install this client.
TLDR
- Click ‘Not Specified’ if you only want to install the communication client on target devices. The wizard will detect the target operating system and send the appropriate client to the device user.
- Click one of the operating system tiles if you also want to install the security client. Make sure the target devices use the operating system you selected.
Option 1 - Enroll + Protect - Single Operating System
- Choose this if you want to deploy both communication and security clients
- Click the Windows OS box. Please make sure all your target devices use this operating system
- The wizard will send enrollment mails which only contain download links for the Windows clients
- You can customize enrollment options as required. You can configure items such as enrollment type, reboot policy, client version, configuration profile and device name
- Note - Please uninstall any other antivirus products from target endpoints before proceeding. Failure to do so could cause conflicts that mean CCS does not function correctly
Option 2 - Just Enroll - Multiple Operating Systems
- Choose this if you only want to deploy the communication client. If required, you can install the security client later after enrolling the endpoint.
- Click 'Devices' > 'Device List'
- Select the target devices
- Click the 'Install or Update Package' button > Choose 'Install Comodo Client – Security'
Click 'Next' to skip to step 3 if you are happy with your choices thus far.
OR
See the tables below for more information about the options on this page.
|
Setting |
Description |
|---|---|
|
Choose platform |
Select Window OS version. 64 bit, 32 bit, or
hybrid.
|
|
Use default Communication Client version |
This client enrolls the endpoint for central management.
|
|
Use default Communication Client Security version |
This client installs security software such as antivirus, firewall and auto-containment.
|
|
Additional options |
AV Database - Choose whether to include
the latest virus database with the installation package. This
increases the size of the package. If disabled, the client will download the latest database anyway when you run the first virus scan. |
|
Configuration Profile |
A configuration profile is a collection of
settings which specify a device's network access rights, security
settings, antivirus scan schedule, and more. The default is 'Windows - Security Level 1' profile. Choose a different profile if required.
|
|
Set Reboot Options |
Endpoints need to be restarted to complete CCS installation. You have the following restart options:
Optional. Type a custom message in the 'Reboot Message' field.
|
|
Device Name Options |
|
- Click
'Next' to proceed to step 3
Review your choices so far.
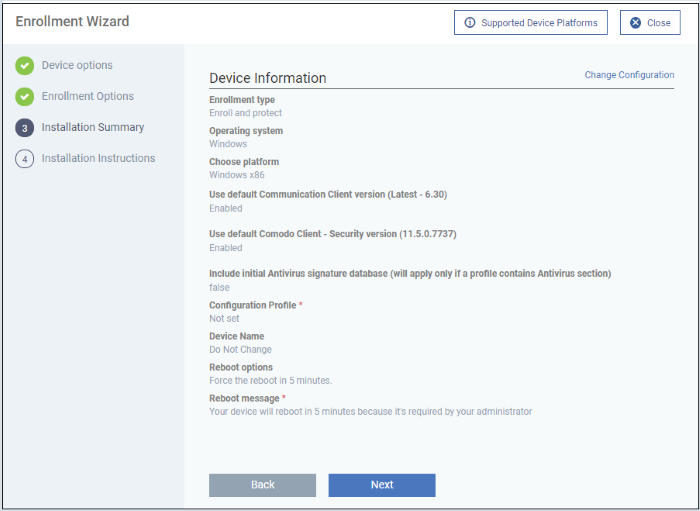
- Click ‘Back’ or 'Change Configuration' (top-right) to revise your choices.
- Click 'Next' to proceed to step 4
Step 4 - Installation Instructions
The final step is to send out the enrollment emails to the device owners:
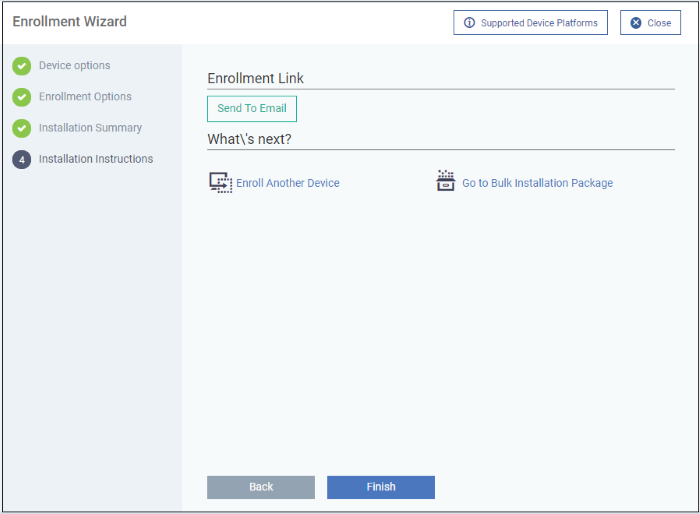
- Send - Click this to send enrollment mails to users with the settings you choose in steps 1 - 3.
- Enroll Another Device - Takes you back to step 1
- Go to Bulk Installation Package - Takes you to bulk installation package screen to configure and enroll users in bulk. See 'Bulk Enrollment of Devices'
- Click 'Finish' to close the window.
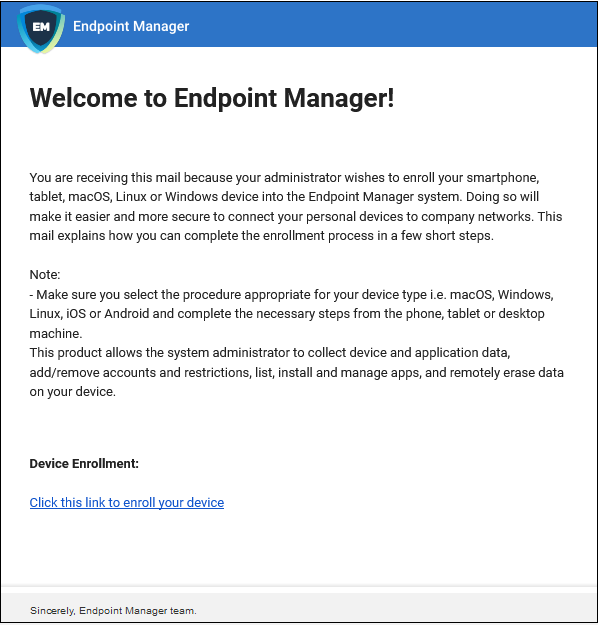
The user experience is as follows:
- User opens the email on the Windows endpoint you want to enroll
- Click the enrollment link in the email to open the device enrollment page
- Click the 'Download Windows Installer' button:
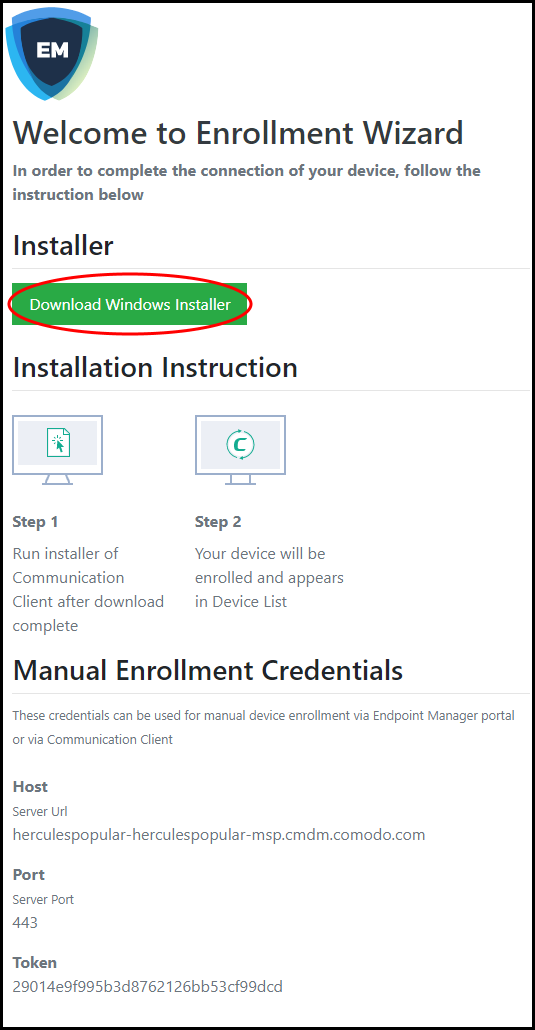
- The EM client setup file gets downloaded.
- Run the setup file to install the client on the endpoint.
- The
device is automatically added to Endpoint Manager once installation
is complete. The EM communication client icon
 appears at the
bottom-right of the endpoint screen.
appears at the
bottom-right of the endpoint screen.
- If the client is not automatically enrolled after installation, you can manually enroll the device at a later time. This might happen if, for example, there are connectivity issues.
- You will need to enter the host, port and token ID to manually enroll. You can find these items at the end of the device enrollment page.
- Protection is effective immediately after the computer restarts.
An Endpoint Manager (EM) security profile is applied to the device.
- If the user is already associated with a configuration profile in EM, then those profiles will be applied to the device. See Assign Configuration Profile(s) to User Devices and Assign Configuration Profiles to a User Group for more details.
- If no profiles are defined for the user then the default Windows profile(s) will be applied to the device. See Manage Default Profiles for more details.
The device can now be remotely managed from the EM console.