Introduction to Service Desk Module
- Comodo Service Desk is a web based ticketing and support platform used by enterprises and service providers to manage user support requests.
- After creating an account, you can raise support queries by creating tickets in the help desk portal.
- This guide explains how you can register for a service desk account, submit support tickets, view the knowledge-base and more.
You need to sign-up for a Service Desk account in order to submit tickets. There are two ways to register an account:
|
Note: You might be able to submit tickets as a guest, without registering, if your administrator has enabled this feature. However, you can only check your ticket status in the portal after registration. |
Self Enrollment at the Web Portal
- Your administrator will send you the URL of the support portal.
- You can register your account by entering your email address and password.
- You will then receive an activation mail.
- Clicking the link in the mail to activate your account.
Sign-up for an account
- Visit the web-portal at the URL provided by your administrator
- Click 'Sign-in' at the top right
The login page is shown:
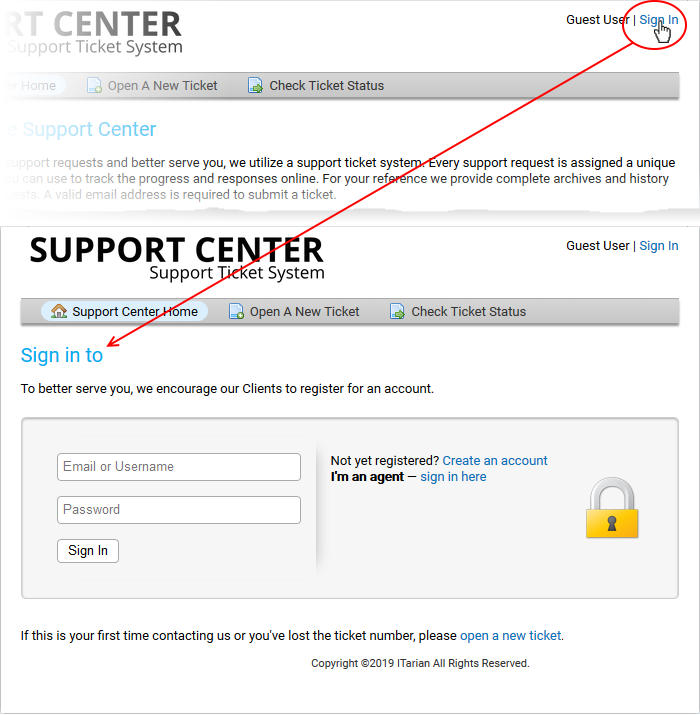
- Click 'Create Account' on the right
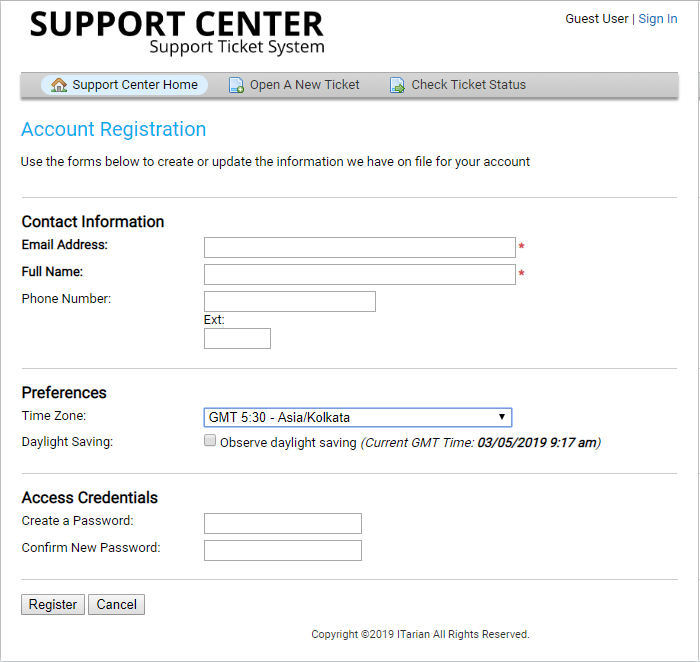
The 'Account Registration' form appears.
-
Complete all required fields on the the form and click the 'Register' button.

Your account will be registered and an email containing account activation link will be sent to your email address.
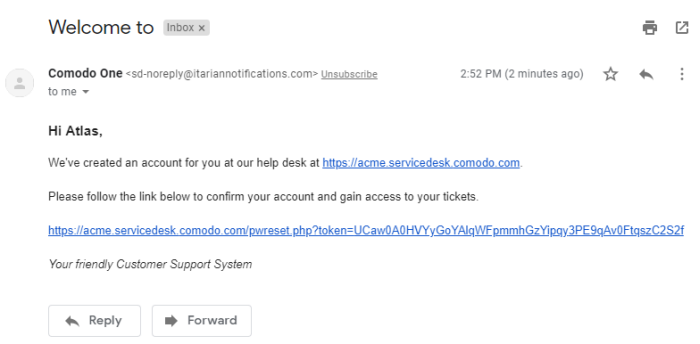
- Click the link to activate your account.
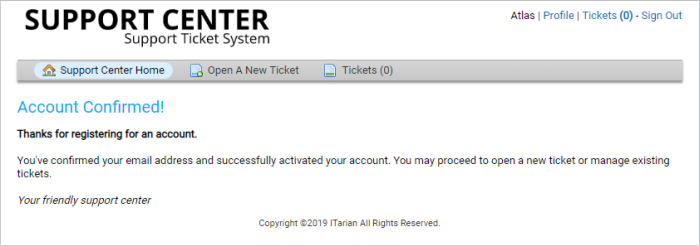
- You can now raise a new ticket, reply to agent queries and more.
- You will receive an email from Service Desk containing a link to activate your account.
- Click the activation link to open the 'Manage Your Profile Information' page:
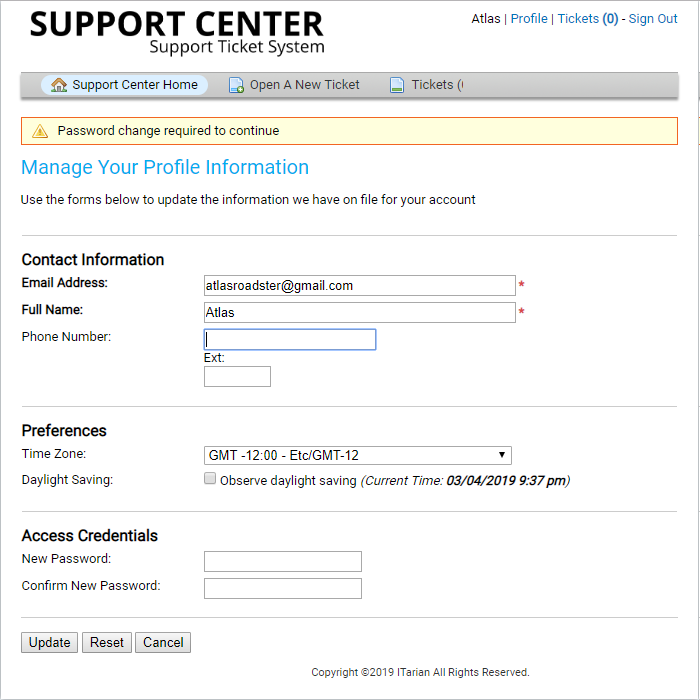
- Enter and confirm a new password and click the 'Update' button.
- You can now login to the support portal to create and manage support tickets.
Open a New Ticket in Service Desk
There are multiple ways to create a ticket:
Open a ticket via the web portal
You can create tickets in the web portal as a guest user or registered user.
Create a ticket as a guest user
- Visit the web-portal at the URL provided by your administrator
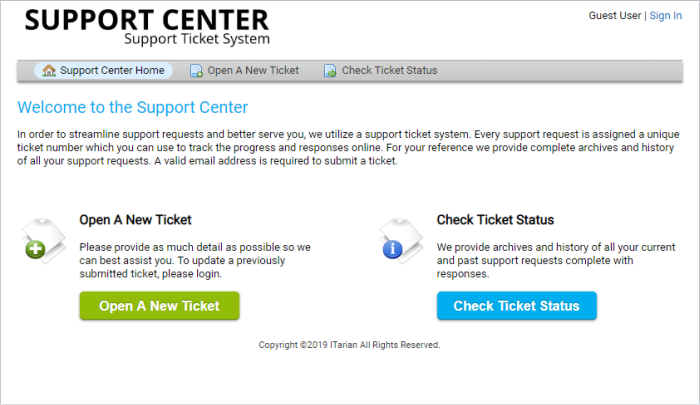
- Click the 'Open New Ticket' button
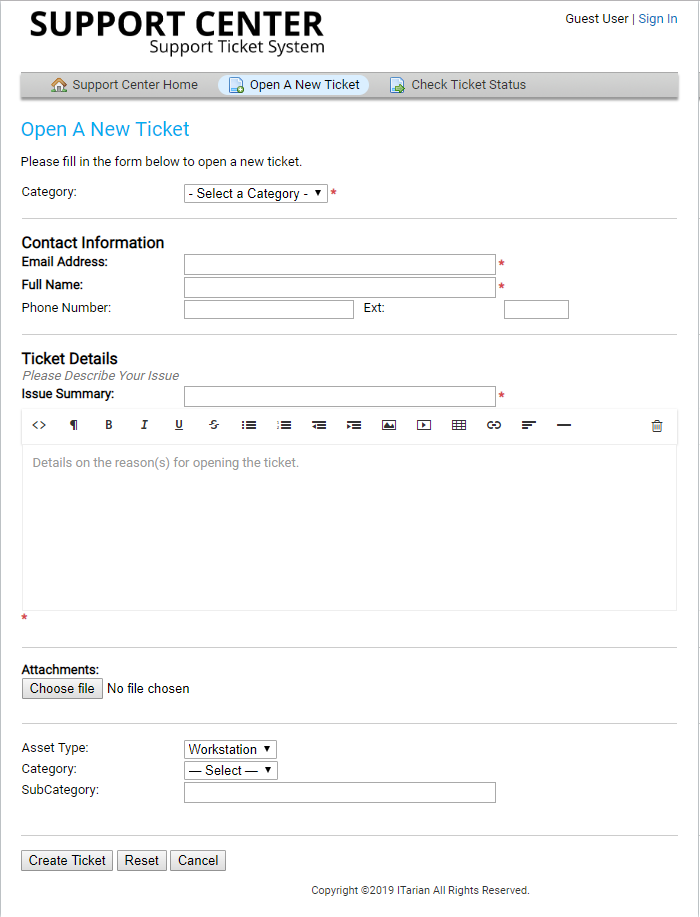
|
Note: The form you see may differ to the one shown above. The layout is configured by your admin. The above shows the default fields and labels. |
- Complete the new ticket form:
- Category - Select the help topic on which you need help.
- Email Address - Your contact email address. Your email address doubles up as your username to login to your account.
- Full Name – Enter your first and last names.
- Phone Number - Your contact phone number (optional)
- Issue Summary – Describe your problem.
- Issue Details - Enter a more detailed description of the issue.
- Attachments - Add screenshots, documents or files to support your request.
- Priority Level – Select the urgency level of your ticket. The options are: low, normal, high or critical.
- Asset Type - Select the type of device which your issue concerns
- Category – The type of request you are reporting. Examples include 'General Inquiry' and 'Report a problem'.
- Sub Category – Choose a specific item within the category. For example, 'Overheating' may be a sub-category of 'Report a problem', and 'Billing question' might be a sub-category of 'General Inquiry'.
- Click 'Create Ticket'.
- Click
'Reset' to clear from data.
- Click
'Cancel' to close the ticket without saving details.
You will see an acknowledgment screen and also receive a confirmation email. You can check ticket status by entering your email address and the ticket number in the help desk portal.
Create a ticket as a registered user
- Login to your help desk web portal at the URL provided by your administrator.
The portal should open at the 'Open New Ticket' page by default.
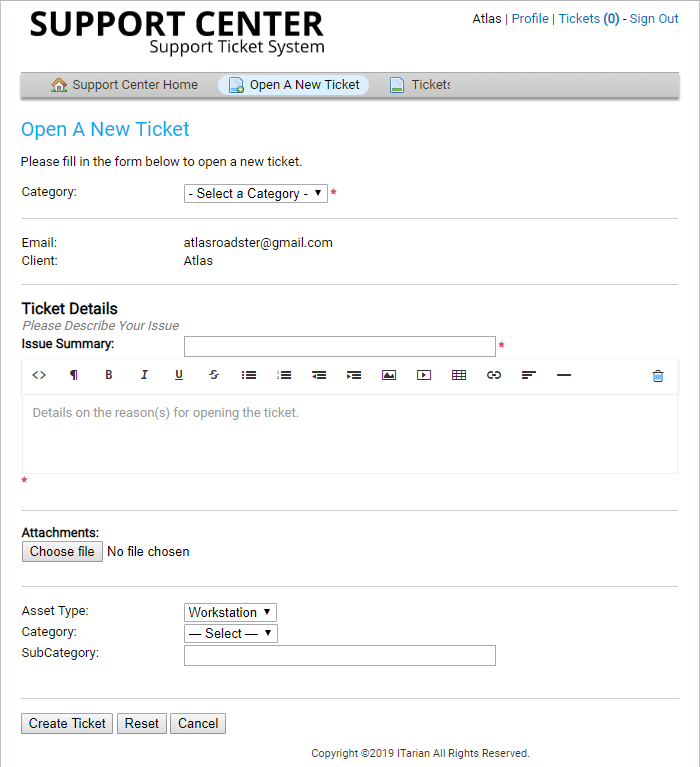
- Alternatively, click 'Open New Ticket' in the top-menu:
|
Note: The form fields and field labels depends on how the admin has configured the ticket form. The above form shows the default fields and labels. |
- Complete the new ticket form and click the 'Create Ticket' button at the bottom.
- Category – Select the help topic on which you need help.
- Email - Your contact email address This will be auto-populated.
- Client - Your full name. This will be auto-populated.
- Issue Summary - Describe your problem.
- Issue Details - Enter a more detailed description of the issue.
- Attachments - Add screenshots, documents or files to support your request.
- Priority Level – Select the urgency level of your ticket. The options are: low, normal, high or critical.
- Category – The type of request you are reporting. Examples include 'General Inquiry' and 'Report a problem'.
- Sub Category – Choose a specific item within the category. For example, 'Overheating' may be a sub-category of 'Report a problem', and 'Billing question' might be a sub-category of 'General Inquiry'.
- Asset Type - Select the type of device which your issue concerns
- Click 'Create Ticket'.
You will see an acknowledgment screen and receive a confirmation email. The mail contains the ticket number and the department to which the ticket is assigned. You can check ticket status by entering your email address and the ticket number in the help desk portal.
You create a ticket by sending a mail to the support address provided by your help desk. You will receive an automated reply (if enabled by the administrator) with ticket details. You can then check the ticket status from the web portal.
If you speak to support over the phone, the staff member may create a ticket on your behalf. You will receive an automated reply (if enabled by the administrator) with the ticket details. You can then check the ticket status from the web portal.
Registered users and guests can check their tickets as follows:
Registered Users
Registered
users should sign-in into their account at the help-desk web portal:
View your tickets
- Login to your help desk web portal
- Click 'Tickets' from the top
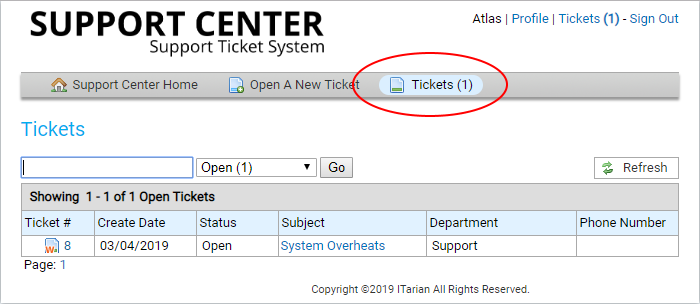
- The total number of tickets you have open is shown at top-right.
- Search tickets - Enter a word or sentence from the ticket in the search box, select a ticket status (open or closed) then click the 'Go' button.
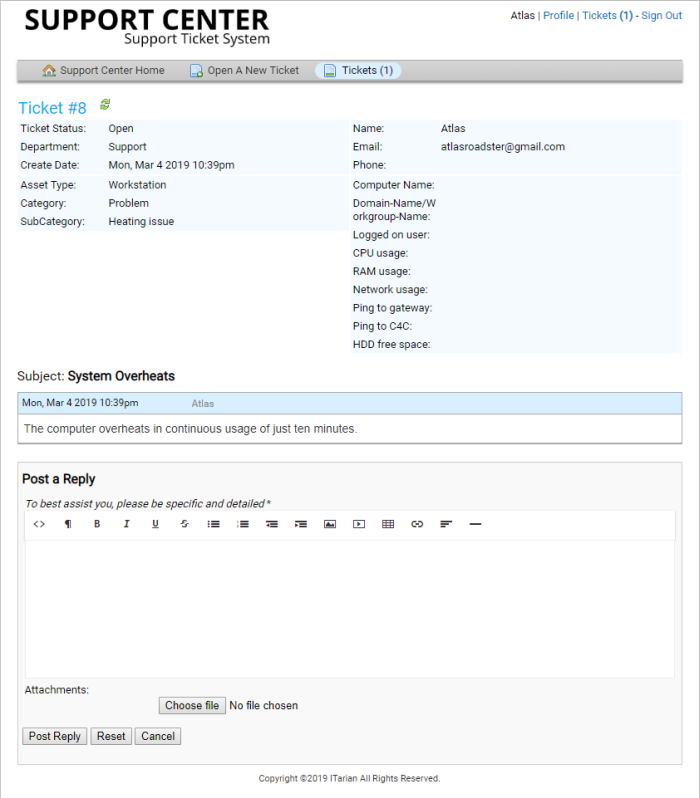
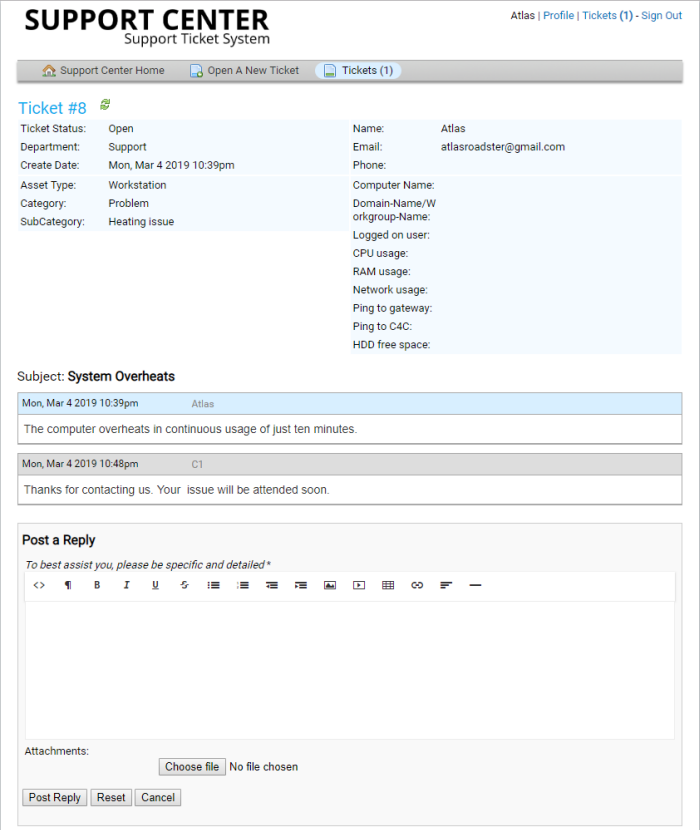
- Click a ticket number or the subject to view the ticket thread.
- This contains your initial request and all staff responses.
- To post a reply, type your response and click the 'Post Reply' button.
Guest Users
Guest users
can view the status of their ticket by providing their email ID and ticket
number.
-
Open the help desk portal
-
Click 'Check Ticket Status'
-
Enter your email address and ticket number in the respective fields
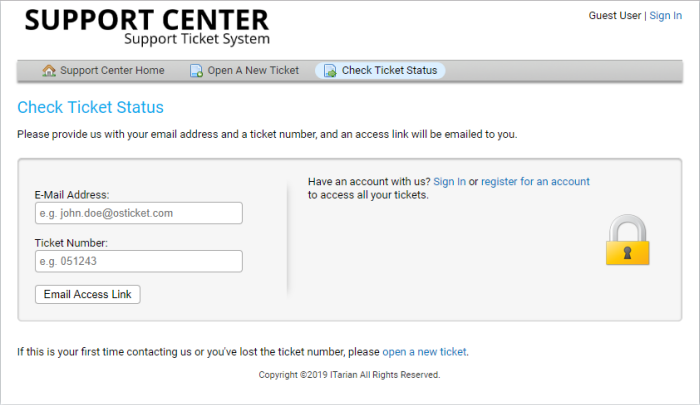
Depending on the settings implemented by the administrator, the button below the 'Ticket Number' field will be either 'View Ticket' or 'Email Access Link'.
- View Ticket - Will validate your email address and ticket number then open your ticket.
- Email Access Link - A verification mail will be sent to your email ID. Click the verification link in the mail to view your ticket.
To post a
reply, enter your response to the ticket and click the 'Post Reply'
button at the bottom.


