Scan and Clean Your Computer
Click 'Antivirus' > 'Run a Scan'
- The 'Run a Scan' area lets you launch an on-demand scan on an item of your choice.
- The item can be anything you choose - your entire computer, a specific drive or partition or even a single file.
- You can also scan a wide range of removable storage devices, such as external hard-drives, USB sticks and more.
Run an on-demand virus scan
- Open Xcitium Client Security
- Click the 'Antivirus' tab
- Click 'Run a Scan' box
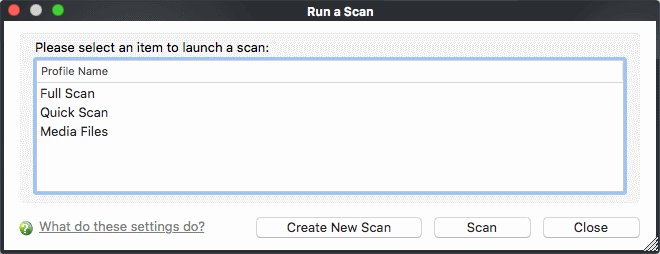
- XCS ships with two pre-defined scan profiles - 'Full Scan' and 'Quick Scan'. These cannot be edited or removed:
- Full Scan - Scans every drive, folder and file on your system, including external connected devices.
- Quick Scan - Scans important operating system files, system memory, auto-run entries, registry keys and hidden services.
- Create
New Scan – Create your own custom
scan of specific files, folders or drives.
See Create
a custom scan profile if you need more details.
Click
'Scan' after making your selection (or just double-click the profile
name).
You need to create a scan profile in order to run a custom scan. Once created, you can re-run the scan in future.
- Open Xcitium Client Security
- Click the 'Antivirus' tab
- Click the 'Run a Scan' box
- Click 'Create New Scan'
- Type a name for your new profile. For example, 'My External Drives'
- Click 'Add' to choose files, folders or drives you want to include in the profile
- Repeat the process to add multiple items
- Click 'Apply'. Your new profile will be listed in the 'Run a Scan' dialog
- Select your new profile in the list and click 'Scan'
- Next, see:
|
Tip: If you just want to scan a file or folder, you can just drag it into the scan box in the 'Summary' area. |
Before running the scan, Xcitium Client Security will first check for AV database updates. If updates are available they will be downloaded and installed.
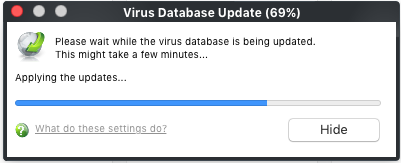
The scan, based on the profile you selected, will begin immediately.
The progress dialog shows the profile name, the location that is currently being scanned, the start time and duration of the scan, the total number of objects scanned so far and the number of threats found.
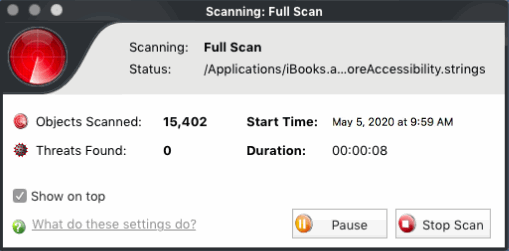
- Click 'Pause' to suspend the scan
- Click 'Resume' to recommence scanning
- Click 'Stop Scan' to abort the scan process
altogether.
Once the scan is complete, the results window opens:
- The results window lists all threats discovered by the scan and provides controls which let you deal with the them:
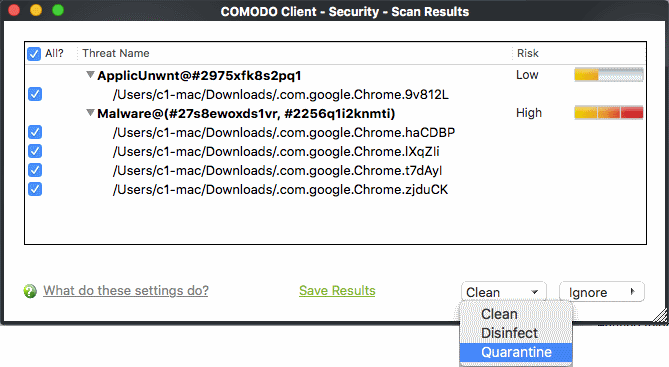
- Click the 'Threat Name' column header to sort results in alphabetical order
- Click the 'Risk' column header to sort results by risk level
- Select 'All' if you want to apply 'Clean' or 'Ignore' actions to every threat.
- Save Results - Save the scan results as a text file.
- Clean – There are three options to deal with an infected file:
- Clean – The selected items will be completely deleted from your computer
- Disinfect - If a disinfection routine exists, XCS will remove the infection and retain the original file. If no disinfection routine exists, XCS will move the file to quarantine.
- Quarantine – Moves the selected files to quarantine. Files moved in this way are encrypted and not allowed to run. You can view the files at a later time, and choose to delete or restore the file to its original location. See https://help.xcitium.com/topic-463-1-1035-16009-Quarantined-Items.html for more details.
- Ignore - Two options:
- Once - The file is removed from the threat results. The file isn't, however, added to the list of exclusions. The file will be detected as a threat again by the next scan.
- Add to Exclusions - The file is moved to the exclusions list. XCS will skip this file in future scans and not consider it to be a threat.
'Scan Profiles' let you set up custom scans on specific areas on your system. Scan profiles can be run on-demand at any time.
- Open Xcitium Client Security
- Click the 'Antivirus' tab
- Click 'Run a Scan'
- Click the 'Create New Scan' button
OR
- Open Xcitium Client Security
- Click the 'Antivirus' tab
- Click 'Scan Profiles'
- Click the 'Add' button in the scan profiles dialog
The 'Add New Profile' dialog opens:
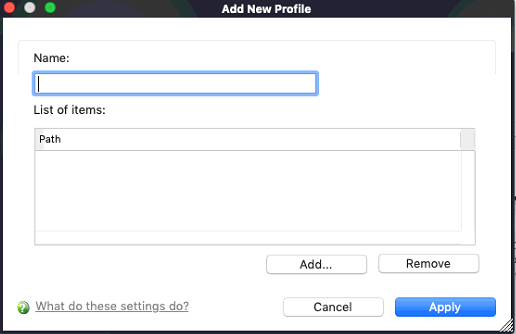
- Click 'Add' to select the items you wish to include in the scan.
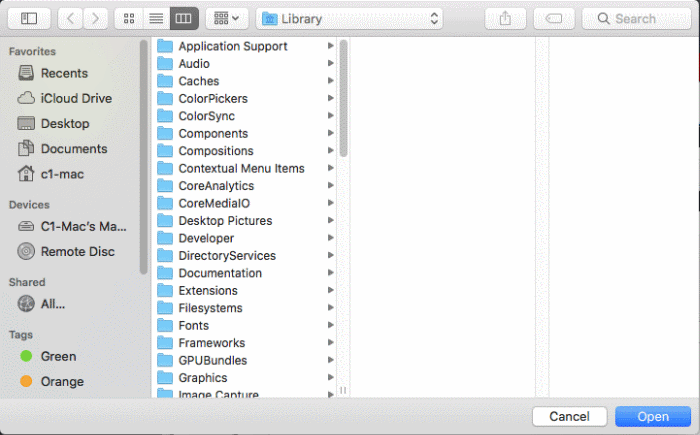
- Navigate to the location of the target item, select it and click 'Open'
- Repeat the process to select multiple items
- Click 'Apply' to add items for the new scan profile.
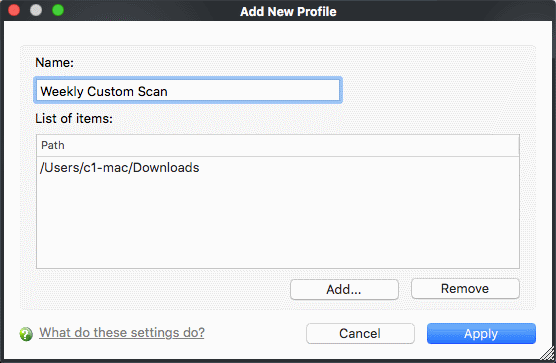
- Click 'Apply'
- The profile will be added to the list of scan profiles:
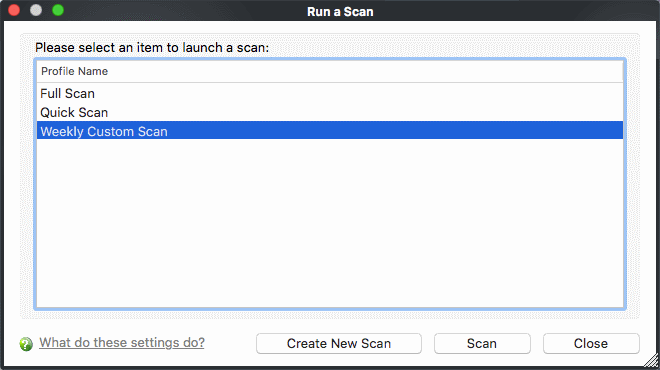
- Repeat the process to add more scan profiles.


