Mail Archive
CASG is capable of saving copies of your emails in the archive.
- The mail retention period is set by your administrator.
- The archive interface lets you view, reply and resend mail to yourself. You can also report spam from here.
Open the mail archive interface
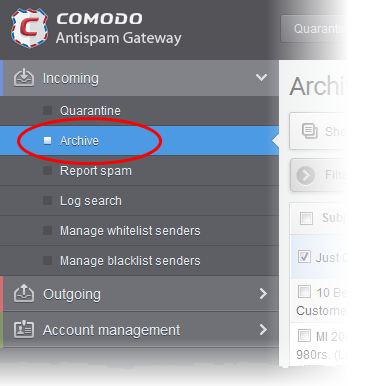
- Click 'Incoming' on the left then choose 'Archive'
Your archived mails are shown as follows:
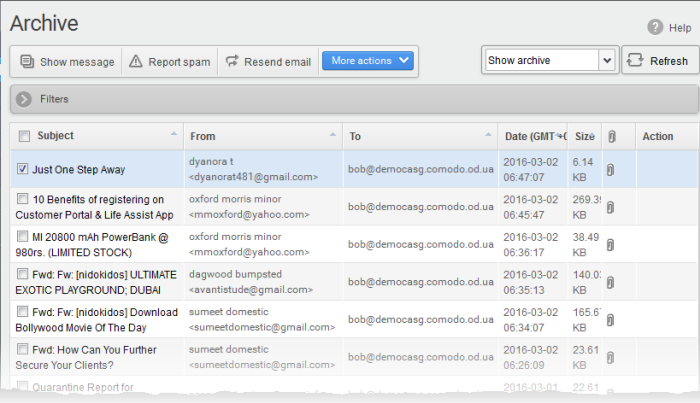
From this interface, you can:
Page Filter
The drop-down menu at top-right lets you filter archived mail by status:
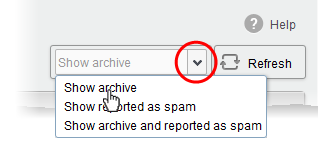
- Show archive: Displays all non-spam archived mails
- Show reported as spam: Displays archived mails that you have marked as spam
- Show archive and reported as spam: Displays both spam and non-spam archived mails
- You can search for specific mails by using filters. See Use 'Filters' to search archived emails for more details.
There are two ways to view the content of archived mail:
- Select the mail in interface and click the 'Show Message' button
OR
- Click the email link in the subject column
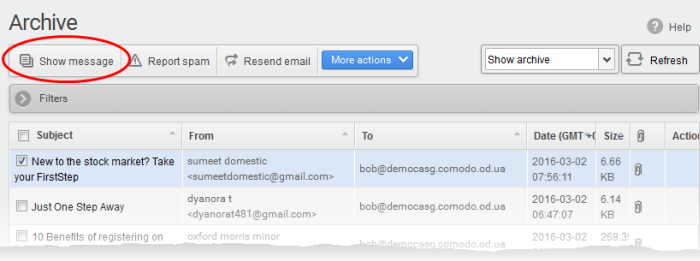
The selected mail opens:
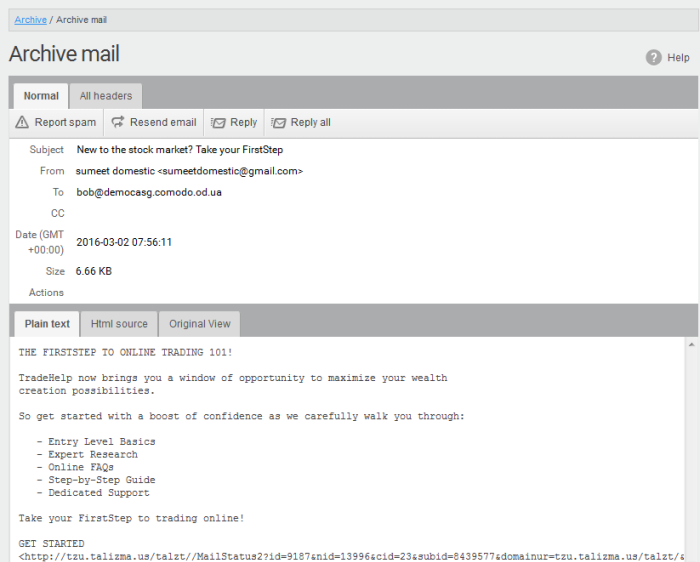
By default, the email opens in normal view and shown in plain text, where the images, banners and links are not displayed. Click 'Html source' to view the source code of the mail. To view images and links, click the 'Original View' tab.
- If
the mail has attachments, you can download it from this dialog.

- Select the attachment and click 'Download' or 'Download with Containment'.
- Download - Save the original file.
- Download with Containment - Containment is a technology whereby attachments with an 'unknown' trust rating are run inside a secure, sandbox environment. You can open and run the file as normal, but it is prevented from making potentially damaging changes to your computer.
'Download with containment' is only available if enabled by your administrator.
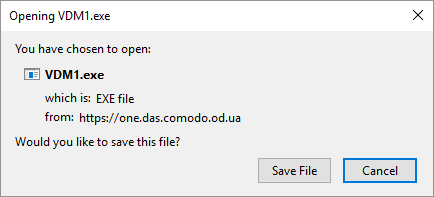
You can open the attachment with an
appropriate application or save to a desired location in your
computer.
- 'All headers' tab - Email headers contain information about the route taken by the mail before it reached your mailbox. This lets you check the authenticity of the mail:
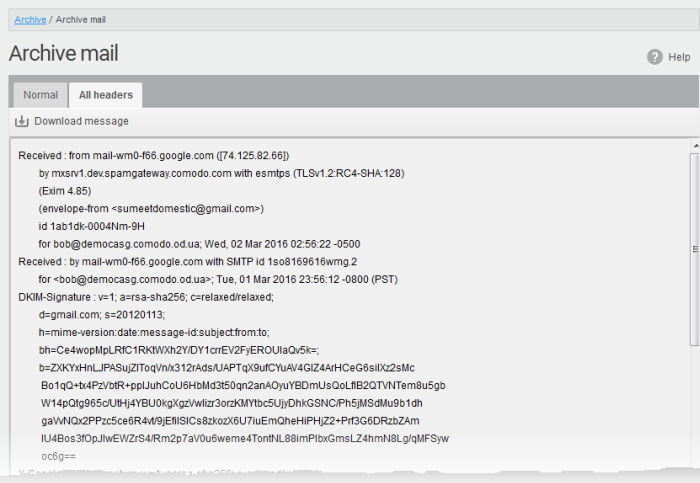
- To
save the email as a HTML file, click 'Download' message.
View archived mail in a new window
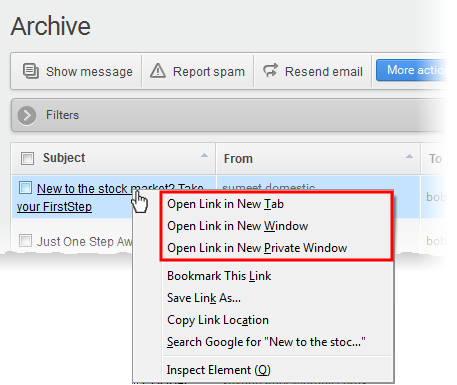
- Right-click on the subject line of the mail you want to view
- Choose whether to open in a new tab, new window, or new private window:
- Your browser may display a pop-up warning.
- Click 'Options' > then select 'Allow pop-ups for...' to allow the message to open in a new window.
- Click 'Show message in new window' again.

Resend
mails from Archive to your inbox
The 'Archive' interface lets you re-send selected mails to yourself so that you can access them from your mail client. This is useful if you want to recover mails that you have deleted.
Resend a mail
- Select mail(s) from and click the 'Resend' email button:

A confirmation dialog is shown:
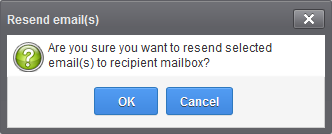
- Click 'OK' to receive the mail(s) at your mail box
CASG will only resend the mail to your mailbox, and not to any other recipients in the 'To', 'CC' and 'BCC' fields of the emails.
Report spam from the archived mails
You can submit mails that you suspect are spam to Comodo for analysis. We will analyze reported mails and, if we confirm them as spam, will update our filters to quarantine similar mails in future.
Report spam emails
-
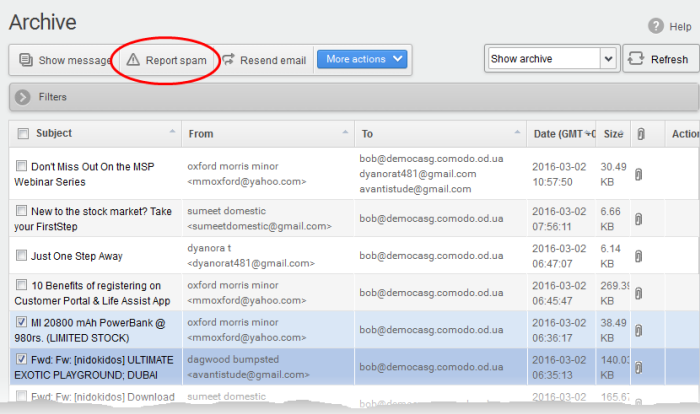
Select the mail(s) to be submitted as spam, from the 'Archive' interface and click the 'Report Spam' button from the top
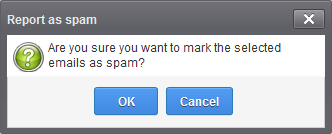
A confirmation dialog is shown:
-
Click 'OK' to upload the mails for analysis
You can send replies to archived mails. This is useful if you have accidentally deleted a mail from your mail box but wish to send a reply to the sender. You can also choose to send the reply only to the sender or to all for which the email was addressed.
Send a reply to a mail from archive
- Select the mail from the Archive interface
- Click 'More actions' and choose the reply option
- Reply - The reply mail is sent only to the sender email address
- Reply all - The reply mail is sent to all email addresses in the 'To' and 'CC' fields of the selected mail
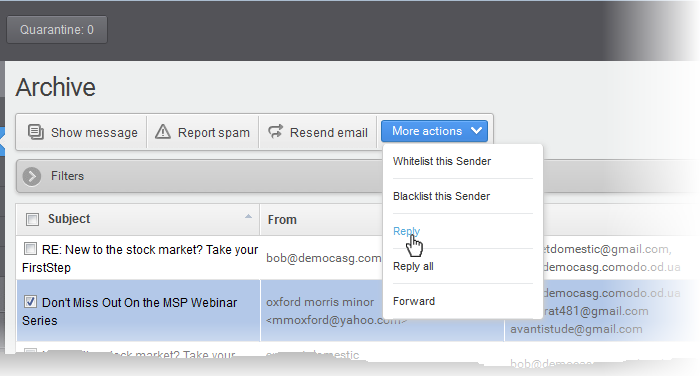
The Reply/Reply all interface opens:
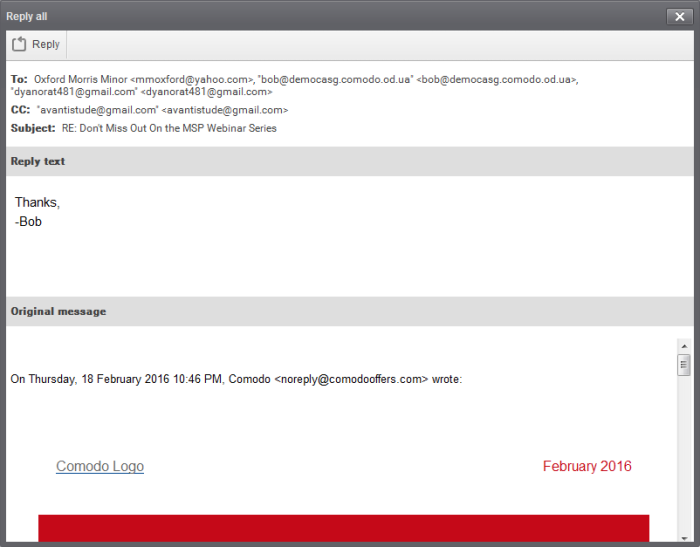
- Enter your reply message in the 'Reply text' field and click Reply from the top left
The message is sent to the selected email addresses.

You can forward mails from your archive to different mail addresses. This is useful if you want to share an email with other people or to send the mail to your alternative email address.
Forward a mail from archive
-
Select the mail from the Archive interface
-
Click 'More actions' and choose 'Forward'
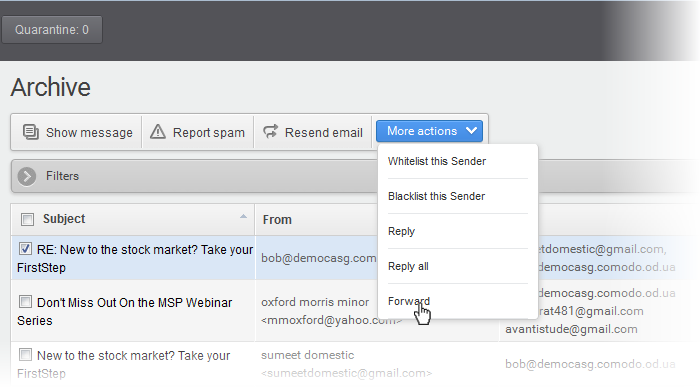
The 'Forward' interface opens:
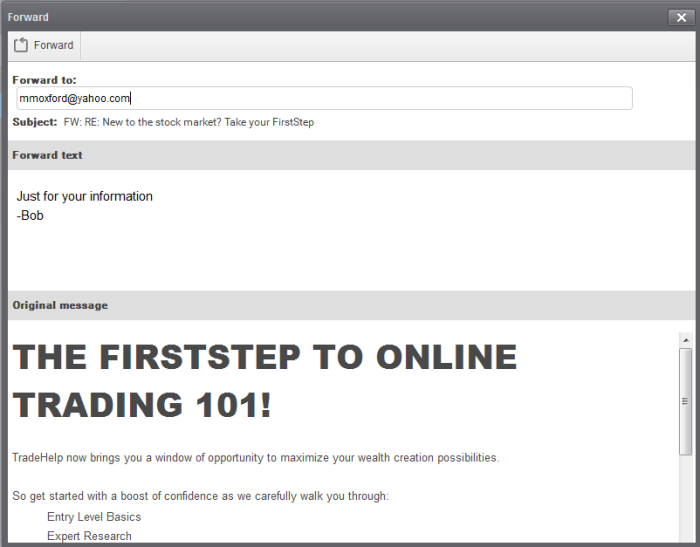
-
Enter your forward message in the 'Forward text' field, enter the email address to which the mail has to be forwarded and click 'Forward' from the top left
The message is sent to the entered email addresses.

To stop receiving emails from a specific senders whose mails are available in the archive, you can request the administrator to add those senders to blacklist.
|
Note: Depending on the permission level configured for your email account by your administrator, the button for adding senders to blacklist is either 'Blacklist this Sender' or 'Request blacklist' in the 'More actions' drop-down button. If the interface displays 'Blacklist this Sender' button, you can add the sender to blacklist without approval from your administrator. |
-
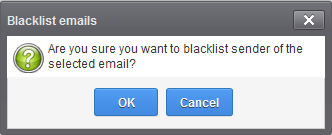
Select the mail that you want its sender to be added to blacklist and click 'More actions' > 'Request Blacklist' or 'Blacklist this sender'.
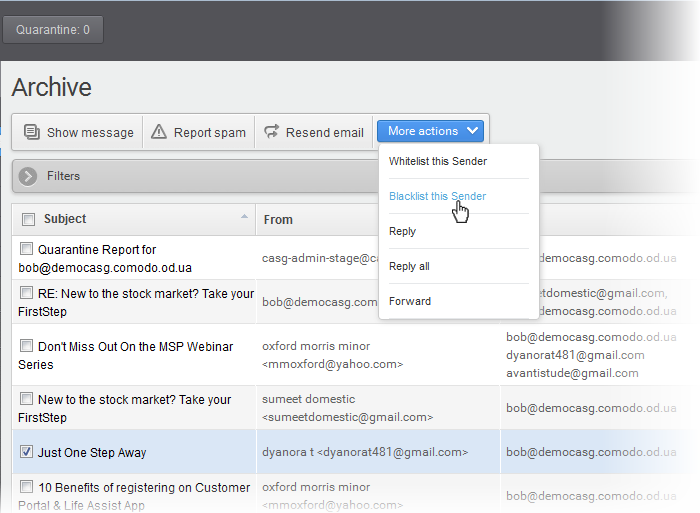
Upon request to the administrator, an email notification is sent to your administrator with a copy to you. This request is also displayed in the 'Action' column of the 'Archive' interface. If the administrator accepts the request, the sender is added to blacklist and you will no longer receive any mail from that sender. If the request is rejected, the 'Blacklist this Sender' icon in the 'Action' column is no longer displayed.
- If
you want to call off the request before the administrator accepting
it, choose the mail, click 'More actions' and choose 'Cancel
request'.
-
Click 'OK' for confirmation
Senders added to blacklist are displayed in the Manage blacklist senders interface. See Manage Blacklisted Senders for more details.
You can add authenticated senders to whitelist from the archive interface, so that the mails from those senders will not be subjected to security checks.
|
Note: Depending on the permission level configured for your email account by your administrator, the button for adding senders to whitelist is either 'Whitelist this Sender' or 'Request whitelist' in the 'More actions' drop-down button. If the interface displays 'Whitelist this Sender' button, you can add the sender to whitelist without approval from your administrator. |
-
Select the mail that you want its sender to be added to whitelist and click 'More actions' > 'Request Whitelist' or 'Whitelist Sender'.
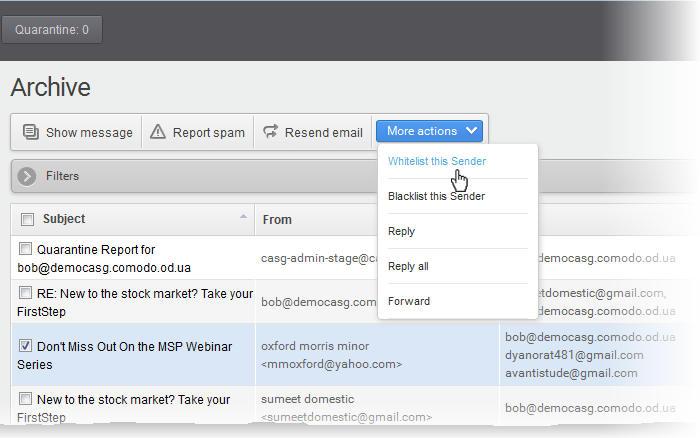
Upon request to the administrator, an email notification is sent to your administrator with a copy to you. This request is also displayed in the 'Action' column of the ' Archive' interface. If the administrator accepts the request, the sender is added to whitelist and the mails from them will bypass security checks. If the request is rejected, the 'Whitelist this Sender' icon in the Action column is no longer displayed.
- Senders added to whitelist will be displayed in the 'Manage whitelist senders' interface. See the section Manage Whitelisted Senders for more details.
- If you want to cancel the request before the administrator accepting it, choose the mail, click More actions and choose 'Cancel request'.
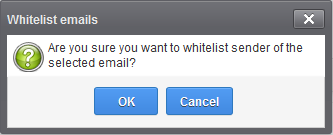
If the administrator has provided the permission to whitelist a sender without approval, a confirmation dialog is displayed on clicking 'Whitelist this Sender'.
-
Click 'OK' for confirmation
Use filters to search archived emails
- Click anywhere on the 'Filters' stripe to open (or close) the filters area.
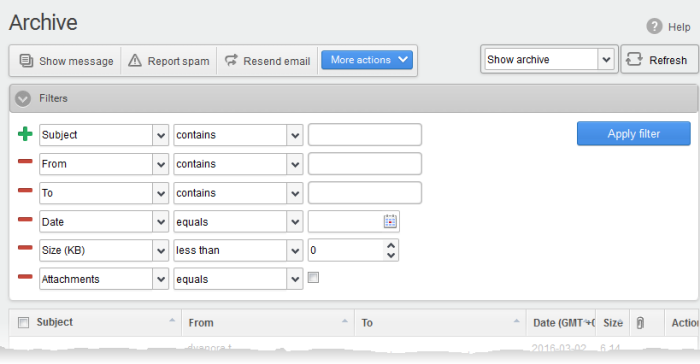
- Choose the filter by which you want to search from the first drop-down, then a condition in the 2nd text box. Some filters have a third box for you to type a search string.
- Click ‘Apply Filter’.
You can filter results by the following parameters:
- Subject: Type the email subject in the text box (column 3) and select a condition in column 2.
- From: Enter the sender name or address in the text box (column 3) and select a condition in column 2.
- To: Enter the percipient name or address in the text box (column 3) and select a condition in column 2.
- Date: Search by date and time mails archived. Select the date (column 3) and select a condition in column 2.
- Size (KB): Search archived mails by their size. Select or enter the mail size in column 3 and select a condition in column 2.
- Attachments: Enable or disable the checkbox (column 3) and select the condition in column 2.
Click anywhere on the 'Filters' tab to close the filters area. Click the 'Refresh' button to remove filters.
You
can add multiple filters to the same search by clicking  .
.


