


Quick Start Guide
This tutorial explains how to setup the Network Assessment Tool (NAT) tool and run a scan on a target network.
Step 1 - Login to Comodo One and download the NAT Tool
- Login to your Comodo One account at https://one.comodo.com/app/login.
- Click 'Tools' on the top-menu.
- Click 'Download' in the 'Network Assessment Tool' tile:
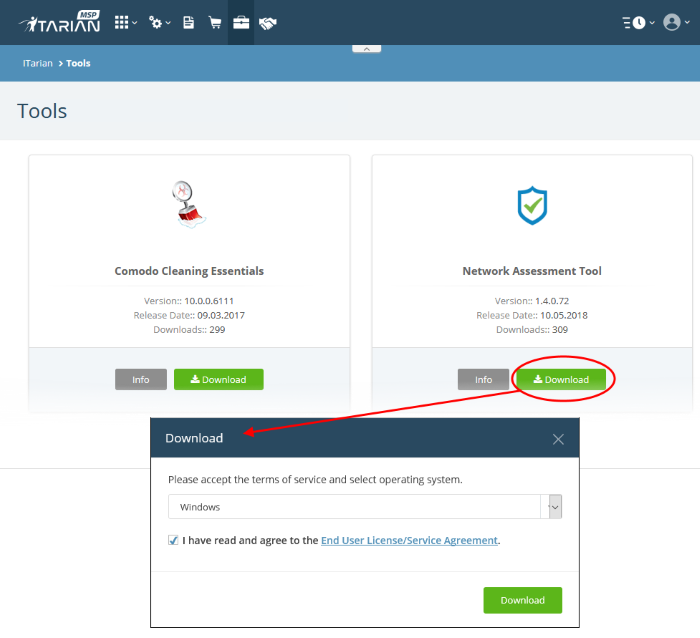
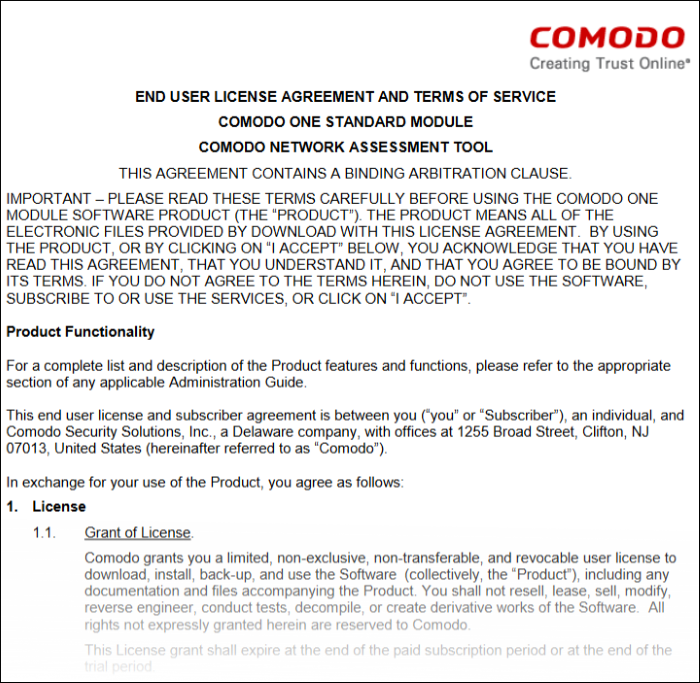
- Agree to the EULA then click the 'Download' button
|
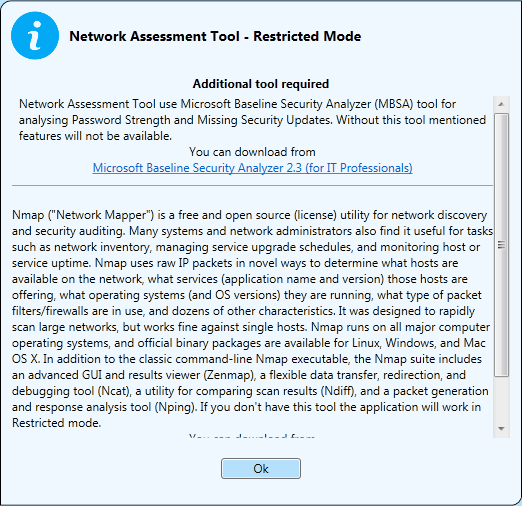
Prerequisite - To work correctly, NAT requires that Network Mapper (NMAP) and Microsoft Baseline Security Analyzer (MBSA) are also installed . The installation wizard allows you to download both both applications if you do not have them already. |
- Double
click on the setup file
 to start the NAT installation wizard
- Follow the wizard and continue the installation.
On completion of installation, the wizard will check whether the prerequisite software MBSA and NMAP are installed.
- If available, the installation will complete and will move to the initial configuration wizard.
- If not available a dialog containing guidance and download links for the additional software will be displayed.
- Agree to the terms and conditions and follow the steps in the installation wizard.
- The wizard will check whether the required NMAP and MBSA software are installed.
- If they are installed, NAT installation will complete and you'll move to the initial configuration wizard.
- If they are not installed, you will see a dialog with download links for the tools. Follow the instructions and install the two tools:
Step 3 – Run Initial Configuration Wizard
The configuration wizard begins once NAT installation is complete:
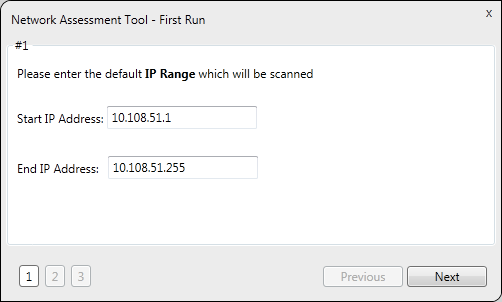
NAT identifies the network on which it is installed and populates the 'Start IP Address' and 'End IP Address'
- Select 'Enable scanning Workgroup/Domain' if you want to automatically add workgroup/domain
- Click 'Next'.
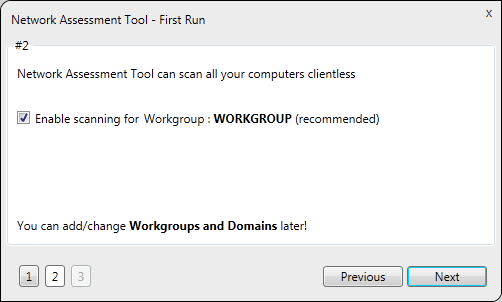
NAT automatically identifies the workgroup or domain to which your computer is a member of and displays it.
- Select 'Enable scanning Workgroup/Domain' if you want to automatically add workgroup/domain
- Click 'Next'.
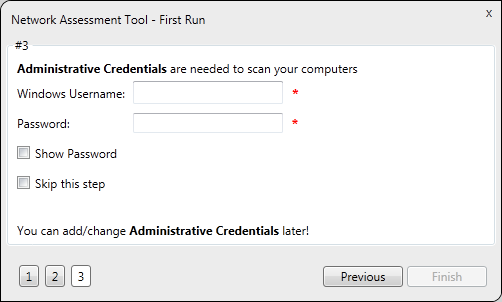
- Enter an admin username and password for the target network and click 'Finish'
- NAT will immediately begin scanning your network. Progress is shown at the bottom of the main interface:

- To view scan progress, click the 'Scanning Queue' button
- To generate reports on completion of scan, click 'Generate Report'.
NAT allows
you to add multiple target networks. You can add networks via
Active Directory domain, by Workgroup or by IP
range.
To add a network:
- Click 'Scanning Methods' on the menu bar:
- Select 'Active Directory', 'Workgroup' or 'IP Address Range' tab depending on the type you want to add.
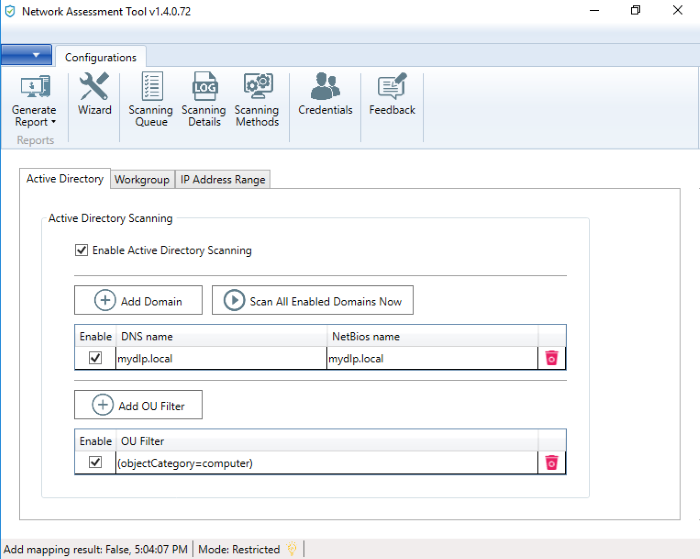
Add an Active Directory domain
- Click the 'Active Directory' tab
- Make sure 'Enable Active Directory Scanning' is selected
- Click 'Add Domain'
A new row will be added to the list
- Enter the DNS and NetBios names in the respective fields.
Add a workgroup
- Click the 'Workgroup' tab
- Make sure 'Enable Workgroup Scanning' is selected
- Click 'Add Workgroup'
A new row will be added
- Enter the name of the workgroup you want to scan
Add an IP Address Range
- Click the 'IP Address Range' tab
- Make sure 'Enable IP Address Range Scanning' is selected
- Click 'Add IP Range'
- A new row will be added to the list
- Enter the start and end IP addresses in the respective fields
- Enter a description for the IP range in the text-box
- Time out period - Skip scans on endpoints that do not respond in the set time.

- Click the 'Save' button
to add the IP range.
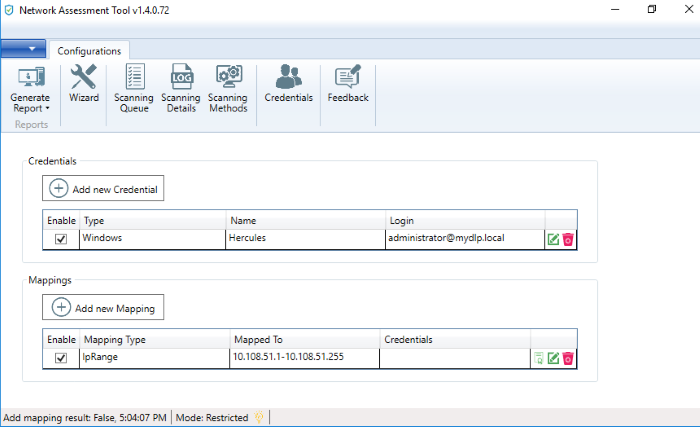
- The next step is to map login credentials to the IP address range. NAT saves the credentials you entered during initial configuration.
- Click the 'Credentials' button
in the top-menu if you want to add more accounts. The next section, Step 5 - Add Credentials and Map to Respective Networks, offers help with this if you need it.
- Click the 'Add Credential' button and select the logins you want to map to the IP range. All credentials must be able to access endpoints in the range.

Step 5 - Add Credentials and Map to Respective Networks
- You need to provide admin username and password for target networks so NAT can scan their endpoints.
- You can map multiple credentials to a single network. NAT will try all credentials if one set fails on a particular endpoint.
- Click 'Credentials' on the menu bar to get started:
- Click 'Add new Credential'

The 'Set new credential' dialog will open.
|
Set new credential dialog – Form parameters |
|
|---|---|
|
Form Element |
Description |
|
Type |
Choose the operating system of the endpoints to which the credentials apply. |
|
Name |
A name to identify the account. For example, the name of the administrator. |
|
Login |
The admin username. |
|
Password |
The admin password. |
- Click 'OK' to add the credential
- Repeat the process to add more credentials
Map credentials to a network
- Click the 'Credentials' button in the top menu
- Click 'Add new Mapping' to open the wizard:
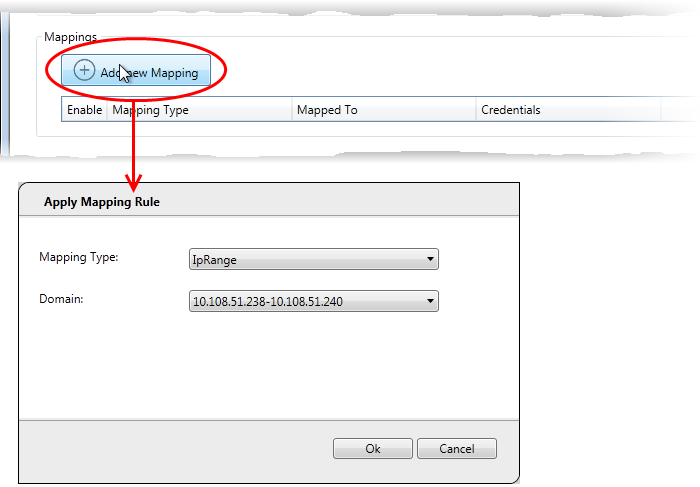
- Mapping Type - Choose the type of network to which the credentials. Choices are 'IP Range', 'Domain' and 'Workgroup'.
- Domain - Choose the network to which the credentials apply. The drop-down shows all networks you have added of the type you chose as the 'Mapping Type'.
- Click 'Ok'
- Repeat the process to map the credentials to different networks as needed
- Click 'Scanning Methods' on the menu bar
- Click the tab of the type of network you want to scan - 'Active Directory', 'Workgroup', 'IP range'.
- Ensure the networks you want to scan are enabled. Disable those you do not want to scan.
- Click 'Scan All Enabled Domains/Workgroups/IP Ranges Now':

- The scan will start.
- Click the 'Scanning Queue' button to view scan progress:
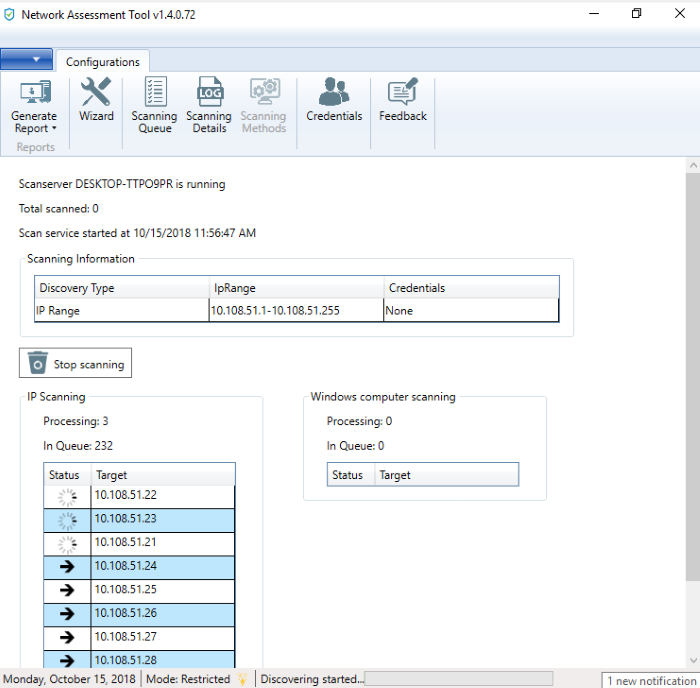
- Scanning Information - Details about current scans on domains, workgroups and IP addresses.
- IP Scanning- List of IP addresses discovered by Nmap on the current network.
- Windows Computer Scanning-Host-names and IP addresses that are currently being scanned using Windows Management Instrumentation (WMI) and Microsoft Baseline Security Analyzer (MBSA).
There are two types of report you can generate after each scan:
- Client Risk Report – A breakdown of security issues on discovered network assets.
- Network Management Plan - Remediation advice for items listed in the risk report.
Download reports from the last scan
- Click 'Generate Report' on the menu bar
- Choose the report type from the drop-down:
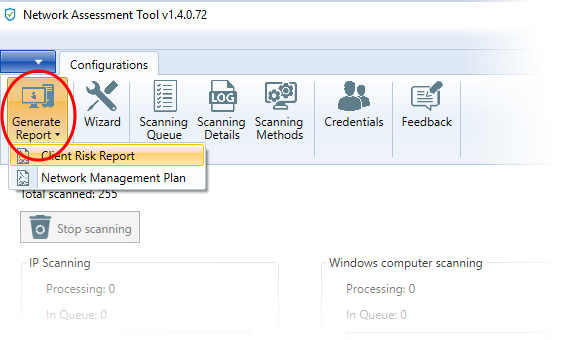
NAT will start generating the report and on completion you will be able to download and save the report on your computer.