


Step 3 - Manage EDR Policies
- An Endpoint Detection and Response (EDR) policy determines which events will generate an alert for you.
- There are 7 event categories. You can define specific rules within each category.
- Comodo EDR ships with a default security policy that is applied to all enrolled endpoints.
- You can also create custom policies according to your requirements.
- Only one policy can be active at a time. You
cannot delete the active policy.
Note. EDR policies do not determine which events are monitored and logged, they determine which events you receive alerts for. cWatch automatically logs all events and submits suspicious files to Valkyrie for analysis, regardless of EDR policy. This means cWatch will always catch zero-day malware, even if you prefer to disable some alerts in a policy.
You can search raw logs in
the 'Investigation' screen.
- Click 'Policy Management' on the left to manage EDR security policies:
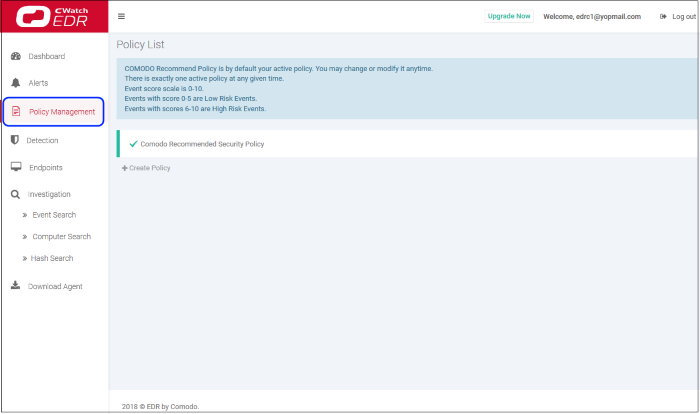
- The screen shows general information about policies and lists the default 'Comodo Recommended Security Policy'.
- A check-mark beside a policy indicates it is currently active.
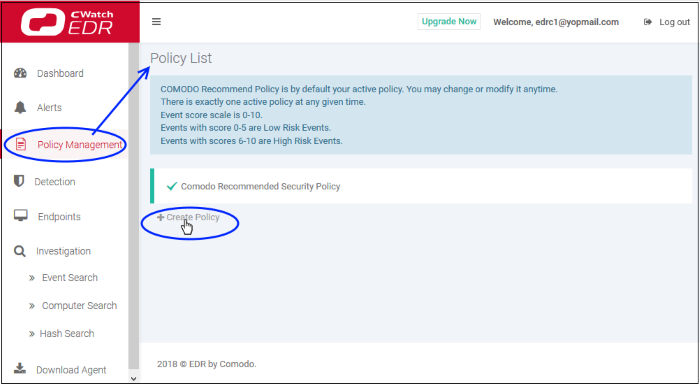
Create and Activate a Policy
- Click 'Create Policy':
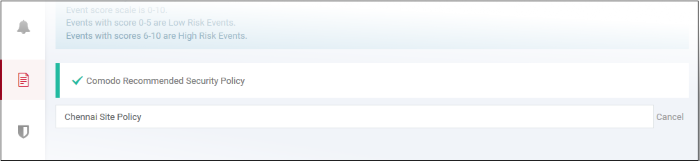
- Create a name for the policy and press enter:
- Now, click on the policy name to view and edit its current details:

- The new policy is automatically assigned a set of default rules.
- You can add new rules, edit or delete rules as required.
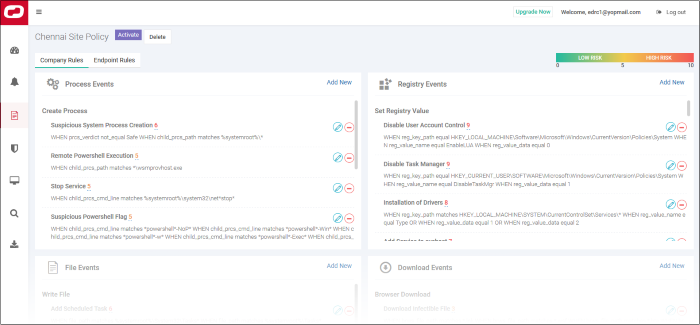
The policy interface has two tabs – 'Company Rules' and 'Endpoint Rules'.
- Company Rules – Create rules by event category. Company rules are applied to all protected endpoints. See 'Company Rules' for more information.
- Endpoint
Rules – Create additional conditions for
each event category and apply to specific endpoints. See
'Endpoint Rules' for more
details.
There are seven event categories in the company rules section.
Each category
has conditions or rules that can be implemented in your policy. You
can create new conditions and edit or delete a condition from an
category.
The built-in event categories are:
- Process Events –Rules to alert you when processes are invoked by an application
- Registry Events - Rules to alert you about changes to the Windows registry on your endpoints.
- File Events - Rules to alert you about modifications to system files.
- Download Events - Rules to alert you when files are downloaded via browsers, emails, shared folders or external drives.
- Upload Events - Rules to alert you when files are transferred to shared folders or external drives.
- Defense+ Events - Rules to alert you when processes attempt to access critical operating system functions or launch attacks.
- Network Events - Rules to alert you about any service listening to ports and network connections on your endpoints.
To create a new condition
- Click 'Add New' lat the top of an event category:
The 'Add Condition' dialog will open:
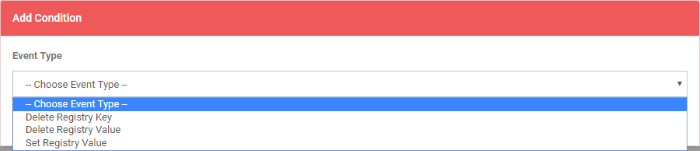
- 'Event Type'– choose the type of incident that you want EDR to detect. The event types available depend on the event category chosen.
- In the example above, the category is 'Registry Events', so the available event types are 'Delete Registry Key', 'Delete Registry Value' and 'Set Registry Value'.
- After choosing a type, you must next construct your condition. You do this by choosing the specific criteria which should be monitored. Again, the criteria vary by event category and event type.
- In the example above we will chose 'Registry Events' > 'Set Registry Value'. The available criteria for 'Set Registry Value' let you specify which key names, values or paths should be monitored.

- Event Name – Create a label for your condition. This label will be shown as 'Alert Name' in the 'Alerts' interface.
- Score – Rate the event according to how seriously you judge the incident. Scores range from 0 to 10.
- Scores 0 to 5 – Low risk events
- Scores 6 to 10 – High risk events
The next step is configure the parameters and conditions for the rule.
- Click the arrow below 'AND/OR'
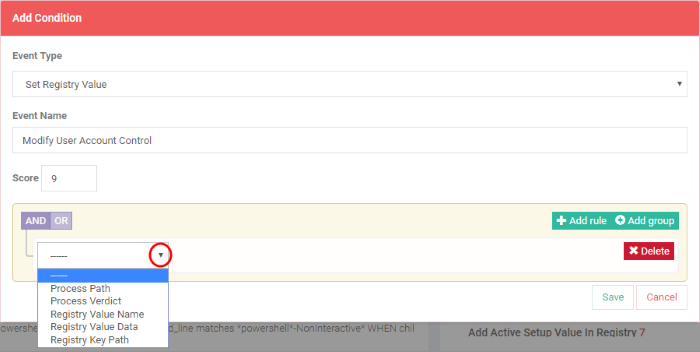
The parameters depend on the selected category and event type.
- Choose the parameter you wish to monitor
- In the second box select the condition. The conditions list varies for different parameters.
- In the third box, enter or select the value. You have to enter the value or select depending on the parameter.

- Click 'Delete' to remove the rule
- Click 'Save' if the rule satisfies your requirement
- To add multiple rules, click 'Add rule'
- Define parameters and condition as explained above.
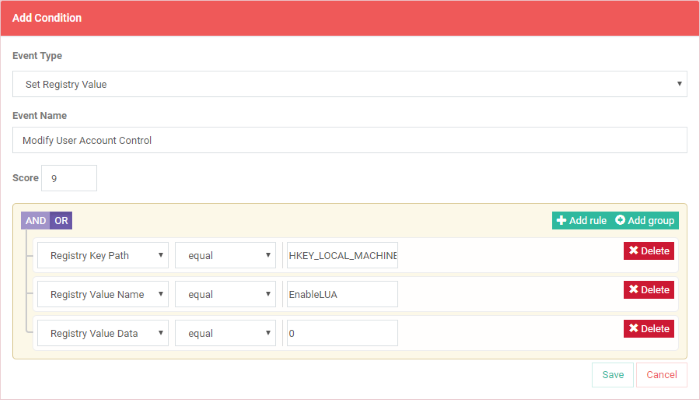
- Use 'AND' or 'OR' operators for the rule per your requirement
You can add multiple rules and define their relationship with 'AND', 'OR' operators.
- To add a group, click 'Add group'
- Define parameters and conditions as explained above.
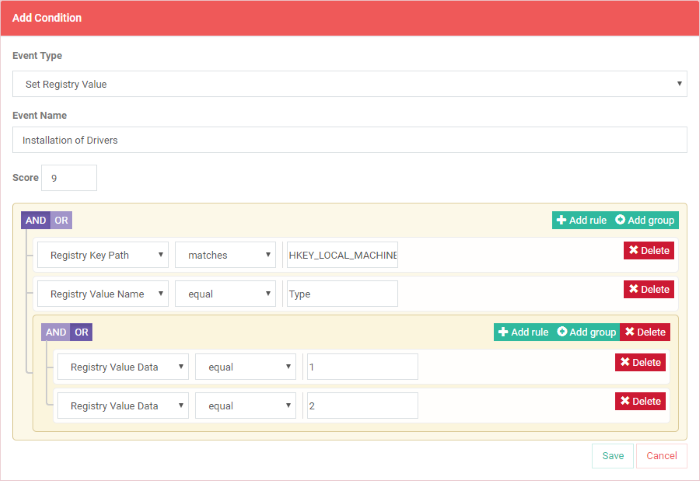
- Use 'AND' or 'OR' operators for groups (and within a group for rules) per your requirements.
- Click 'Save' when done.
- An alert will be created if the rule condition(s) are met.
- To edit a rule, click the pencil icon beside it and update as required. The process is same as explained above.
- Click 'Policy Management' on the left then the 'Endpoint Rules' tab
- Select the endpoint from the drop-down
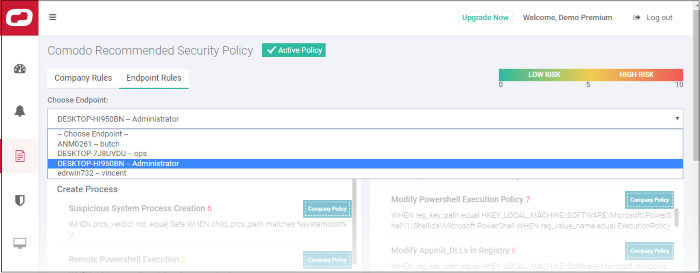
- All the event rules under 'Company Rules' will be applicable for the endpoint and shown as 'Company Policy', which cannot be edited or removed from here.
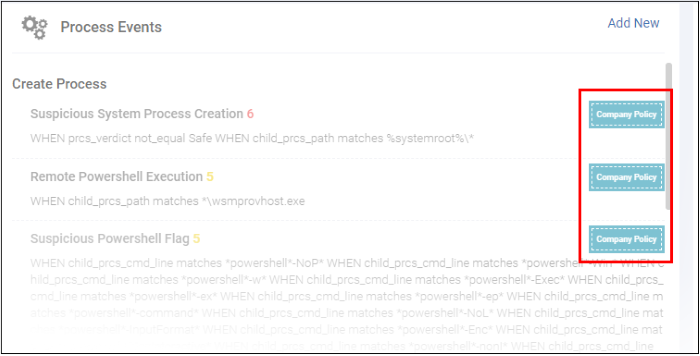
- Add new rules under event categories that will be applicable for the selected endpoint only
- Click 'Add New' link and follow the same process as explained under 'Company Rules'
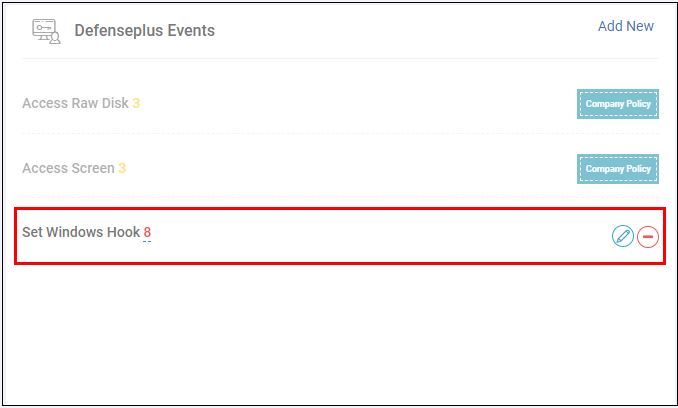
- The added rule can be edited or removed from the event category.
- To edit a rule, click the pencil icon beside
it and update as required. The process is same as explained above.
See 'Manage EDR Policies' for more help with this.