


Step 2 - Configure Xcitium Enterprise Communications
You need to install an Apple Push Notification (APN) certificate token on your portal so Xcitium Enterprise can communicate with iOS or MAC OS based managed devices.
Add Apple Push Notification certificate
-
You need an Apple Push Notification (APN) certificate on your Xcitium Enterprise instance if you wish to manage iOS or Mac devices.
-
You can enroll for an APN certificate using your Apple account. If you do not have an Apple account then please create one at https://appleid.apple.com. A free account is enough.
-
The certificate is valid for one year. Xcitium Enterprise will remind you when your certificate is nearing expiry. It is free to renew the certificate each year.
-
Follow the steps below to obtain and install an APN certificate:
Step 1- Generate your PLIST
-
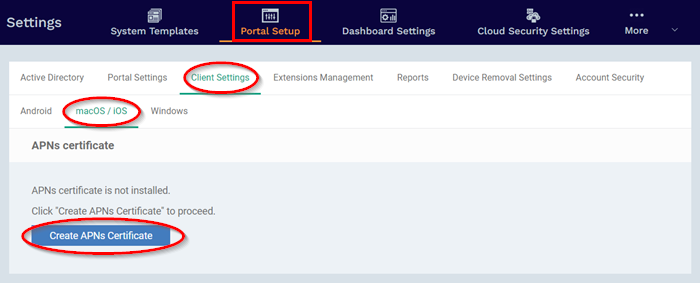
Click 'Settings' > 'Portal Set-Up' > 'Client Settings'
-
Click the 'macOS / iOS' tab.
-
Click 'Create APNs Certificate' to open the APNs application form.
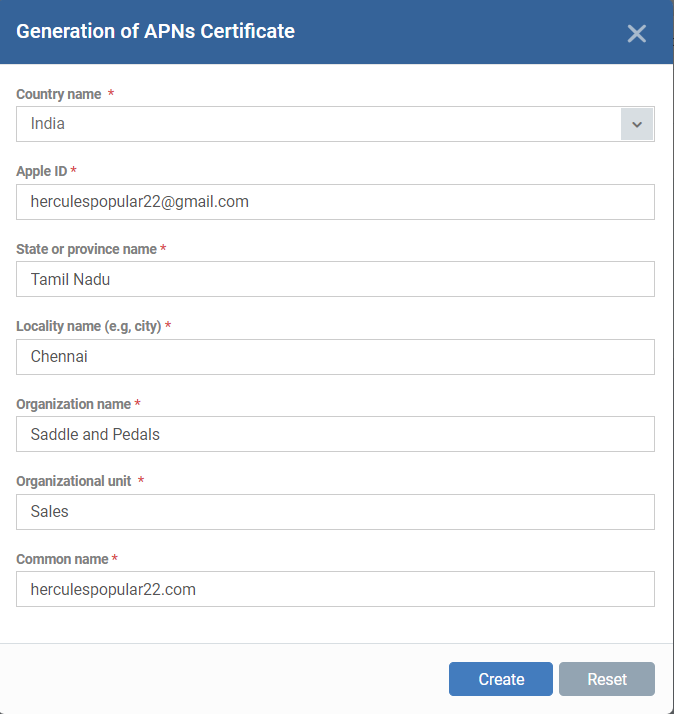
Complete the application form to
generate a certificate signing request (CSR):
-
Complete all fields marked with an asterisk. The information in these fields will go into your certificate, so be as accurate as possible.
-
Click 'Create'.
-
This will send a request to Xcitium to sign the CSR and generate an Apple PLIST.
-
Usually your request will be fulfilled in seconds and you will be taken to a page which allows you to download the PLIST:

-
Download the PLIST from the link in step 1. This is a file with a name similar to 'COMODO_Apple_CSR.csr'. Please save this to your local drive.
-
Next, you need to submit this list to Apple to obtain your APN certificate.
Step 2 - Obtain Your Certificate From Apple
-
Login to the 'Apple Push Certificates Portal' with your Apple ID at https://identity.apple.com/pushcert/.
-
If you do not have an Apple account then please create one at https://appleid.apple.com.
-
Once logged in, click 'Create a Certificate'.
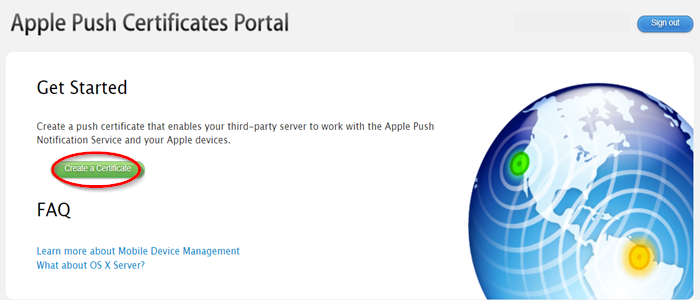
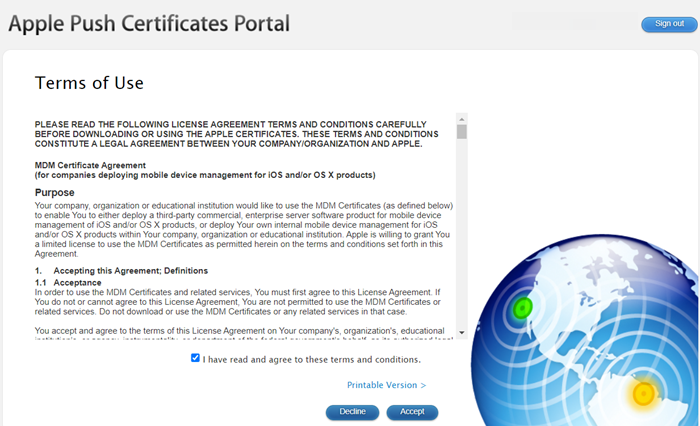
You will need to agree to Apple's EULA to proceed.
-
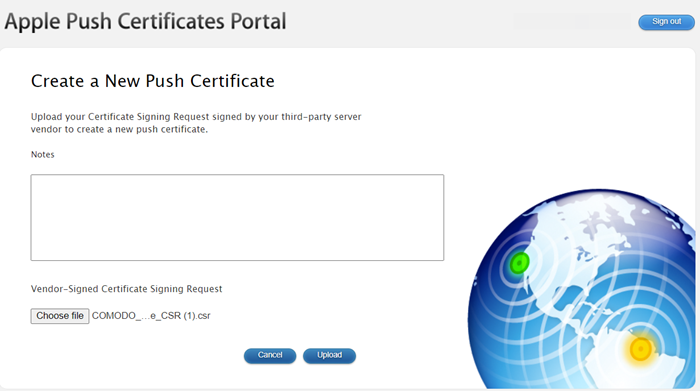
On the next page, click 'Choose File', navigate to the location where you stored 'COMODO_Apple_CSR.csr' and click 'Upload'.
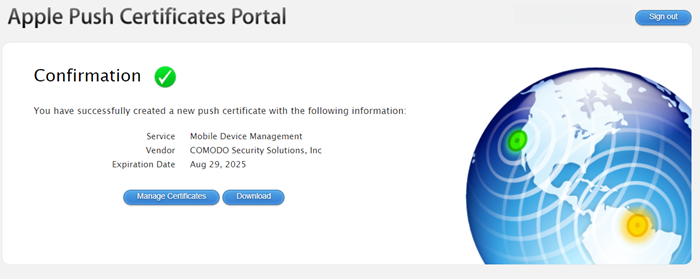
Apple servers will process your request and generate your push certificate. You can download your certificate from the confirmation screen:
-
Click the 'Download' button and save the certificate to a secure location. It is a .pem file with a name similar to 'MDM_COMODO GROUP LTD._Certificate.pem'
Step 3 - Upload your certificate to Xcitium
-
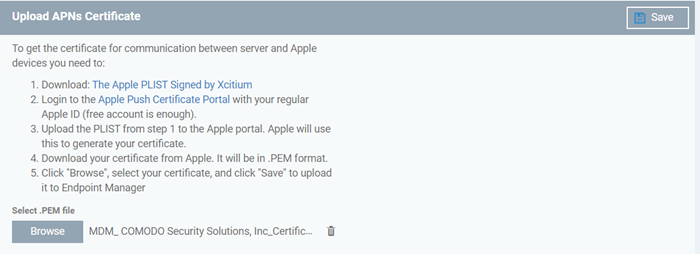
Return to Xcitium, click 'Settings' > 'Portal Set-Up' > 'Client Settings' > 'macOS / iOS'
-
Click the 'Browse' button, locate your certificate file and select it.
-
Click 'Save' to upload your certificate.
The certificate details box shows your certificate fields and the start/end dates:
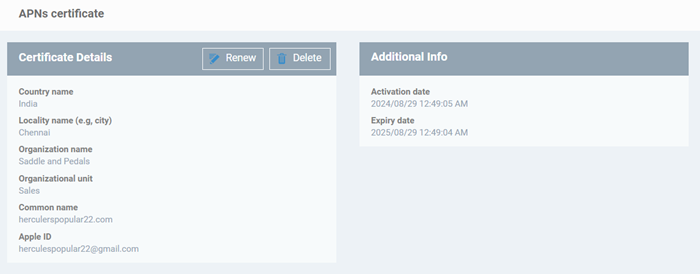
Xcitium Enterprise can now communicate with iOS and Mac OS devices. You can enroll iOS devices and Mac OS devices for management.
-
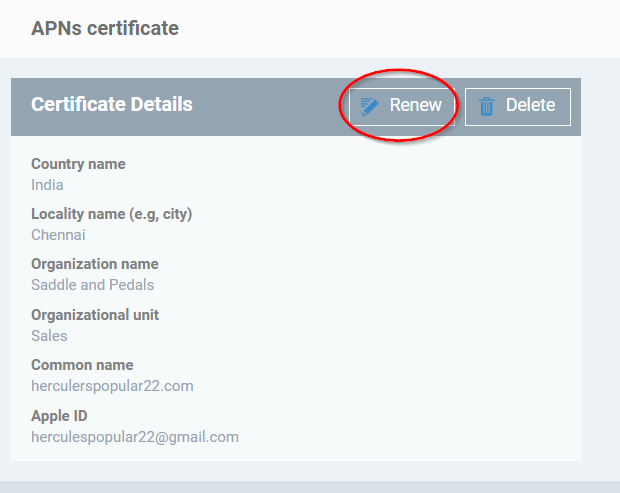
The certificate is valid for 365 days. Xcitium will remind you when your certificate is due to expire.
-
We advise you renew your certificate at least 1 week before expiry. If it is allowed to expire, you will need to re-enroll all your iOS and Mac devices.
-
Click 'Renew' in the APNs certificate details interface to renew the cert:
-
Click 'Delete' only if you wish to remove the certificate so you can generate a new APNs certificate