Managing Cases
NxSIEM allows the administrator to group 'Incidents' that are mutually related or identified as series of events as a 'Case' and assign it to the user allotted for the customer. The user will be able to view the list of incidents to be attended together, take a consolidated remedial action and close the case.
For example, if an intruder executes Brute Force attack and access a network and tries to identify the vulnerable endpoints in the network by performing a port scan, the brute force attack is added as an incident and port scans at different endpoints are added as separate incidents in NxSIEM, if appropriate correlation rules are deployed for the customer. These incidents can be combined as a case and assigned to the user allotted for the customer for a collective remedial action.
The Case Management interface allows the administrator to create and manage cases. To open the 'Case Management' interface, click the 'Menu' button from the top right, choose 'Incidents' and then click 'Case Management'.

The Left side panel contains the options for selecting the cases to be displayed in the right panel using the filter options. The right side panel displays the list of cases with their details as a table.
- To view all incidents without filtering, select 'All' in all the filter option drop-downs and click 'Search'.
- To view the cases created for a specific customer, assigned to a specific user, of specific, status and/or priority, select the option(s) from the respective drop-downs and click 'Search'.
|
Case List - Table of Column Descriptions |
|
|---|---|
|
Column Header |
Description |
|
Date |
Displays the precise date and time at which the case was created. |
|
Name |
Displays the name of the case. |
|
Customer |
Indicates the customer for whom the case was created. |
|
Username |
Indicates the user allotted to the customer, to whom the case is assigned for investigation. |
|
Priority |
Indicates the severity level of the case as set by the administrator. |
|
Status |
Displays the status of the case on whether it is attended or yet to be attended. The possible values are:
|
|
Description |
A short description of the case as entered by the administrator. |
|
Last Update Time |
Displays the date and time at which the case was last updated by adding or removing incidents, adding notes etc. |
Sorting Options:
- Clicking on any column header sorts the items in alphabetical order of entries in that column.
The following sections explain on:
The administrator can create cases and assign to specific users from the case Management interface. The incidents can be attached to the case only from the 'Incident Management' interface.
To add a case
- Click the 'Add' button at the bottom right of the 'Case Management' interface
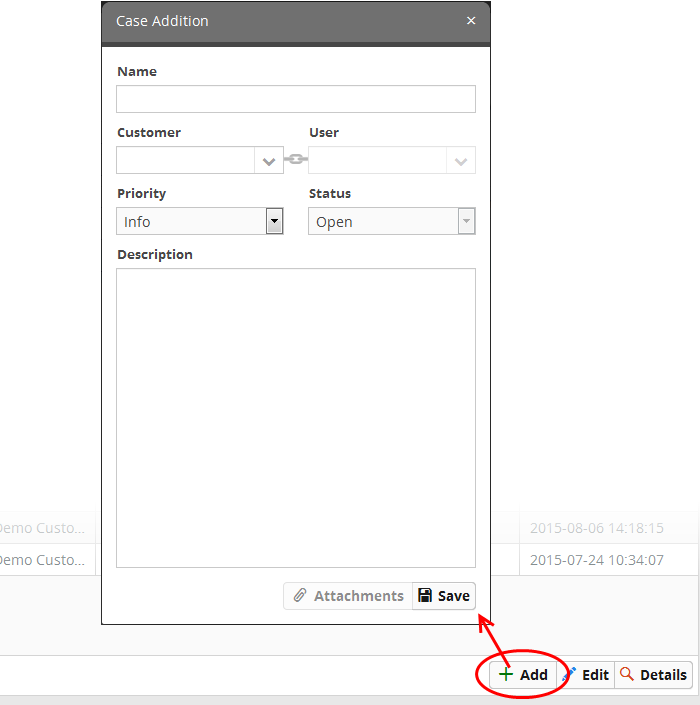
The 'Case Addition' dialog will appear.
- Name - Enter a name for the case.
- Customer - Choose the customer from the drop-down for whom you want to add the case.
- User - The drop-down will display the users assigned to the selected customer. Choose the user to whom the case is to be assigned. Refer to the section 'Administration' for details about assigning users to customers.
- Priority - Select the severity level of the case from the drop-down. The options available are 'Info', 'Low', 'Medium', 'High' and 'Critical'.
- Description - Enter an appropriate description for the case.
- Click the 'Save' button
The Case will be added. The next step is to add incidents to it. For a tutorial on attaching incidents to the case, refer to the explanation of Adding Incidents to Cases in the previous section Managing Incidents.
Viewing Details and Updating the Cases
The 'Case Details' pane allows the administrator to view and manage incidents attached to the case, view the details of the incidents, update the case on actions taken, like exchanging comment and notes with the user and add attachments that may aid in attending to the incidents.
To view the details of a case
- Use the filter options at the left to view the list of cases pertaining to a specific customer, assigned to a specific user, specific type, status and/or priority level .
- Choose the case from the 'Case List' at the right and click the 'Details' button.
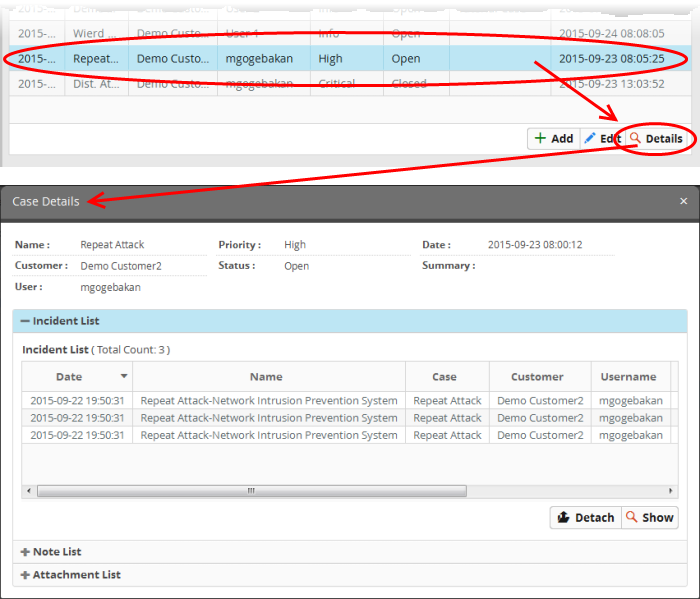
The upper portion displays the general details like name of the case, priority, customer, status, user to whom the case is assigned and so on. The lower portion contains three stripes that allow you to:
- Incident List - View and manage list of incidents attached to the case and view details on individual incidents
- Note List - View and add notes to the case
- Attachment List - View and share files that may be useful to investigate and take remedial measures for the incidents
- Click the 'Incident List' stripe to open the 'Incident List' pane.
The 'Incident List' displays the list of incidents attached to the list with their details, as a table, similar to the 'Incident List' in the Incident Management interface. Refer to Incident List – Table of Column Descriptions in the section Managing Incidents for explanations of the details displayed.
- To view the full details of an incident, select the incident and click 'Show'.
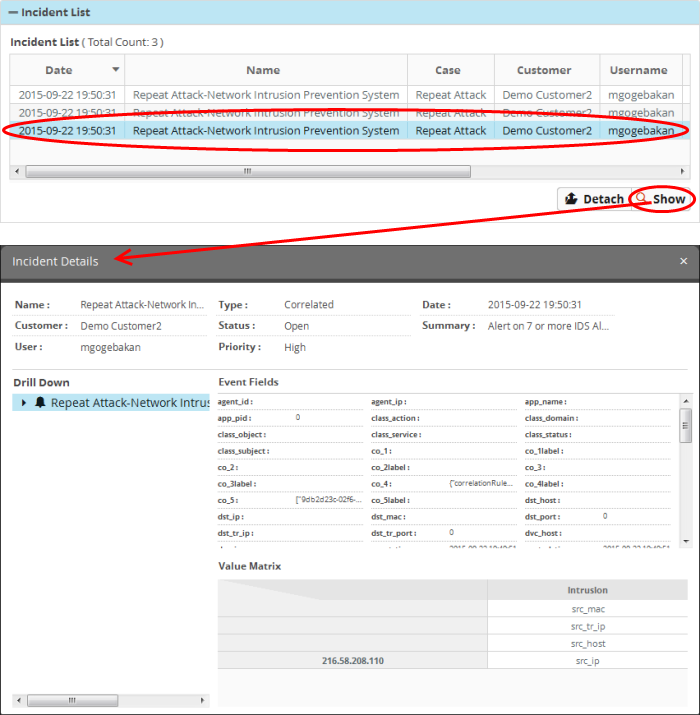
The 'Incident Details' pane for the selected incident will be displayed. Refer to the explanation of Viewing the details of incidents in the section Managing Incidents for more information on the details displayed in this pane.
- To remove an attended/closed incident or incident added by mistake, from the case, select the case and click the 'Detach' button
.
A confirmation dialog will appear.
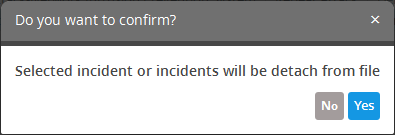
- Click 'Yes' to remove the incident from the case.
To view and add notes to the case
- Click the 'Note List' stripe to open the 'Note List' pane.
The 'Notes List' displays the list of comments and notes entered by the administrator and user that attends the case. You can add your comments to the case, through this pane.
- To view the full details of an incident, select the incident and click 'Show'.
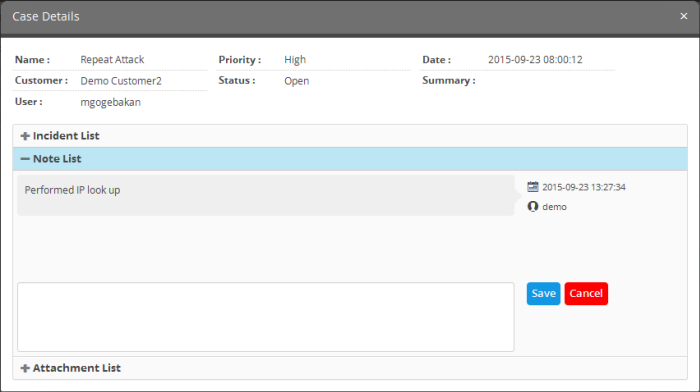
- To add a new note/comment, enter the text in the text box at the bottom and click 'Save'.
To share files for use in attending the case
- Click the 'Attachment List' stripe to open the 'Attachment List' pane.
The pane displays the list of files that were shared in regard to the case, with comments entered for them.

- To upload a file to the case
- Click 'Upload', navigate to the file to be uploaded in the 'File Upload' dialog and click 'Open'.
The file will be added for uploading and a text box will be displayed for entering the description of the file.

- Enter a description for the file in the text box and click 'Save'.
The file will be uploaded and added t the list. The user attending the case can download and use the file.

- To download a file, click the download icon
beside the file to be downloaded and save the file.
- To remove a file from the case, click the thrash can icon
beside the file.
You can change the status, edit the name and severity level of a case at any time. You can also reassign the case to a different individual if required. Also you will be able to view the incidents attached to the case and update the case while editing the case. For example, if you are re-assigning a case to a new user, you can add a note on that to the case.
To edit a case
- Use the filter options at the left to view the list of cases pertaining to a specific customer, assigned to a specific user, specific type, status and/or priority level .
- Select the case that you want to edit from the list and click the 'Edit' button at the bottom.
The 'Case Update' dialog will appear.
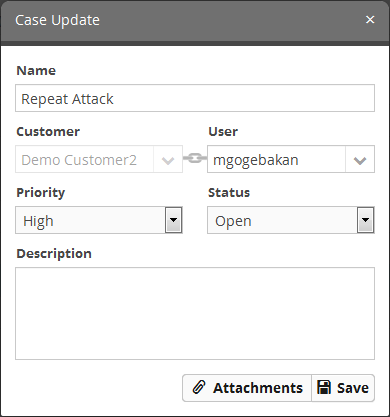
- Edit the details like Name, priority, status as required.
- To reassign the case to a new user, select the new user to whom the incident has to be assigned, from the User drop-down.
|
Note: The 'User' drop-down will display only the users that are added for the customer. Refer to the section 'Administration' for details about assigning users to customers. |
- Click the 'Save' button for your changes to take effect.
- To view the list of incidents and update the case, click the 'Attachments' button.


