Network Zones
Comodo Firewall allows you to define 'Network Zones' and to specify the access privileges of these zones. A 'Network Zone' can consist of an individual machine (including a single home computer connected to Internet) or a network of thousands of machines to which access can be granted or denied.
|
Background Note: A computer network is a connection between computers through a cable or some type of wireless connection. It enables users to share information and devices between computers and other users within the network. Obviously, there are certain computer networks where you need to grant access to, including your home or work network. Conversely, there may be other networks where you want to restrict communication with - or even block entirely. |
To access the Network Zones interface
-
Click 'Network Zones' tab from Firewall Tasks > Network Security Policy interface.
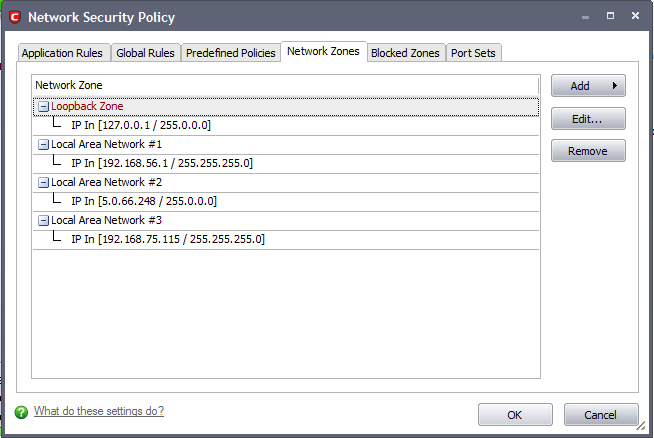
|
Note 1: Adding a zone to this area does not, in itself, define any permission levels or access rights to the zone. This area allows to define the zones so you can quickly assign such permissions in other areas of the firewall.
Note 2: A network zone can be designated as 'Trusted' and allowed access by using the 'Stealth Ports Wizard'. (An example would be your home computer or network)
Note 3: A network zone can be designated as 'Blocked' and denied access by using the 'Blocked Zones' interface. (An example would be a known spyware site)
Note 4: An application can be assigned specific access rights to and from a network zone when defining an Application Rule. Similarly, a custom Global Rule can be assigned to a network zone to all activity from a zone.
Note 5: By default, Comodo Firewall automatically detects any new networks (LAN, Wireless etc). This can be disabled in the Firewall Behavior Settings > General Settings area of the application. |
-
Click 'Add...' button and select 'A New Network Zone...'.
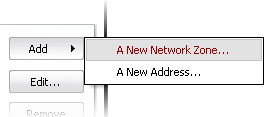
A dialog box will appear, prompting you to specify a name for the new zone.
-
Choose a name that accurately describes the network you are creating.
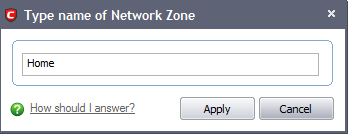
-
Click 'Apply' to confirm your zone name.
This adds the name of your new zone to the Network Zones list.
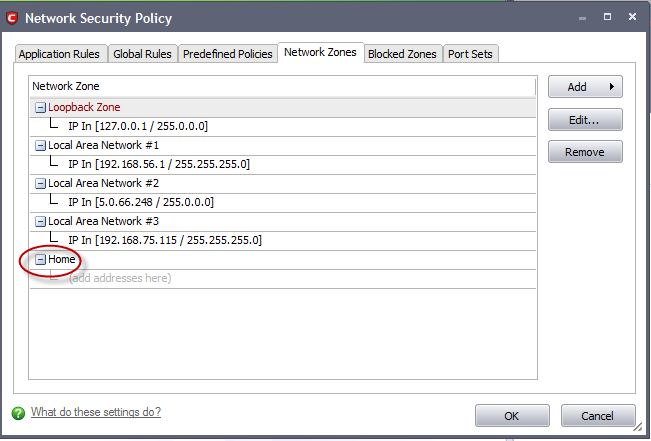
To select the addresses to be included in this zone
-
Select the network name, right click on the name of the new zone and select 'Add...'from the menu.
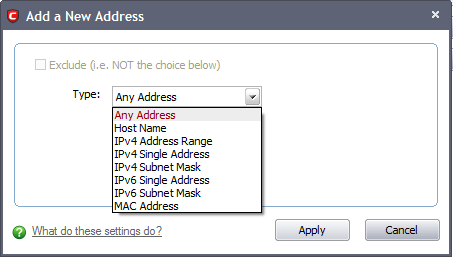
The 'Add a New Address' dialog allows you to select an address from the Type drop-down box shown below (Default = Any Address). The Exclude check box will be enabled only if any other choice is selected from the drop-down box.
-
Click 'Apply' to confirm your choice.
-
Click 'OK' in the 'Network Zones' interface.
The new zone now appears in the main list along with the addresses you assigned to it.
Once created, a network zone can be:
-
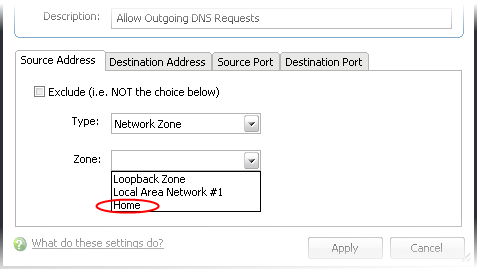
Quickly called as 'Zone' when creating or modifying a network policy
-
Quickly called and designated as a trusted zone from the 'Network Zones' interface
-
Quickly called and designated as a blocked zone from the 'Blocked Zones' interface
To edit the name of an existing Network Zone
-
Select the name of the zone in the list (e.g. home).
-
Select 'Edit...' to bring up the naming dialog.
To add more addresses to an existing Network Zone
-
Right click on the zone name and click 'Add...' or,
-
Select the zone name and click the 'Add...' button on the right and select 'A New Address...' from the drop-down menu.
To modify or change the existing address in a zone
-
Right click on the address (not the zone name) and select 'Edit...'or
-
Select the actual address (not the zone name) and click the 'Edit...'button on the right.
Comodo Internet Security User Guide | © 2012 Comodo Security Solutions Inc. | All rights reserved


