


Phishing Simulation
The Phishing Simulation page shows the license's Start Date and End Date, plus one card per simulation. A one-year license includes four simulations, shown as Simulation 1 through Simulation 4.
- Simulations are worked through one at a time — the next simulation only opens up for configuration once the current one has been completed.
- A simulation currently in progress shows a status of In Progress.
- Each simulation not yet configured shows a status of Upcoming.
- Each simulation that has been completed shows a status of Completed.
- Unlike the managed service (which runs simulations quarterly by default), self-onboarding lets you choose your own schedule for each simulation.
The active simulation's card shows a configuration checklist with seven steps:
- Whitelist
- Set Spear Phishing Permissions
- Select Phishing Templates
- Send Test Emails
- Verify Test Results
- Add / Update Trainees
- Schedule Simulation
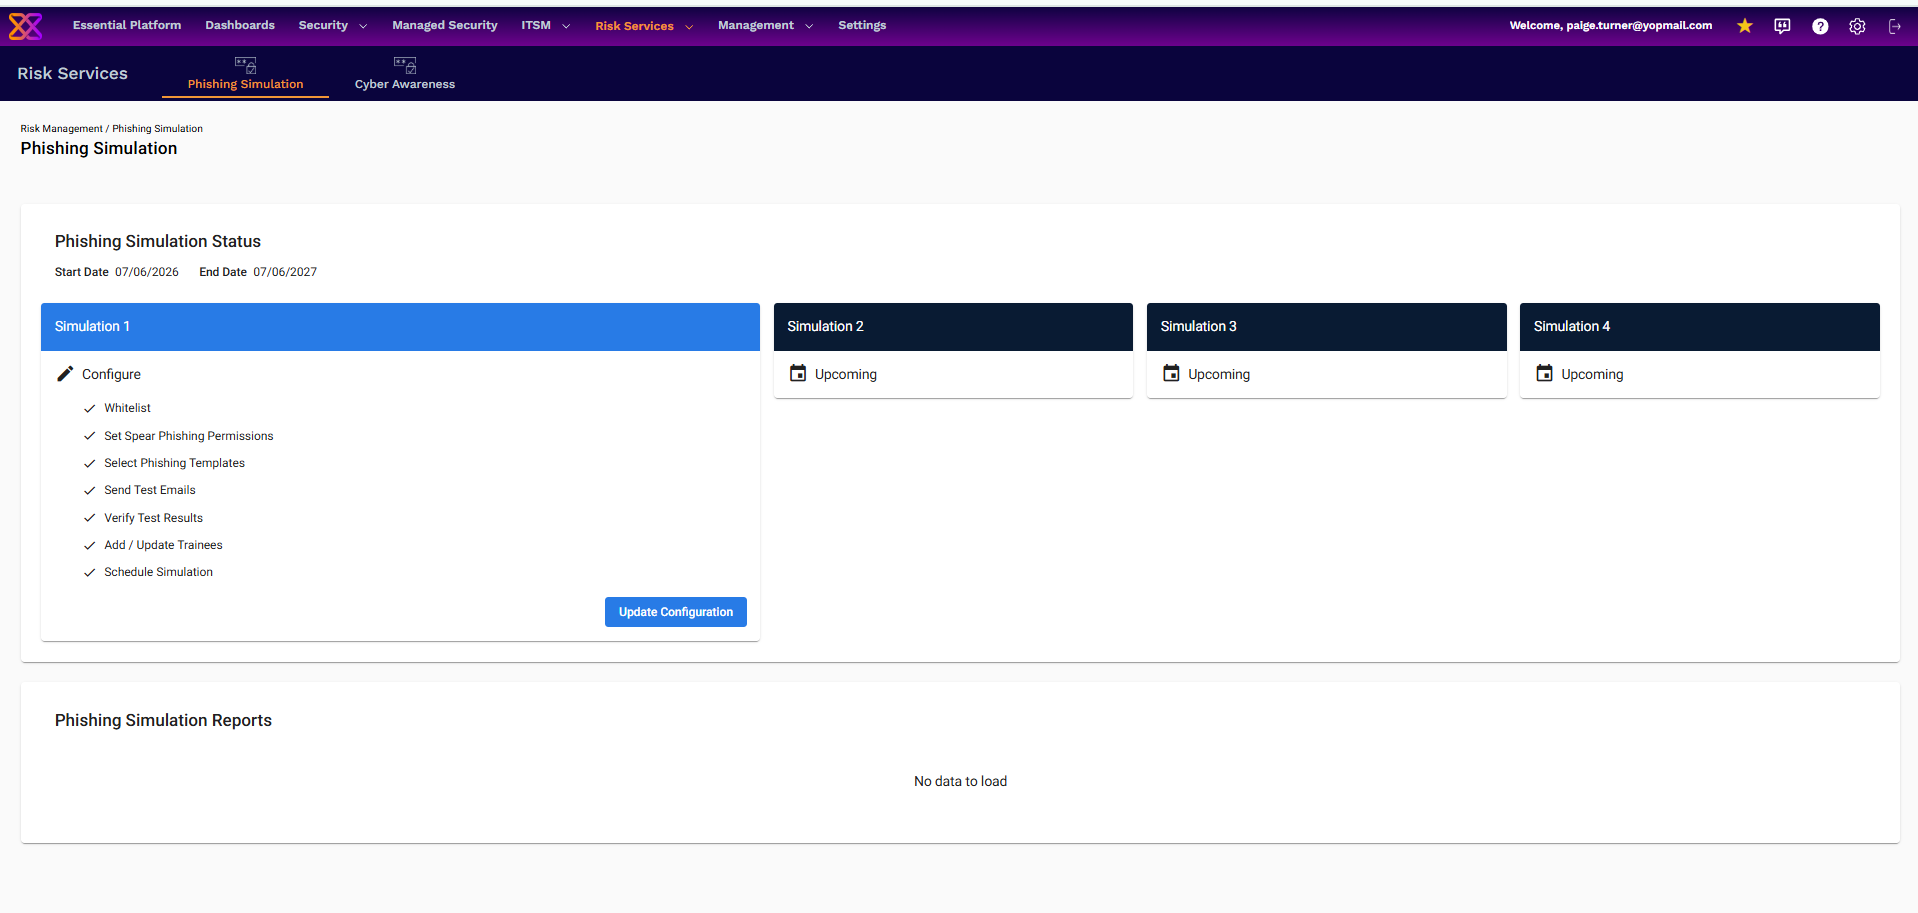
Phishing Simulation Status, showing the four simulation cards and the configuration checklist for the active simulation.
Clicking Update Configuration (or Configure) opens the step-by-step wizard described below.
Configuring a Simulation
The Configure Simulation page walks through the seven steps in order, shown as a step indicator at the top of the page. Completed steps show a checkmark; the current step is highlighted. On subsequent simulations, some steps are optional and can be skipped by clicking directly on the next step's header.
Step 1 – Whitelist
This step provides the information needed to whitelist Xcitium's phishing simulation domains and IP addresses so that test and simulation emails are not blocked by the organization's email security systems. Additional links are provided for common email security systems, and the whitelisting information can be downloaded as a document to forward to IT.
Step 2 – Spear Permission
This step asks whether you approve using your employees' data for spear phishing impersonation purposes, with two options:
- Yes, I approve the use of my employees' data for impersonation purposes only
- No, I do not approve the use of my employees' data
If approved, spear phishing emails can impersonate two organizational roles, each requiring a Full Name and Email (Title is optional):
- Your Head of HR or Office Administrator
- Your Head of Technology or IT
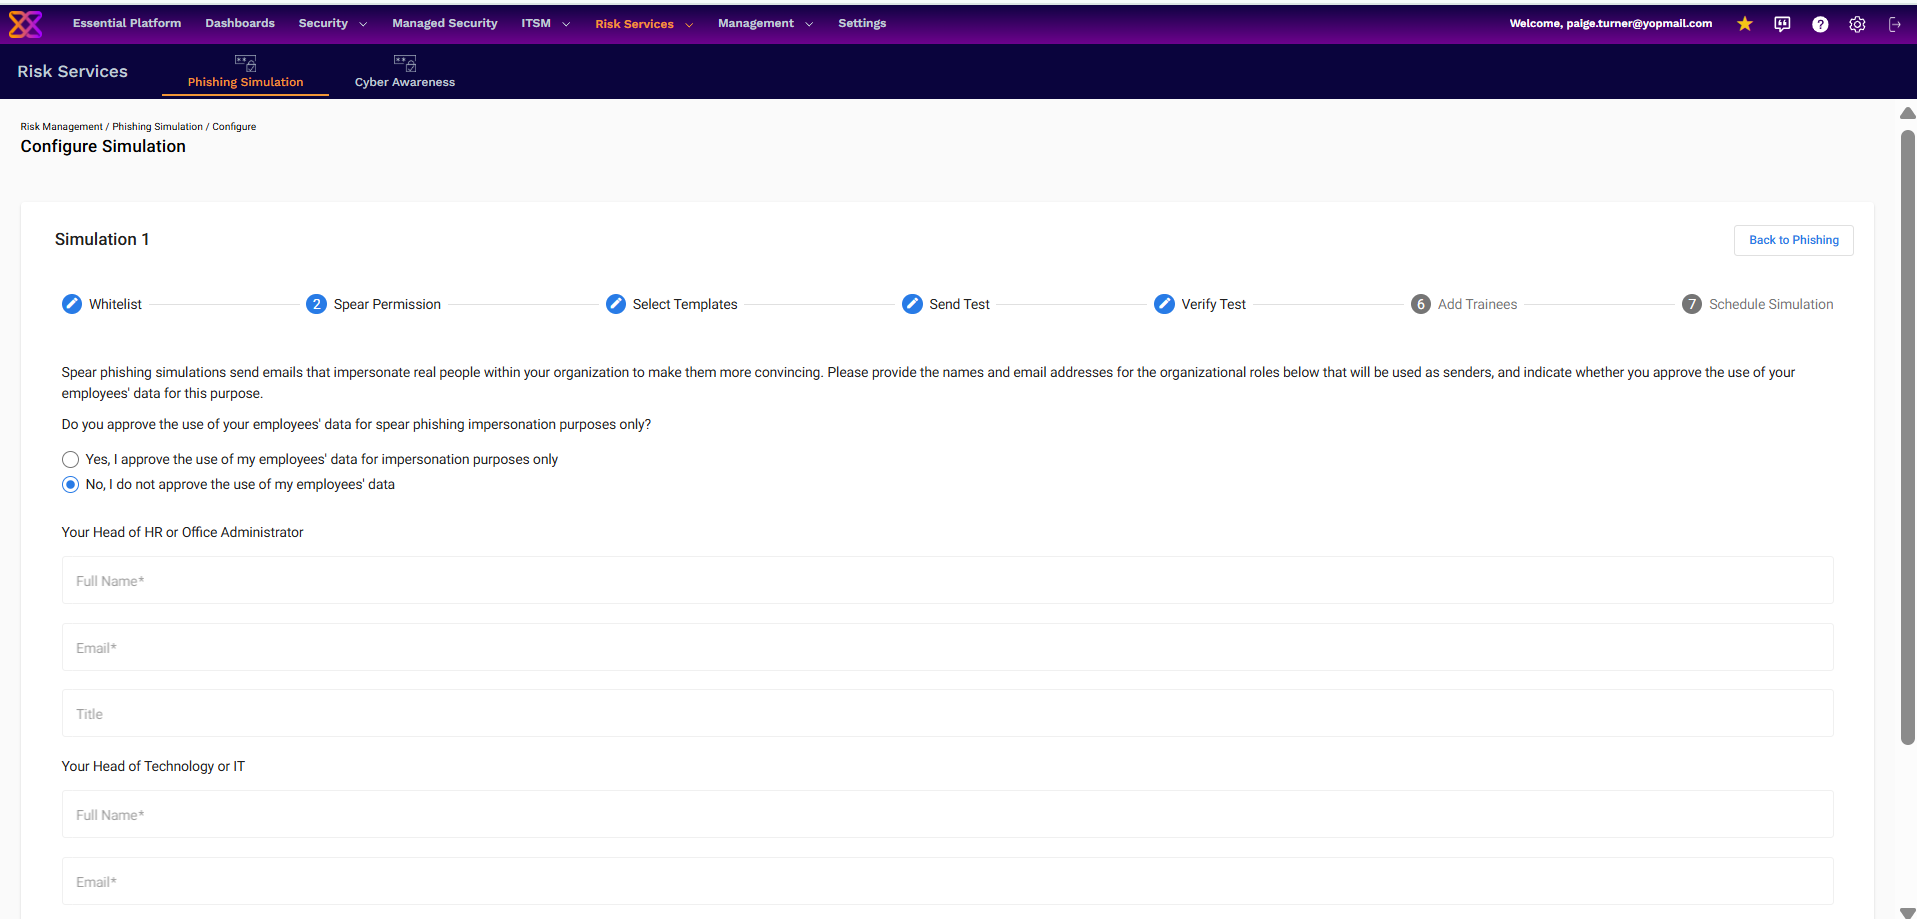
Step 3 - Select Templates
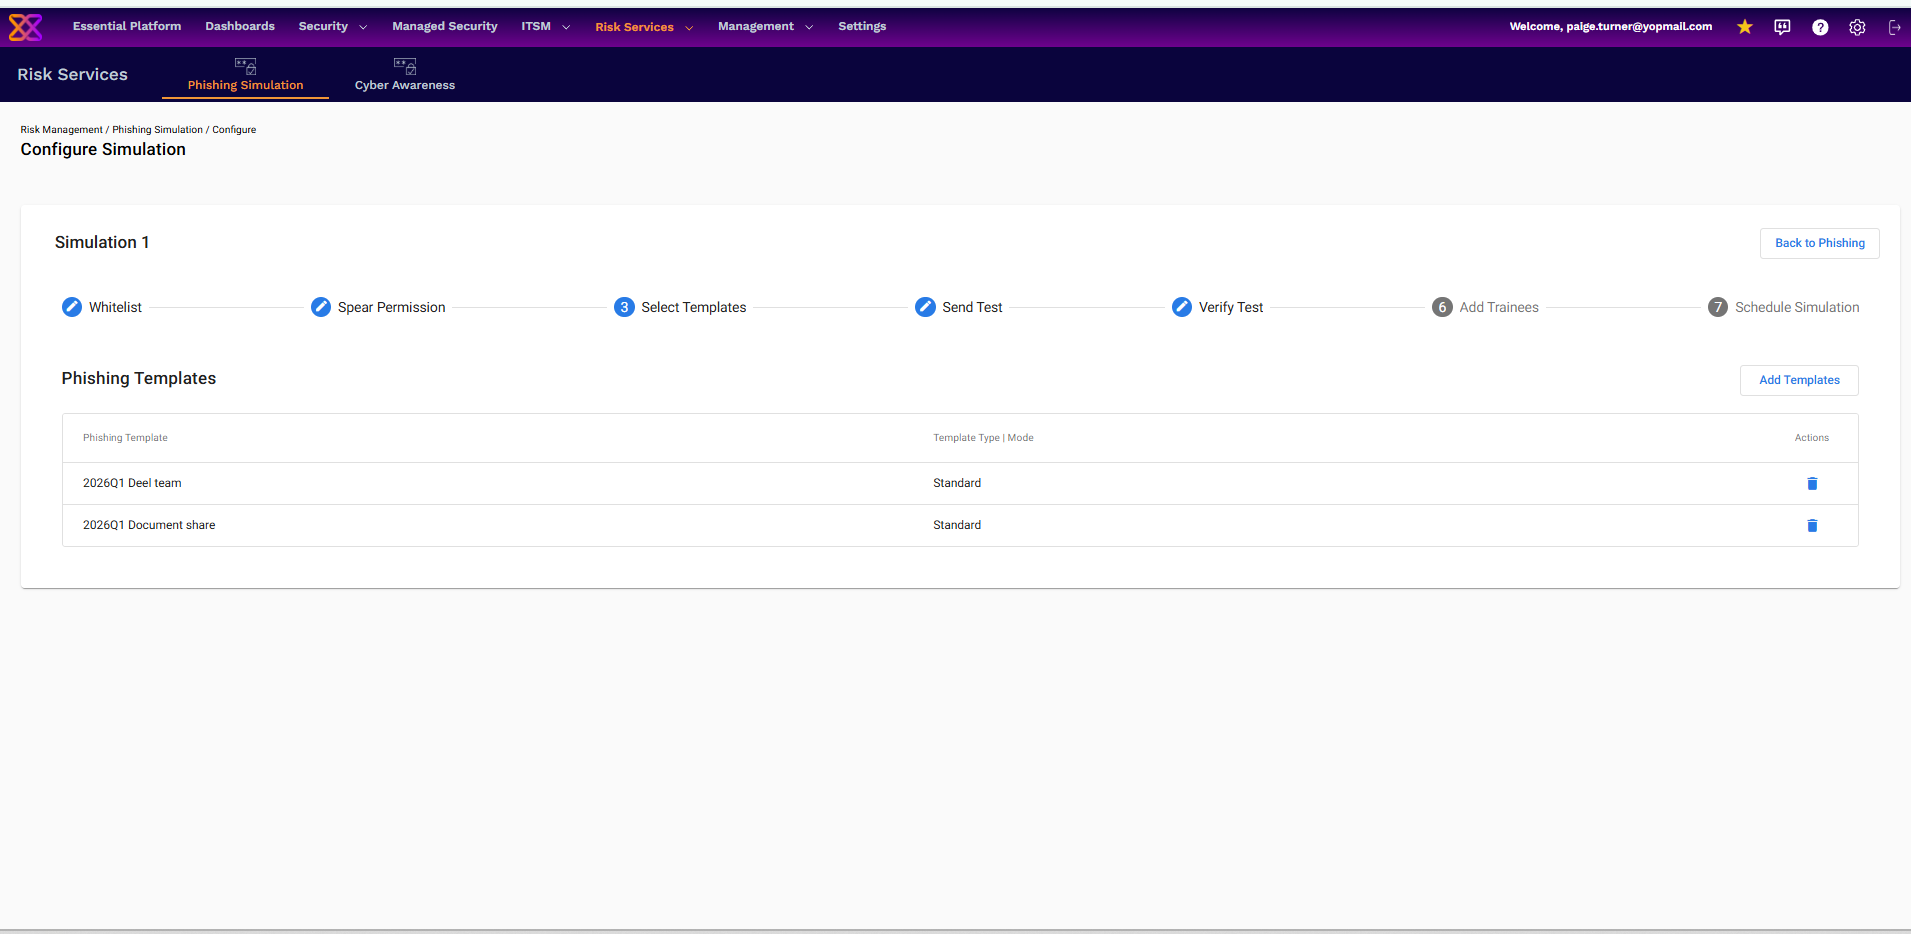
This step lists the phishing templates already added to the simulation, with columns for Phishing Template name and Template Type | Mode (e.g. Standard). Clicking Add Templates opens a searchable list of available This step lists the phishing templates already added to the simulation, with columns for Phishing Template name and Template Type | Mode (e.g. Standard). Clicking Add Templates opens a searchable list of available templates to select from. Previously selected templates can be removed by clicking the delete icon, for example:
- 2026Q1 Deel team
- 2026Q1 Document share
- 2026Q1 Acct suspended
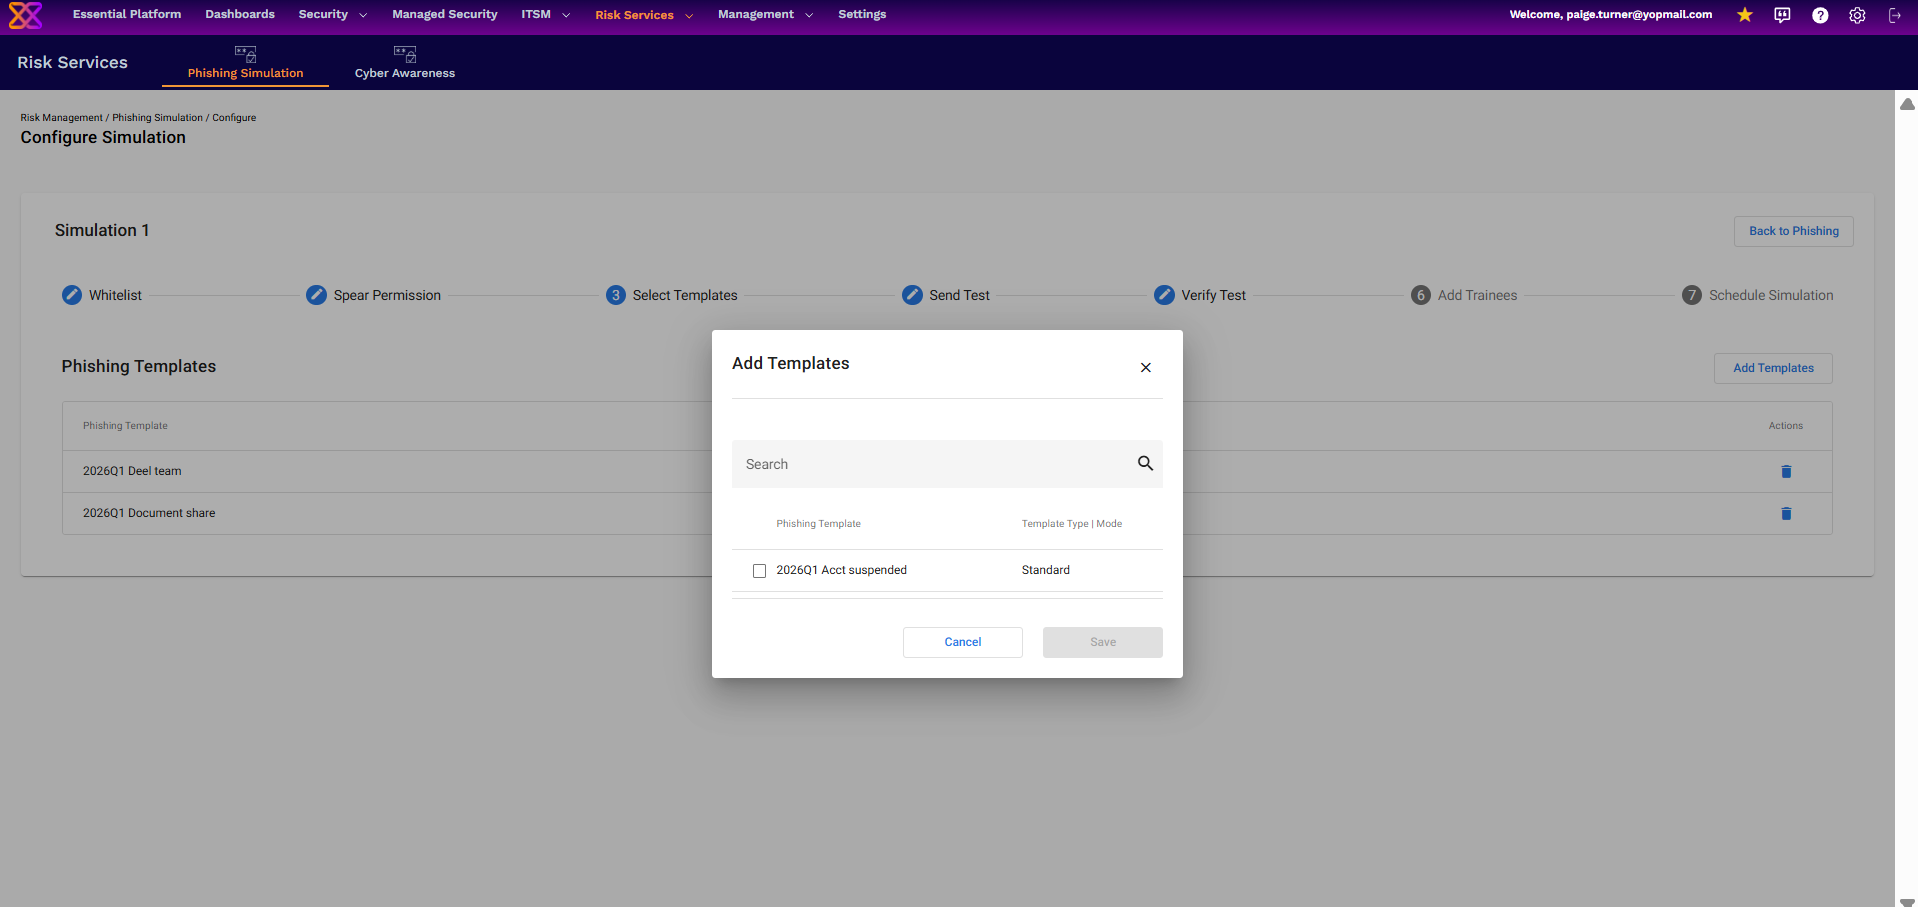
The Add Templates dialog, listing selectable phishing templates.
Note: The template library is updated periodically by Xcitium (e.g. new quarterly templates, QR-code-based templates). New templates become selectable here once added on the back end — no separate action is needed on the client side.
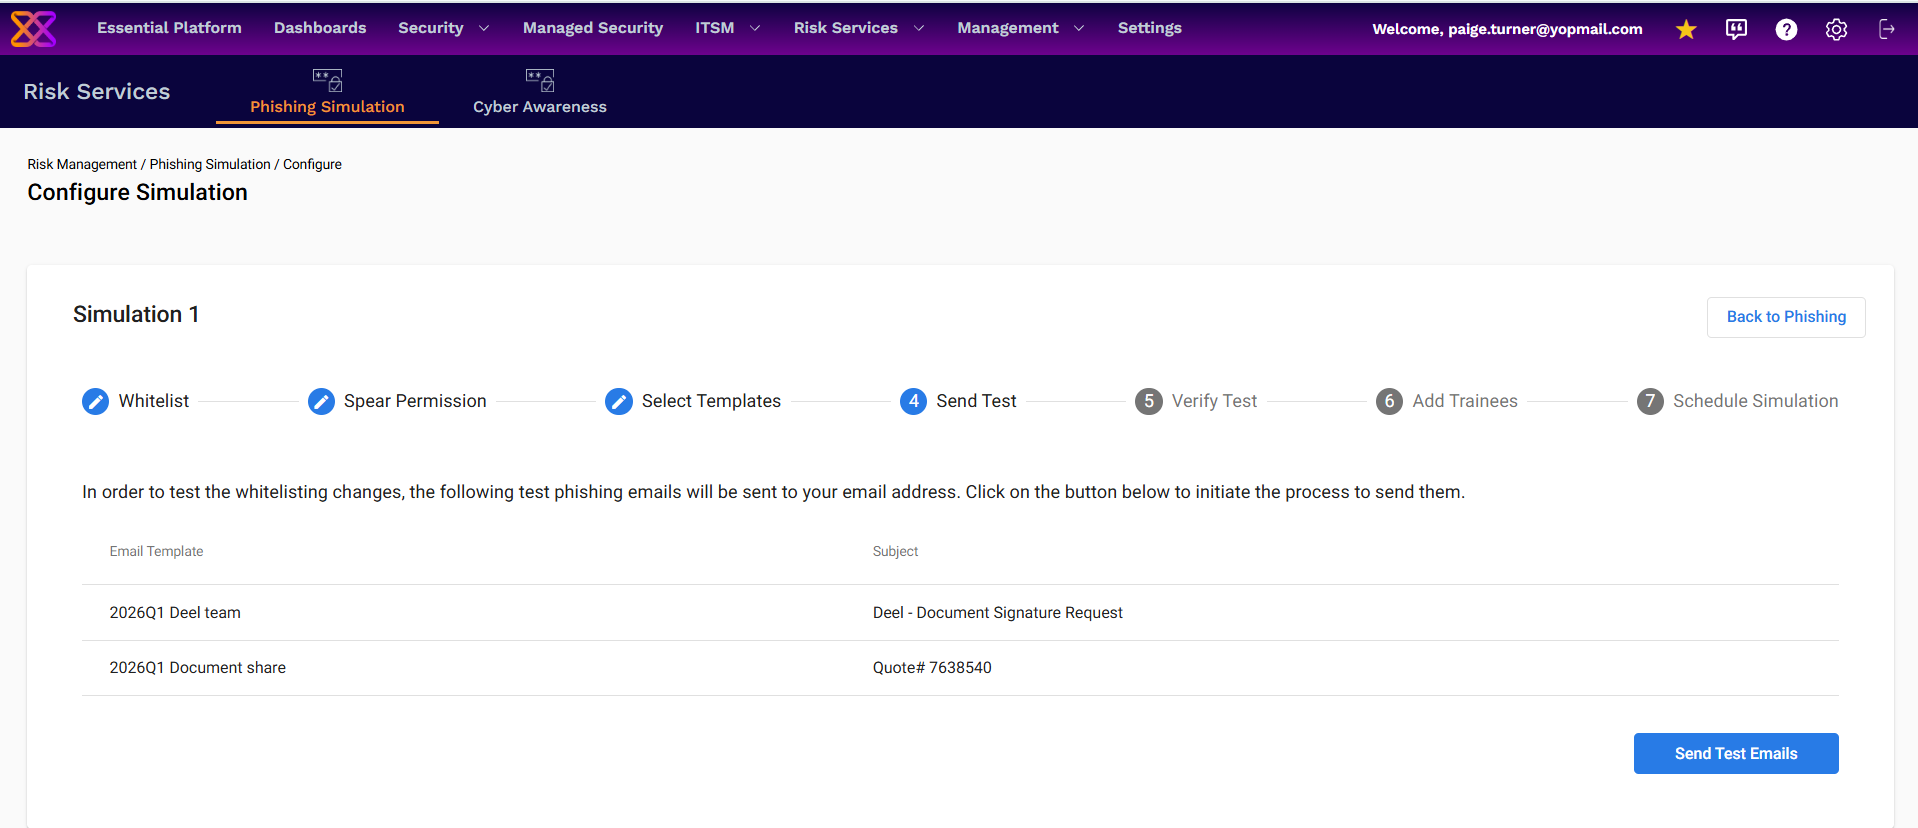
Step 4 – Send Test
This step lists each selected template together with the subject line that will be used, and provides a Send Test Emails button. Clicking it sends a test copy of each template to your own email address so you can confirm whitelisting is working before the simulation goes out to trainees.
Step 5 – Verify Test
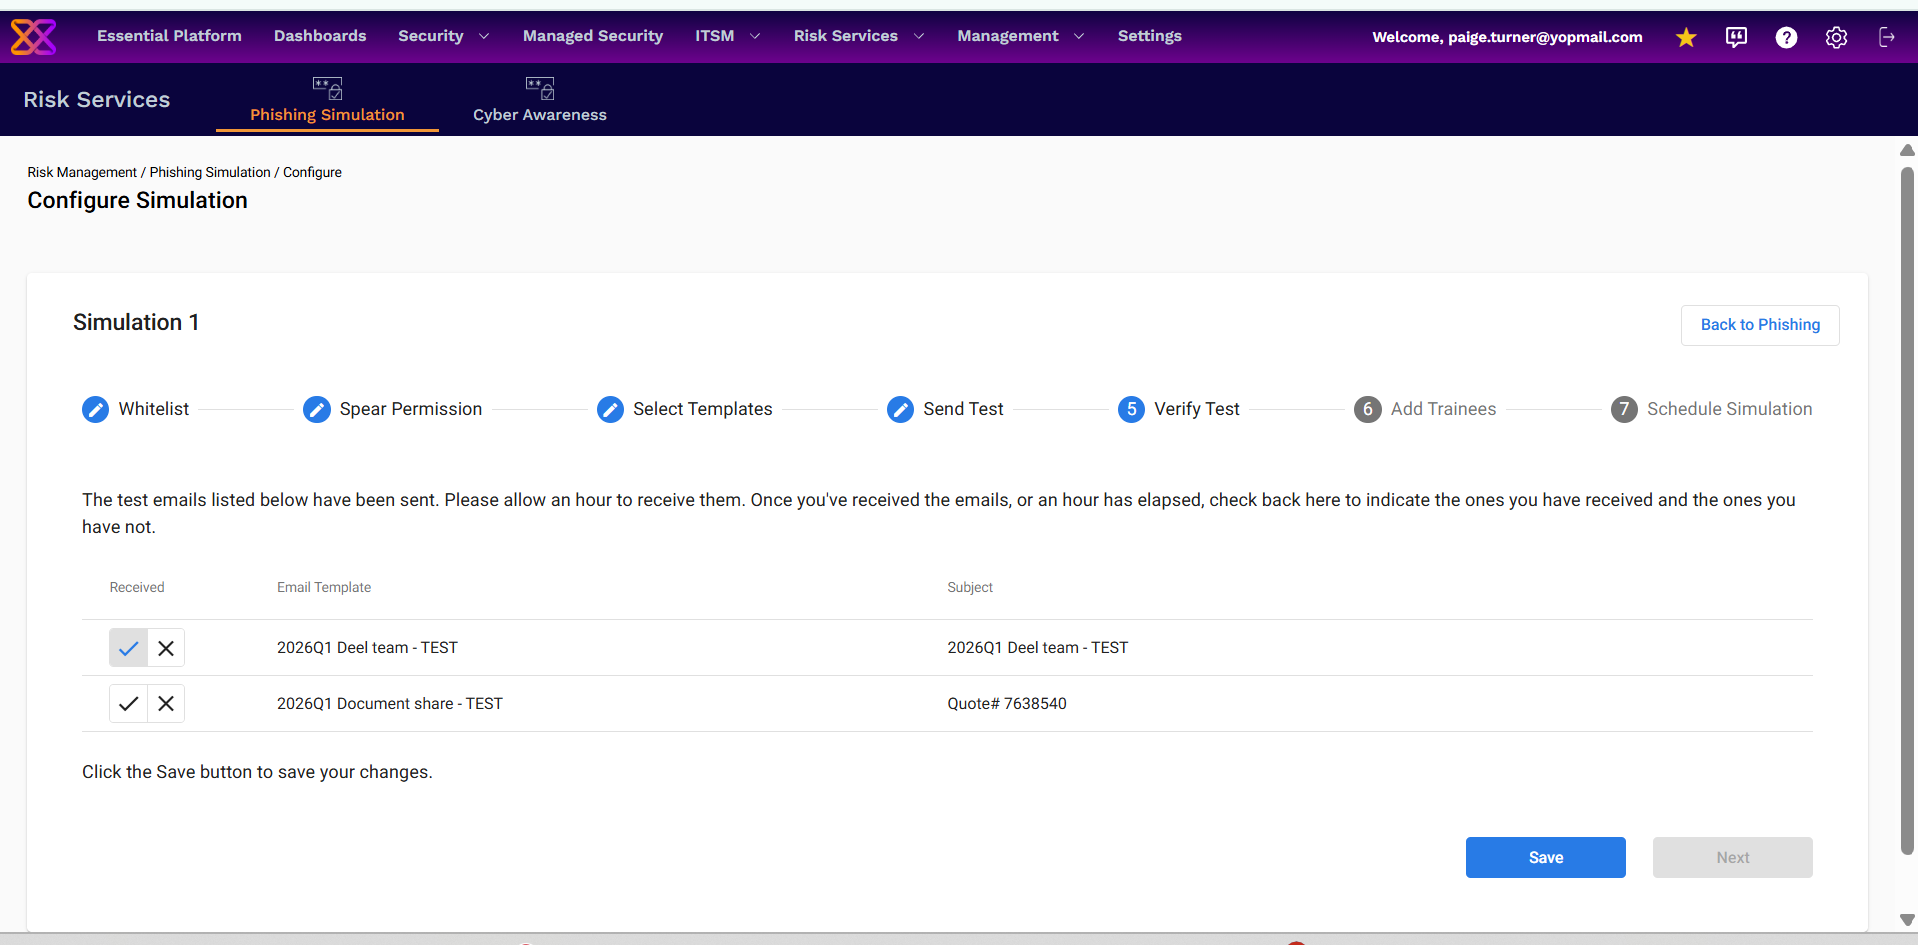
After test emails are sent, this step lists the same templates again with Received checkmark/X controls. For each template, confirm whether the test email arrived, then click Save to continue.
- If all test emails were received, the Next button allows you to move forward to adding trainees and scheduling the simulation.
- If not all emails were received, you're brought back to the initial step, and can move freely between steps to adjust the configuration until another test can be sent.
Step 6 – Add Trainees
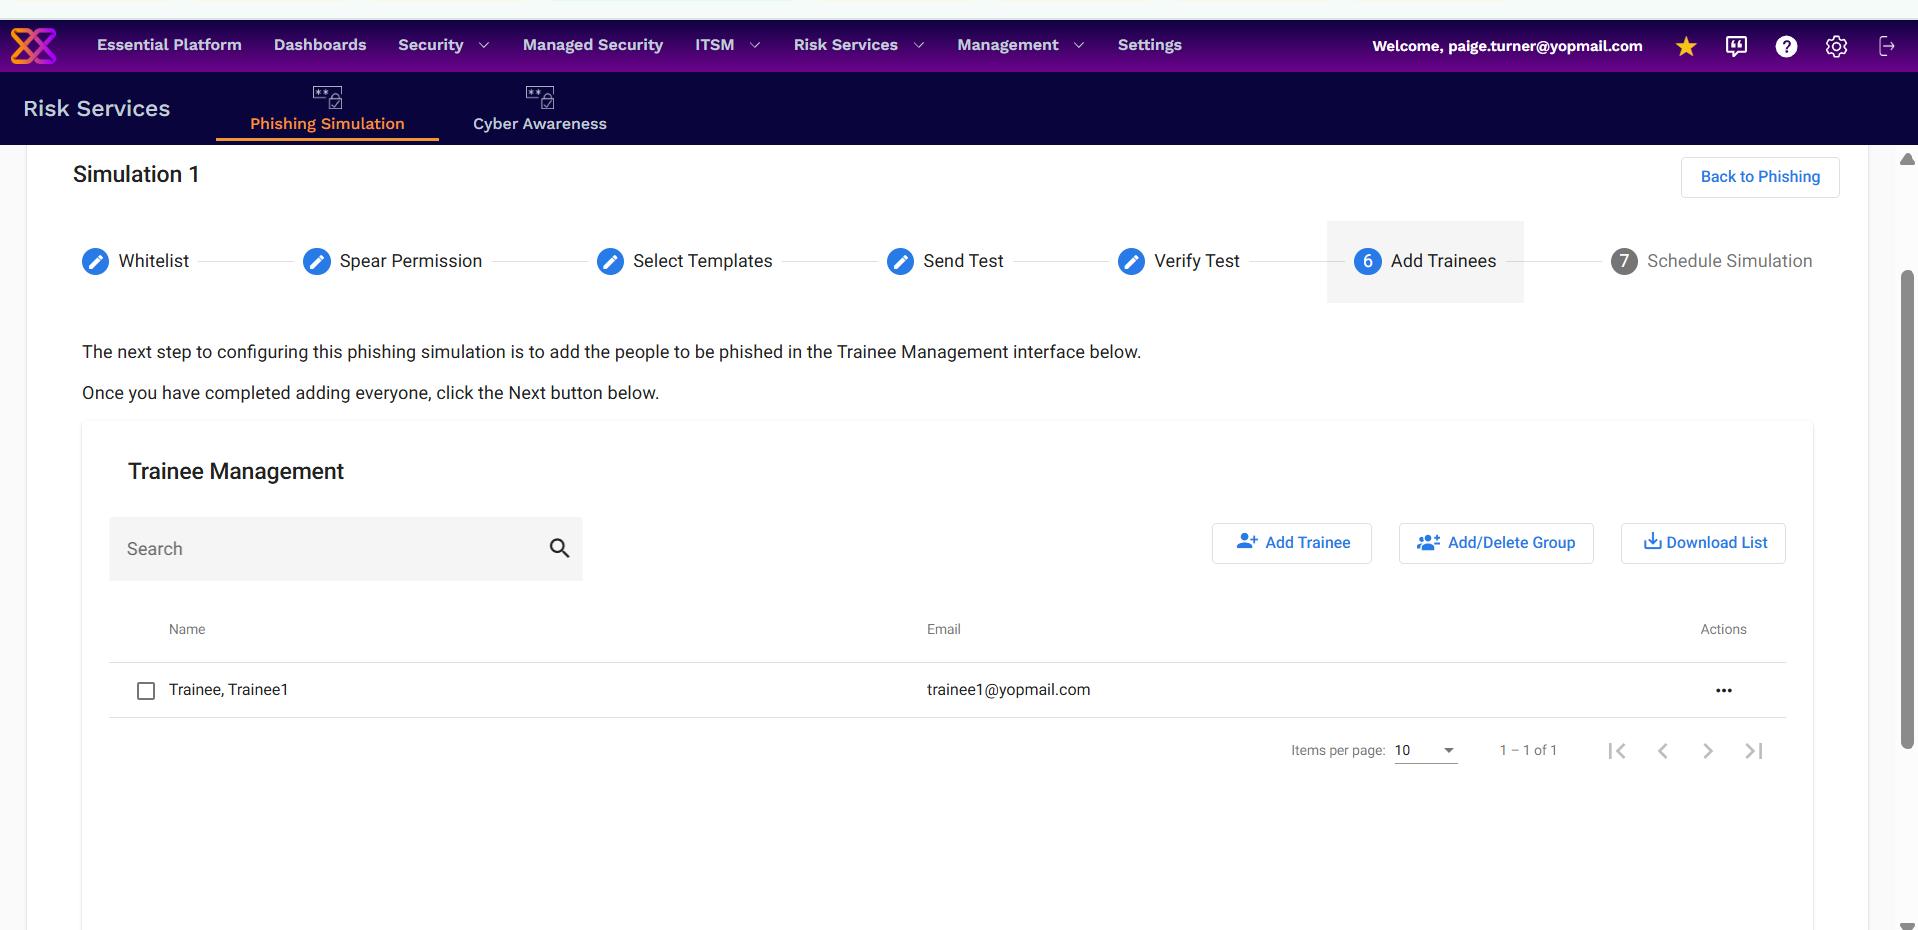
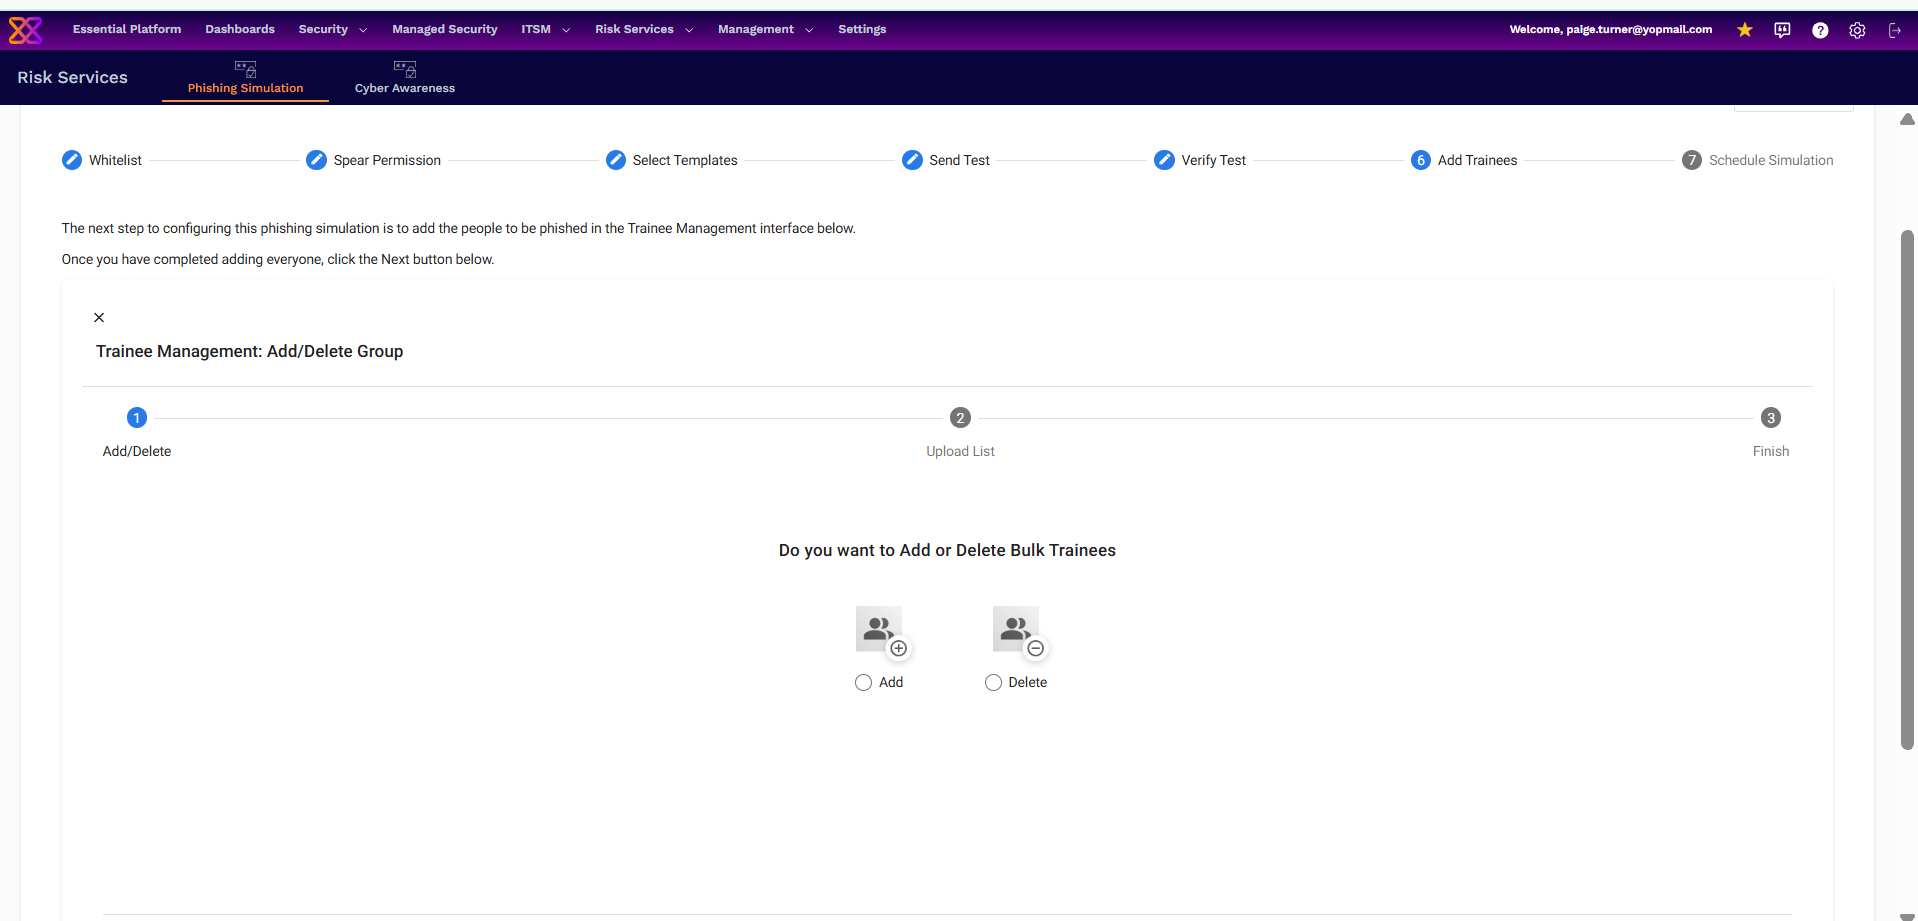
This step opens the Trainee Management interface, used to add the people who will receive the phishing simulation. The table shows Name, Email, and Actions, with three buttons available:
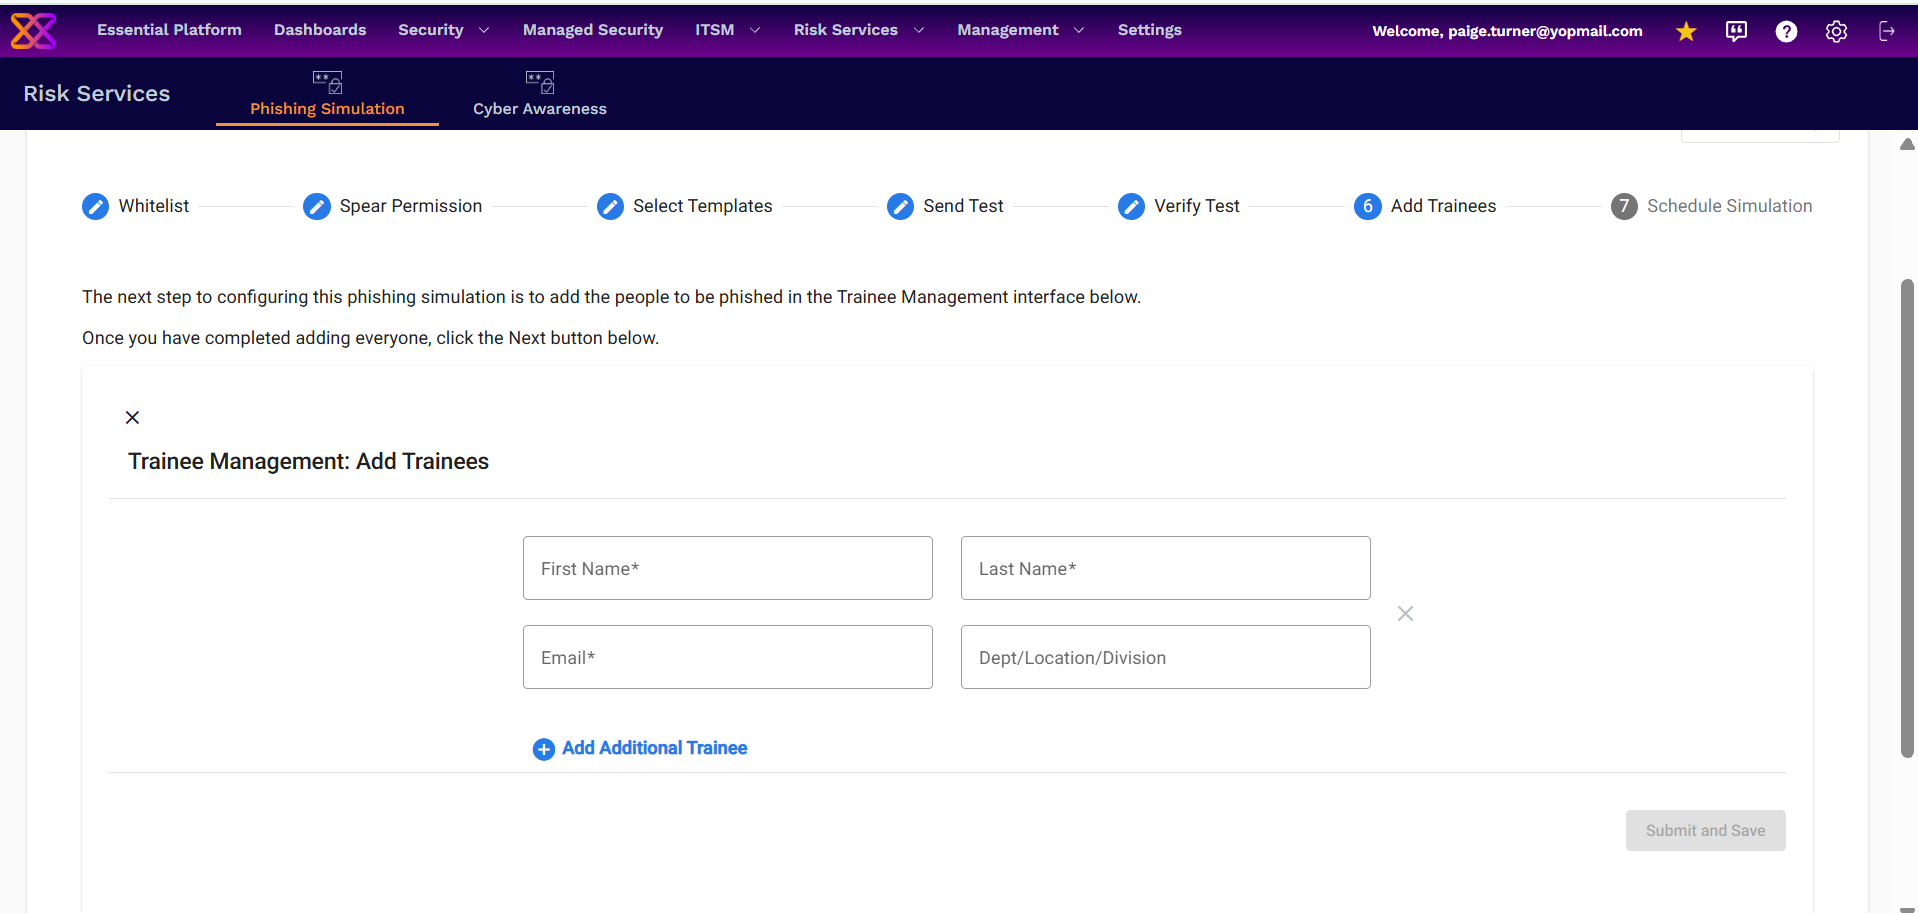
- Add Trainee – opens a form to add one trainee at a time (First Name, Last Name, Email, and Dept/Location/Division, with an option to Add Additional Trainee before submitting)
- Add/Delete Group – a 3-step bulk workflow (Add/Delete → Upload List → Finish) for adding or removing trainees in bulk via an uploaded list; a user list template is available to download
- Download List – downloads the current trainee list
Note: Phishing Simulation and Cyber Awareness Training share the same trainee list — trainees added here are automatically available to both services.
Step 7 – Schedule Simulation
This final step sets the Start Date, End Date, and Completion Date for the simulation (MM/DD/YYYY):
- Start Date – when simulation emails begin sending to trainees
- End Date – when the simulation stops sending emails
- Completion Date – when tracking of clicks/interactions stops and the results report can be generated
Note: At the time of scheduling, only the trainees already added to the simulation are included. Any changes made to the trainee list after scheduling are not reflected in that simulation or its results. Changing the templates or the schedule after this point resets the configuration and requires re-verifying the test emails.
Phishing Simulation Reports
Once a simulation's Completion Date is reached, a report is generated and made available under Phishing Simulation Reports on the Phishing Simulation page. Reports can be downloaded from there.