Custom Scan
The custom scan feature allows you to check for viruses in any particular file/folder or drive. You may have just downloaded some files from Internet and not sure whether it is free from malware or not. The custom scan feature in CCE allows you to select a file or folder to check for malware or viruses. The custom scan feature is a useful and flexible complement to periodically running a 'regular' full scan of your system.
Custom Scan is relatively agile scan method. You can choose what would you want to scan, and where would you want to scan.
On completion of scanning, you can:
- Clean the detected threats or move them to Quarantine and later remove them;
- Exclude an application you consider as safe from the threat list;
- Report the threat as a False Positive to Comodo.
Starting a Custom Scan
1. Click the 'Custom Scan' from the CCE main interface.
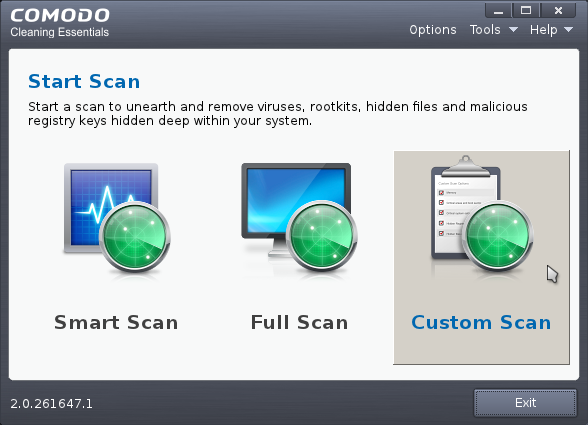
The Custom Scan Setting dialog window will be displayed.
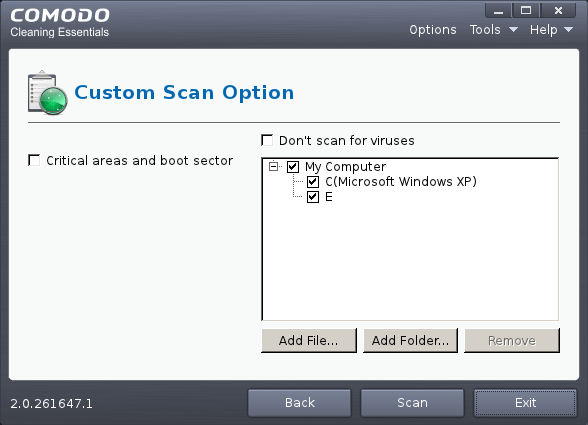
You can select which options you prefer for the custom scan and also choose which specific files, folders or drives are to be included in the scan in the Scan Target area.
2. Choose the Scan Options
- Critical areas and Boot Sector - When selected, CCE scans the Program Files folder and WINDOWS folder of the Operating System of your computer and the Boot Sector of your hard disk drive during the start of any custom scan.
- Don't scan for viruses - When selected, CCE will not check for viruses in the target areas as specified by the above options. This option is only for scanning the above said areas and not on any target areas in your hard disk drive. Hence, the target selection area will become inactive and grayed out.
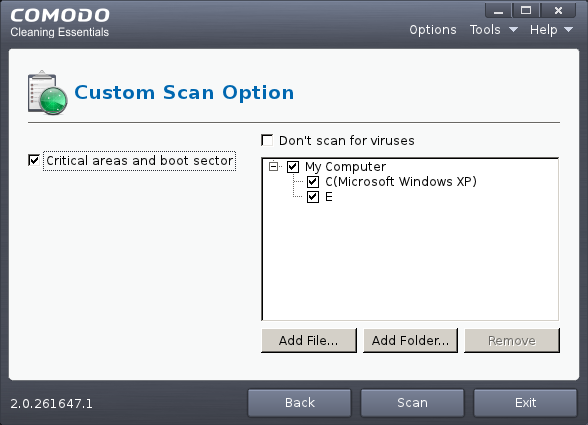
To add file(s)
- Click ' Add Files'.
- Browse to the required file and click 'Open'.
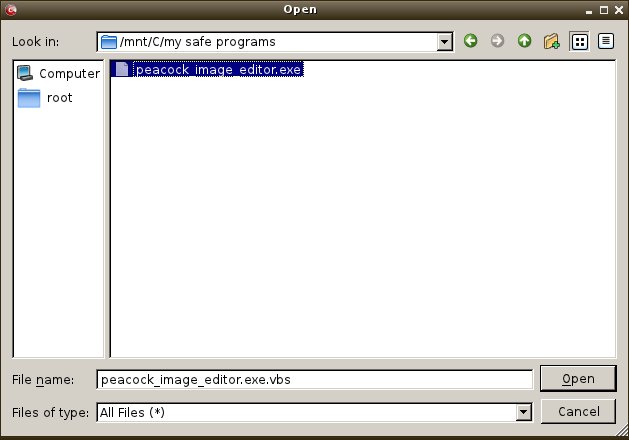
The selected file will be added to the custom Scan Target area.
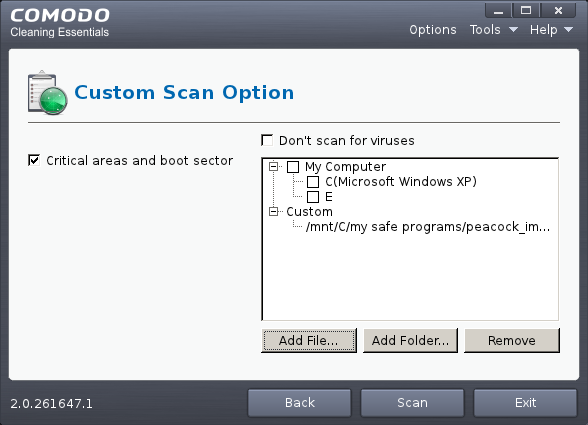
You can add more files and folders for a simultaneous custom scan. Repeat the process to add more files.
To add Folder(s)
- Click ' Add Folders'.
- Browse to the required folder and click 'choose'.
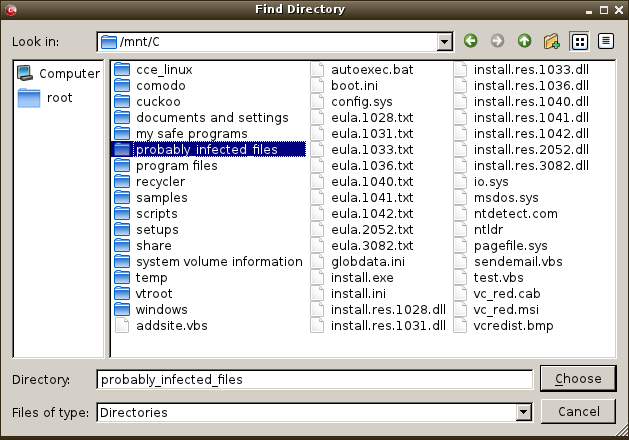
The selected folder will be added to the custom Scan Target area.
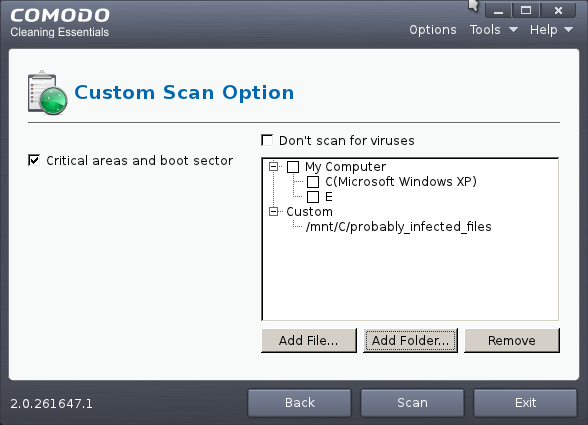
You can add more files and folders for a simultaneous custom scan. Repeat the process to add more files.
4. Click 'Scan' to run the custom scan. The selected file(s)/Folder(s) will be scanned with the scan options and the progress will be displayed.
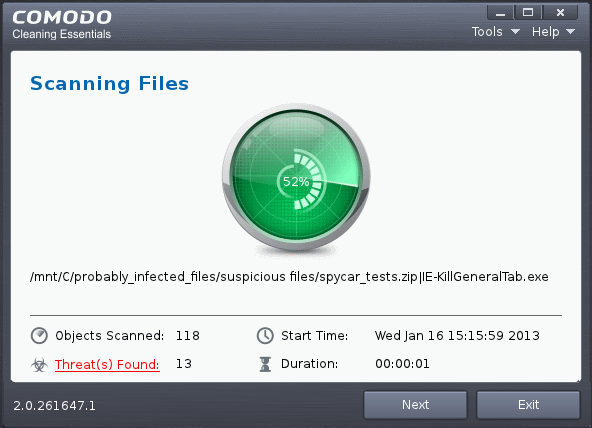
During the course of scanning, if you want to see details on the threats detected so far, click 'Threat(s) Found' link. A results window with the threats identified thus far will be displayed.
The Results
On completion of scanning, the 'Finished' dialog will be displayed.
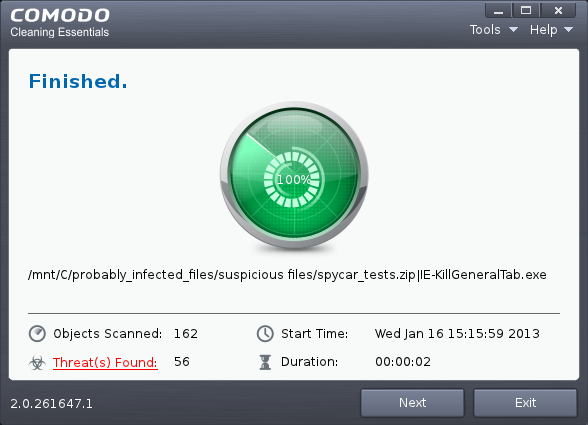
5. Click 'Next' to view the results.
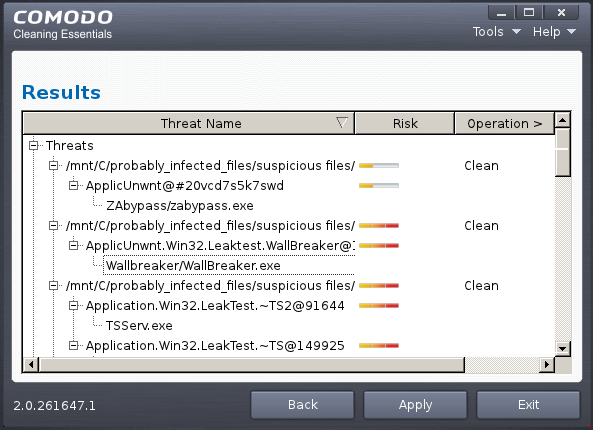
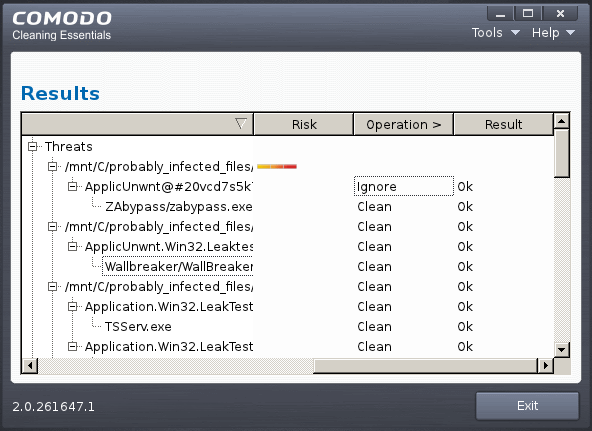
- If malicious executables are discovered on the scanned areas, the 'Results' window displays the list of those items (Viruses, Malware and so on).
| Tip: You can sort the scan results by alphabetical order by clicking the 'Threat Name' column header. Similarly you can sort the scan results based on the risk level by clicking the 'Risk' column header. |
The 'Results' window allows you to quarantine and later remove, ignore the threat if it is a safe file or to submit it as a false positive to Comodo if you are sure about the authenticity of the file. The default operation is 'Clean', that means CCE will clean the threat if a disinfection routine is available for it, else, will move it to quarantine.
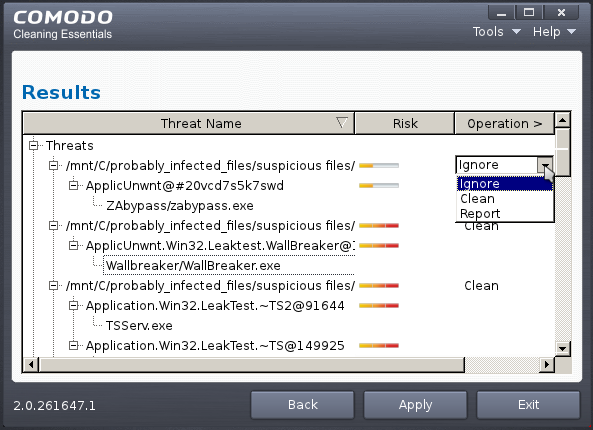
- To clean a threat, click on the entry under the Operations column and select 'Clean'. The file will be disinfected or moved to quarantine upon applying the operation. You can later remove the file from your system from the 'Quarantined Items' interface. Refer to Managing Quarantined Items for more details.
- To ignore a threat if you consider the file is safe, click on the entry under the Operations column and select 'Ignore'.
- To report threat as a false-positive result, click on the entry under the Operations column and select 'Report'. The file will be sent to Comodo. Experts in Comodo will analyze the file and add it to whitelist, if found safe.
- To apply a common operation to all the entries in the list, click on the Operations column header and select the required action.
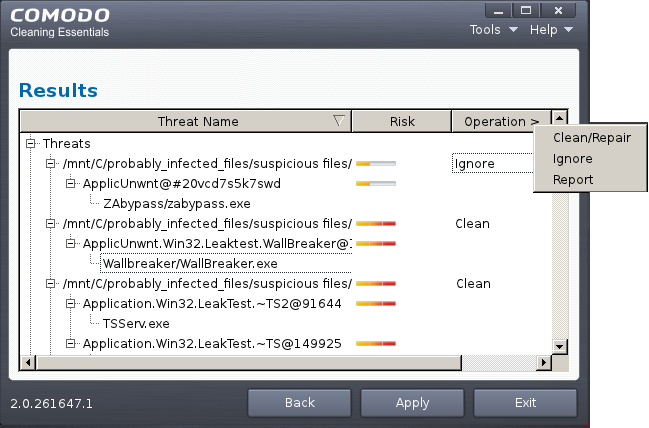
6. Click 'Apply' to apply the selected operations to the threats. The selected operations will be applied and the results will be displayed.
7. Click 'Exit'.
Instantly Scan Folder or File
You can scan a folder or file you just downloaded from Internet / copied in to your system of items in a removable storage device like a pen drive by dragging and dropping it on to the CCE interface.
To instantly scan an item
- Drag the item from its parent folder and drop it on to the CCE Interface
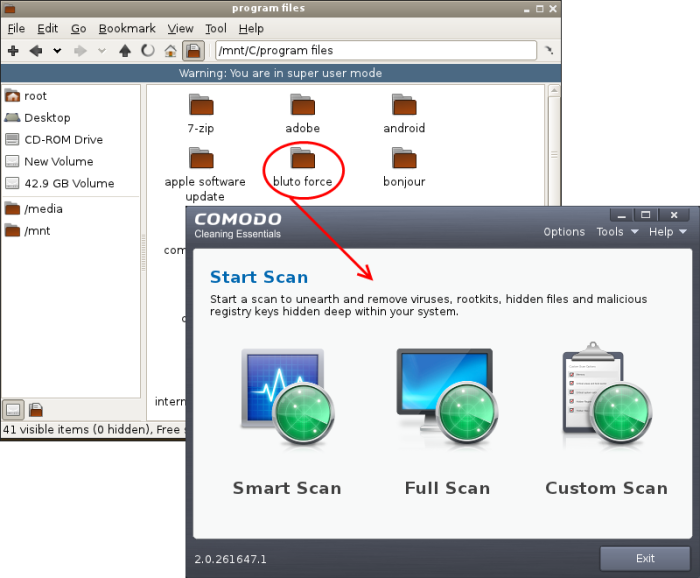
The folder/file will be scanned immediately.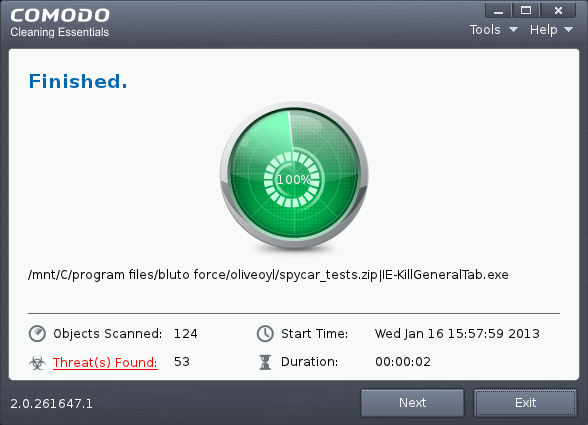
If any threats are found, the results will be displayed. Refer to The Results section for more details.
If you have opted to use the text mode, scroll to 'Custom Scan' by using the down or up arrow and click the 'Enter' button.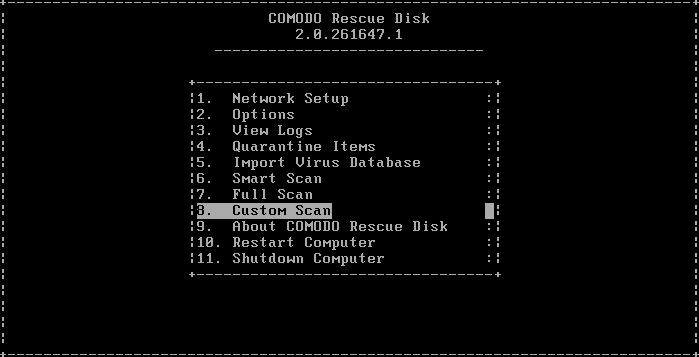
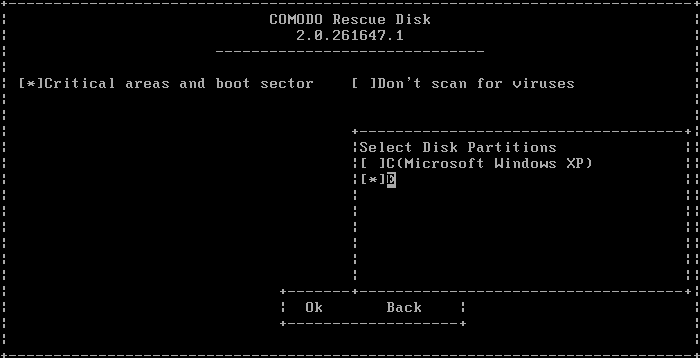
In the Custom Scan interface, you have the option to select the files or folders. Use the Tab button to navigate and 'Space' bar to select the options. For 'Select Disk Partitions' use the 'Up' or 'Down' arrows and select the drive.
| Note: Unlike in Graphic mode, the Text mode for Custom scan allows only to select partitions and not individual files or folders. |
- Navigate to 'Ok' and press the 'Enter' button.
The application will check whether any updates are available for the virus database before commencing the scan. If available, it will first update the local virus database.
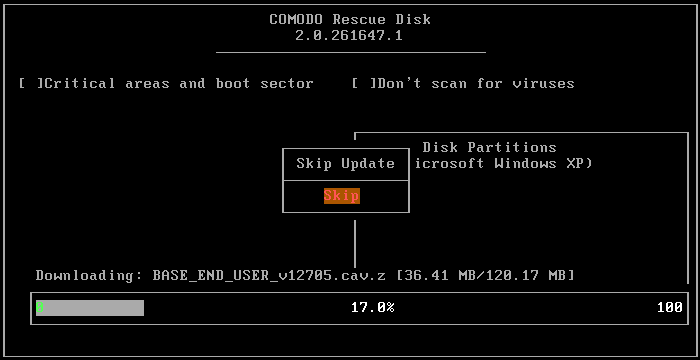
It is advised that you always let the application to update the database as scanning with your virus database up-to-date detects even the zero-hour threats. However, if you do not want the database update at this moment, you can skip this step by clicking 'Enter' button.
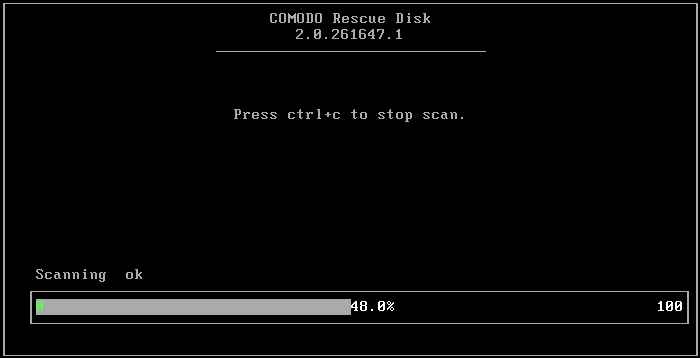
The application will start scanning the selected areas of your system and the progress will be displayed. Press 'Ctrl+C' buttons to abort the scan.
For each and every malware detected by CCE, a 'Choose Action to Virus Detected' screen will be displayed.
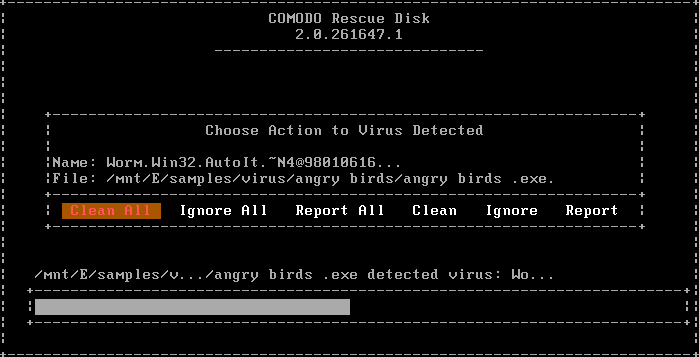
The 'Results' screen allows you to quarantine and later remove, ignore the threat if it is a safe file or to submit it as a false positive to Comodo if you are sure about the authenticity of the file. The default operation is 'Clean All', that means CCE will clean the threat if a disinfection routine is available for it, else, will move it to quarantine. For abnormal system settings, you have the option to either repair the setting or ignore.
- To clean a threat, select 'Clean' using the left or right arrows and press the 'Enter' key. The file will be disinfected or moved to quarantine upon applying the operation. You can later remove the file from your system from the 'Quarantined Items' interface. Refer to Managing Quarantined Items for more details.
- To ignore a threat if you consider the file is safe, select 'Ignore' using the left or right arrows and press the 'Enter' button.
- To report threat as a false-positive result, select 'Report' using the left or right arrows and press the 'Enter' key. The file will be sent to Comodo. Experts in Comodo will analyze the file and add it to whitelist, if found safe.


