Enroll Roaming Devices
- Install the CSIG agent on Windows and Mac devices to protect them when they are outside your network
- Click 'Configure' > 'Objects' > 'Roaming Devices' > 'Download Agent'
- You can manually install the agent on devices or install it remotely through Endpoint Manager (formerly ITSM).
- Once installed, you can deploy policies to the devices as required.
- Roaming devices cannot connect to internal domains unless configured appropriately in the 'Network' interface.
Add new devices
- Click 'Configure' > 'Objects' > 'Roaming Devices'
- Click 'Download Agent' at the top-right.
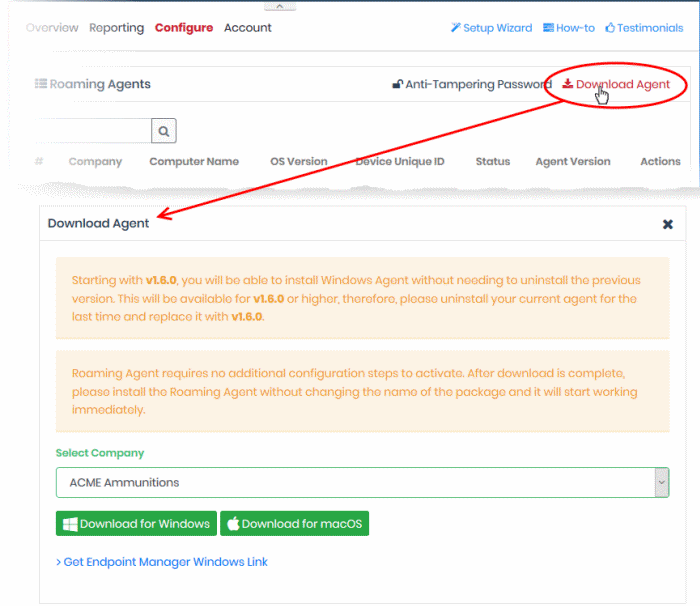
Choose your
download options in the 'Download Agent' dialog:
- Select Company - MSPs only. Select the customer organization for which you want to enroll devices.
- Download for Windows - The agent installation package for Windows devices. See Enroll Windows devices for more details.
- Download for mac OS - The agent installation package for Mac OS devices. See Enroll Mac OS devices for more details.
- Get Endpoint Manager Agent Windows Link - Reveals the link you need to remotely install the agent on Windows endpoints through Endpoint Manager. See Import Windows Devices from Endpoint Manager (formerly ITSM) for more details.
- Click 'Configure' > 'Objects' > 'Roaming Devices'
- Click 'Download Agent' at the top-right
- Click 'Download for Windows' in the 'Download Agent' dialog. The installation file is in .msi format.
- Transfer the setup files to the Windows devices you want to enroll.
Next, install the agent on the device(s).
- Double-click the
 setup file or right-click
and select 'Install' from the context sensitive menu.
The installation wizard starts.
- Click 'Next' and complete the agent installation wizard.
-
Click 'Finish'.
That's it. The device is added and will be displayed in the 'Configure' > 'Objects' > 'Roaming Devices' interface.
- Note - no security rules are applied to roaming device by default. You can create and apply device specific policies according to your requirements.
-
See 'Step 4' and 'Step 5' for advice on how to configure and deploy security policies to roaming devices.
- Click the 'Download for Mac OS' button in the 'Download Agent' dialog. The installation file is in .pkg format.
- Transfer the agent to the Mac OS devices that you want to enroll.
Next, install the agent on the device(s).
- Double-click the package file to start the installation wizard.
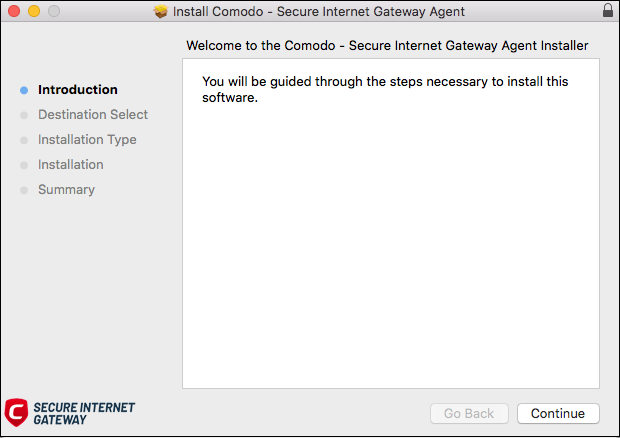
- Click 'Continue' and follow the wizard.
- Click 'Close' to exit the wizard when installation is finished:
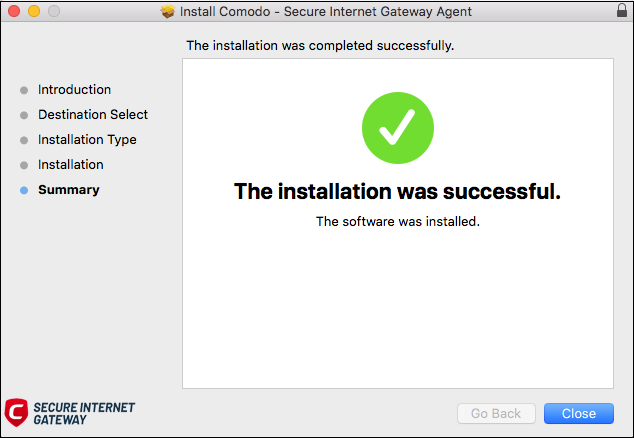
Once installed, the agent starts communicating with the Secure Internet Gateway server. The device is visible in 'Configure' > 'Objects' > 'Roaming Devices'.
- Note - no security rules are applied to roaming devices by default. You can create and apply device specific policies according to your requirements.
- See 'Step 4' and 'Step 5' for advice on how to configure and deploy security policies to roaming devices.
Import Windows Devices from Endpoint Manager
- Click 'Configure' > 'Objects' > 'Roaming Devices'
- Click 'Download Agent' at the top-right
- Click 'Get Endpoint Manager Windows Link':
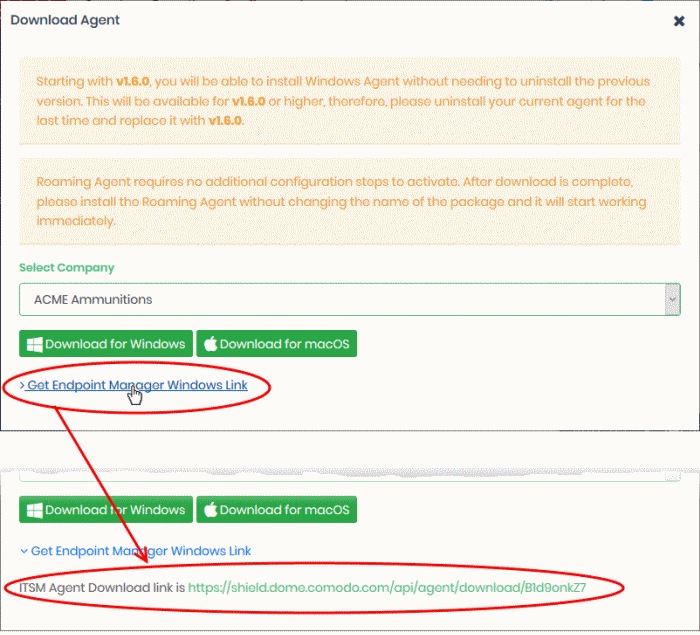
- Use this link as the 'Package URL' to install the agent on managed endpoints.
Process in brief:
- Login to Endpoint Manager
- Click 'Devices' > 'Device List' > 'Device Management' tab
- Select the Windows device(s) on which you want install the packages
- Click 'Install or Update Packages' and select 'Install Custom MSI/Packages'
- Paste the agent download link into the 'MSI/Package URL' field
- Configure the other remote installation options as required
- Click 'Install'
- See https://help.Xcitium.com/topic-399-1-786-10139-Remotely-Install-and-Update-Packages-on-Windows-Devices.html if you need additional help to install packages via Endpoint Manager.
Configure Anti-Tampering Password
- The anti-tampering password helps stop the agent from being uninstalled from a roaming device.
- Once set, the agent cannot be removed unless the password is provided.
- Password protection is only available for Windows devices.
Set an uninstallation password
- Click 'Configure' > 'Objects' > 'Roaming Devices'
- Click 'Anti-Tampering Password' on the top right
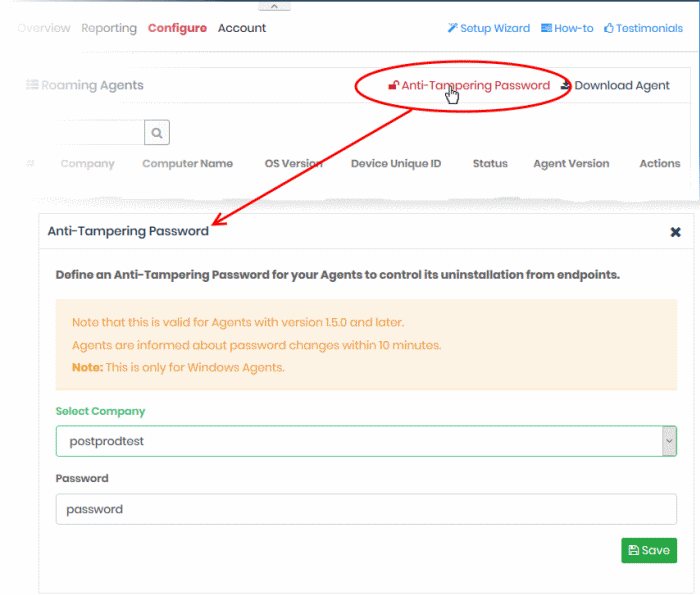
- Select Company - MSPs only. Select the customer organization for which you want to set a password.
- Password – Create a unique key that is required to uninstall the agent.
- Click 'Save' for your settings to take effect
- Repeat the process to set password for other companies
- Password protection will take effect within ten minutes.
|
Note: The password protection applies only to the agents of version 1.5 and later. |


