Step 2 - Create New User Roles (optional)
Click 'Admin Panel' > 'Staff' > 'Roles'
- Roles determine the access rights of staff members and administrators in Service Desk.
- You can add new roles and change the role of a staff member at any time, so you may skip this step for now if required.
- However, before adding new support staff members, you may wish to create custom roles for them.
- Account Administrator
- Administrator
- Technician
- Staff members added through CD are imported into Service Desk with the role assigned to them in CD. You can change this role as required.
- You can assign one of the default 'Administrator' or 'Technician' roles to your new Service Desk staff.
- You can also create custom named roles with different permissions:
Create a new role
- Open the admin panel (see the last link on the left)
- Click 'Staff' > 'Roles'
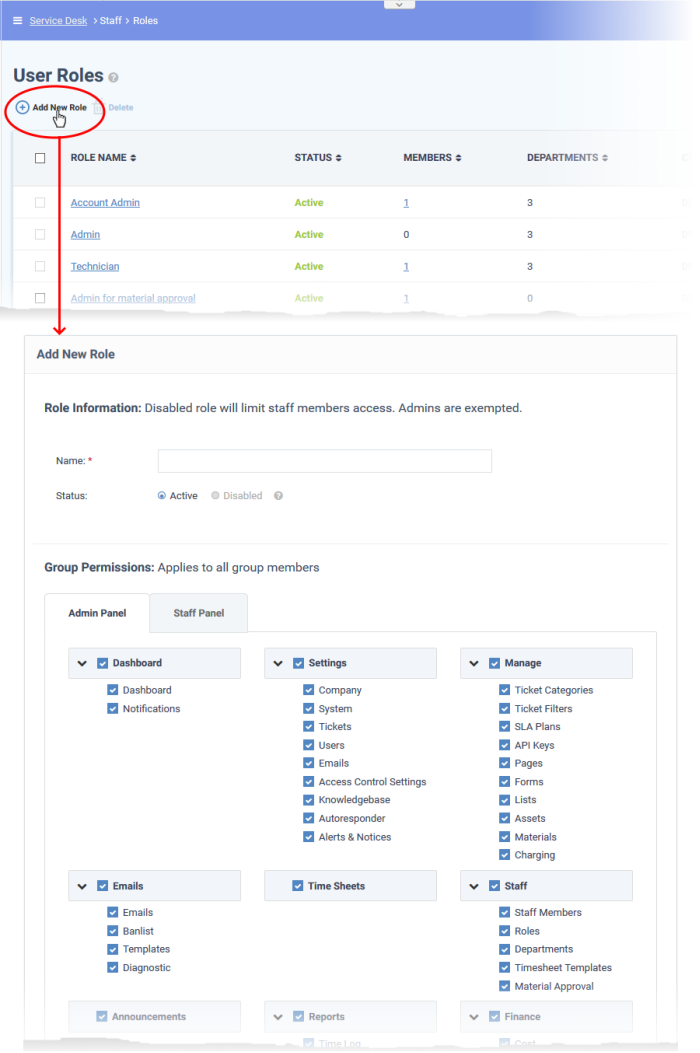
- Click 'Add New Role' at the top:

- Enter the name for your new role and specify the permissions that should apply to its members in the 'Admin Panel' and 'Staff Panel' tabs.
- Select the permissions and privileges that can be given to the members assigned with the role.
- Department Access - Choose which Service Desk departments are available to members with this role.
- Add admin notes if required then click 'Create Role'.
- The new role is listed in the 'User Role' interface and can be applied to new staff members at any time.


