

View Active Directory Details
- Active directory details lets you view AD domain name, users/user groups, and other details about your AD account.
- You can also change the role assigned to a group.
View the details of an AD account
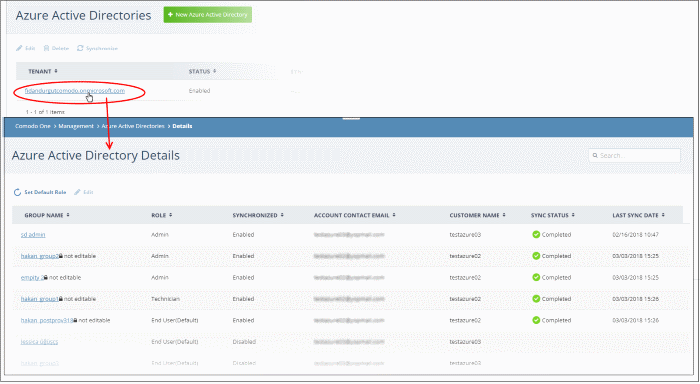
- Click 'Management' then 'Azure Active Directory'
- Click the domain name of an AD account in the 'Tenant' column
This opens the details interface, which shows all Azure user groups added to Xcitium:
|
Active Directory User Groups - Column Descriptions |
|
|---|---|
|
Column Header |
Description |
|
Group Name |
The name of the user group.
|
|
Role |
|
|
Synchronization |
Shows whether or not Xcitium will sync with Azure to update user roster and user details. |
|
Account Contact Email |
The email address of the admin responsible for the AD account in Azure. |
|
Customer |
The customer company to which the user group is assigned. |
|
Sync Status |
The progress of the last synchronization operation. |
|
Last Sync Date |
Date and time of the last synchronization between Xcitium and Azure AD. |
- Click 'Management' > 'Azure Active Directory'
- Click the domain name of an AD account in the 'Tenant' column
- Click on the group whose users you want to view:
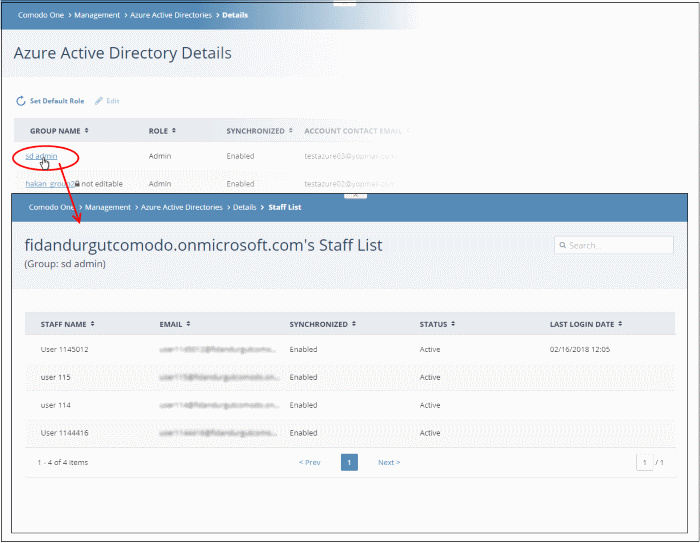
All users in the group are listed. User details include their email address, synchronization status, account status and their last login date.
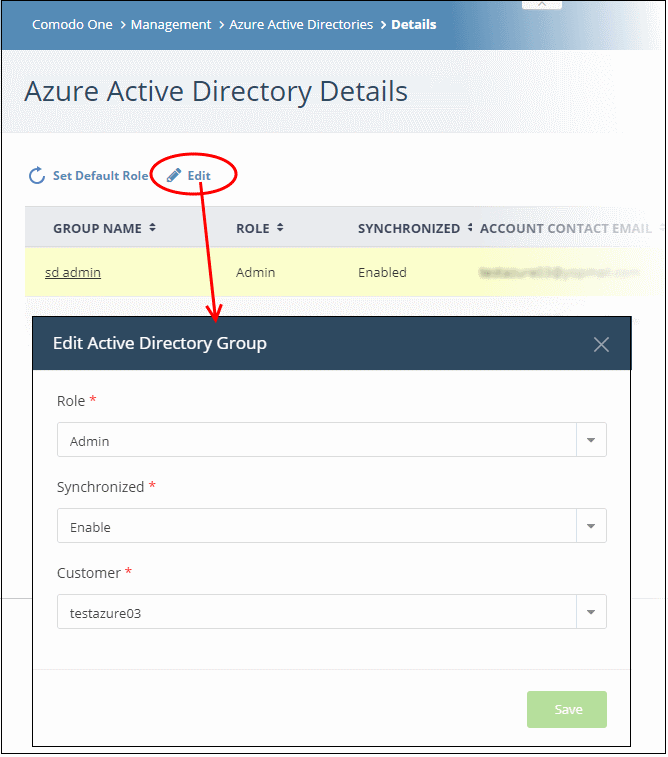
- Select a user group and click 'Edit' at the top
|
Edit Active Directory User Group - Form Parameters |
|
|---|---|
|
Form Element |
Description |
|
Role |
Tip: You can revert the roles to their Azure originals by clicking 'Set Default Role' |
|
Synchronized |
Enable or disable synchronization of user list from this group to Comodo One/Dragon portal. |
|
Customer |
Select the customer company for which the users from this group are to be imported into Comodo One/Dragon. |
- Click 'Save'.