Manage Users
The 'Users' screen allows administrators with appropriate privileges to add new users to theSecure Box Management Console for managing an organization. The scope of operations that a user can perform depends on the privileges assigned to the group to which the user belongs. Refer to the section 'Managing User Groups' if you wish to know more about privilege levels.
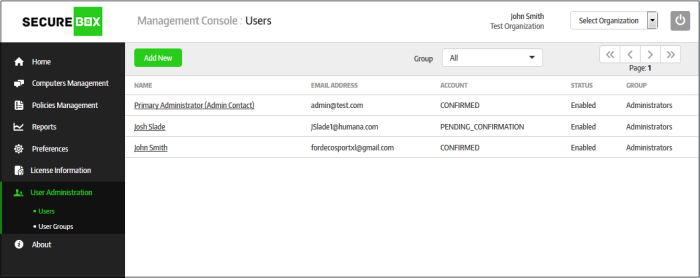
To manage users, click 'User Administration' on the left and then 'Users' below it:
|
Users – Table of Column Description |
|
|---|---|
|
Column |
Description |
|
Name |
The username of an individual user. User’s with (Admin Contact) after their names were chosen as admin contact when the organization was created. Refer to the section 'Adding a New Organization' for more details. Clicking on a username will open the 'User Properties' screen, which is the same screen displayed for adding a user. Refer to 'Adding a user' for more details. |
|
Email Address |
The email address provided for the user while adding |
|
Account |
Indicates whether the user has activated his account by clicking the activation link in the activation email that was sent during the adding process |
|
Status |
Indicates whether the user is allowed to access the management console or not. A disabled user cannot access the management console. |
|
Group |
Indicates to which group the user was added. Refer to the section 'Managing User Groups' for more details. Please note the 'Admin Contact' will by default added to the 'Administrators' group. |
Sorting and filtering options
Sorting the entries
Clicking any column heading sorts the entries based on the ascending/descending order of the entries as per the information displayed in the respective column. Please note the sorting option is not available for 'Group' column.
Using the filter option
The users list can be filtered to display the entries based on a group. Refer to the section 'Managing User Groups' for more details.
- Select the group from the 'Group' drop-down
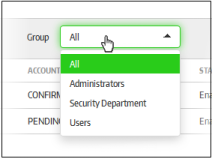
The users belonging to the selected group will be displayed on the screen.
The screen allows administrators to:
- Click the 'Add New' button at the top of the table
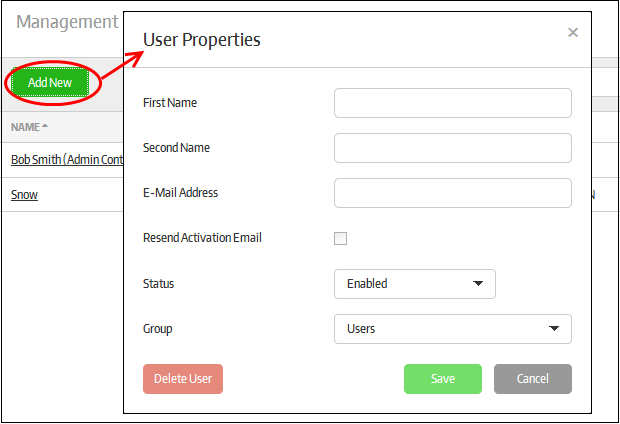
The 'User Properties' screen will
be displayed.
|
User Properties – Form Parameters |
|
|---|---|
|
Form Element |
Description |
|
Name |
Enter the first name of the user |
|
Second Name |
Enter the second name of the user |
|
E-Mail Address |
Enter the email address of the user to which the activation mail will be sent |
|
Resend Activation Email |
Allows to send another activation email if the password in the initial mail is lapsed or if the user is removed and added again with the same email address. |
|
Status |
Select whether the user should be allowed to access the management console. An activation mail will be sent to the user even if disabled is selected. However the user cannot access the management console until the access is enabled by the administrator. |
|
Group |
Select the group to which you want to place the user. The groups can be created from the 'User Groups' section. Refer to the section 'Managing User Groups' for more details. |
- Click the 'Save' button.
An activation mail will be sent to the user, which contains an activation link and a temporary password. The user's account will be activated on clicking the activation link in the mail and can access the management console using the temporary password. It is advisable the user changes the password immediately for continued access to the console. Refer to the section 'Logging-in to the Management Console' to know more about changing console access password.
- Click on the name of the user that you want to edit
The 'User Properties' screen with details of the selected user will be displayed.
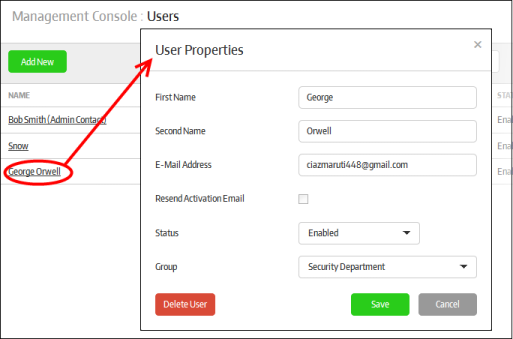
- Edit the details as required. Please note if you change the email address of the user, a new activation mail will be sent to the changed email address. The user has to once again activate the account for accessing the management console.
- Click
the 'Save' button
- Click on the name of the user that you want to delete
The 'User Properties' screen with details of the selected user will be displayed.
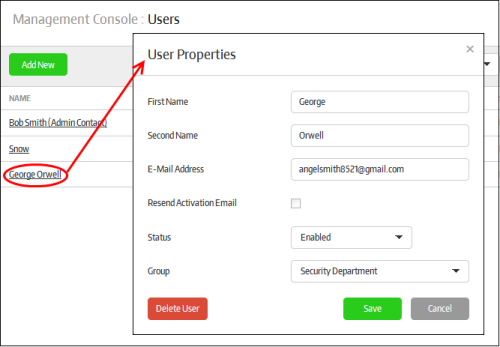
- Click the 'Delete User' button at the bottom
A confirmation dialog will be displayed.
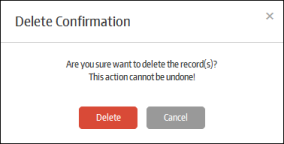
- Click 'Delete' to confirm removal of the user
The user will be removed from the list.


