Manage Licenses and License Keys
'My Licenses' shows licenses you have bought which are available for resale.
- Each order is listed as a separate tile. You can have multiple licenses for the same product. Each row shows the product name, number of active licenses, number of licenses available for resale, and more.
- Click the arrow on the right to get the activation code and more. The activation code link should to be sent to your customer after a sale.
- You can export a list of license keys as a .csv file. This is useful to activate customer licenses without needing to login to your Xcitium account.
Open licenses purchased screen
- Login to your account at https://cam.xcitium.com
- Click 'Reseller Portal' in the left-menu or on the home screen
- Click the 'Licenses Purchased' tile:
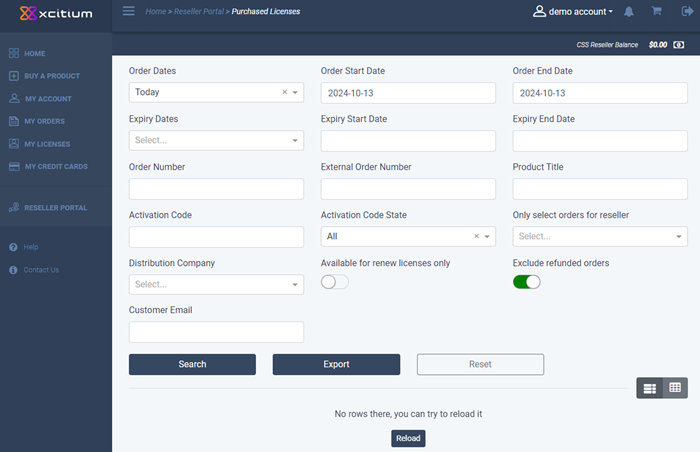
- Use the search fields to filter entries by purchase date, order number, product name and more.
- Click 'Search' after selecting / entering the parameters. Results are shown below the search area.
- Click 'Export' to save your orders as a .csv file
- Click 'Reset' to return to default search parameters
View order details
- The lower pane shows each order as a tile
- Today's orders are shown by default
An example tile is shown below:
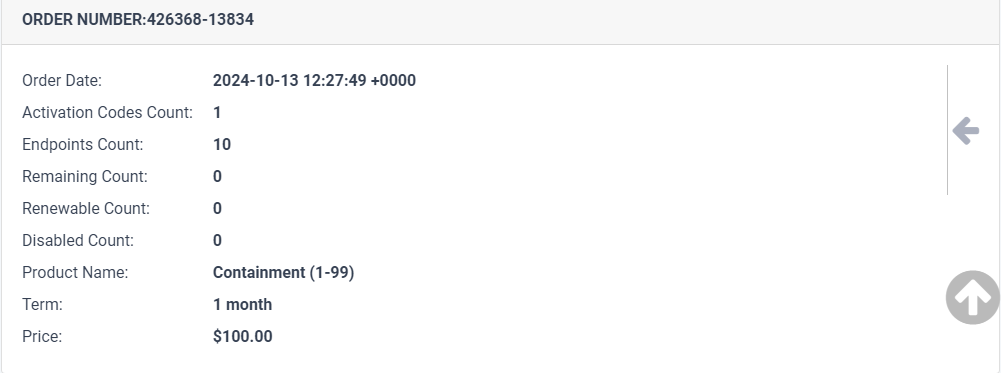
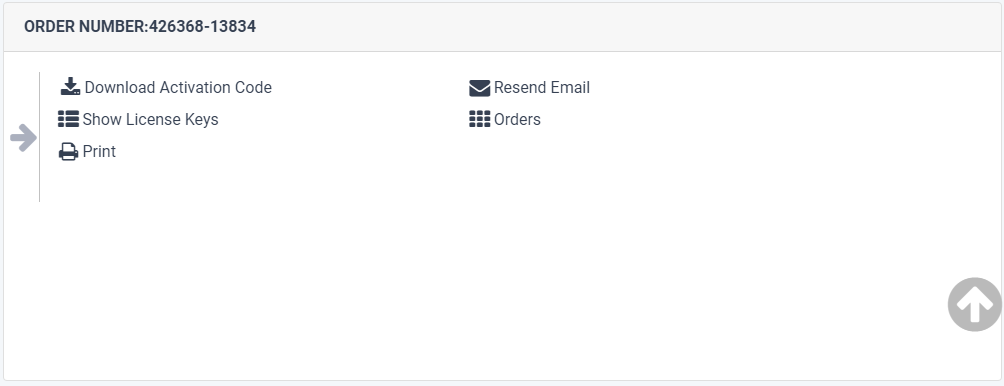
- Click the arrow on the right to view more options:
- Buy More – Clicking this link will open the buy licenses page. See 'Buy Product Licenses'
- Resend Email – Sends you a duplicate of the order confirmation mail which contains your customer's activation code.
- Orders – The purchase details is shown:

- User – Reseller's name
- Order Number – Purchase reference number
- Date – Purchase date
- Product – Name of the purchased item
- Amount – Product purchase cost
- Payment Type – How the amount was paid to Xcitium. Available methods are 'CSS balance' (your account funds) and 'Credit card'.
- State – Two actions are available:
- Processed – License purchased and amount paid to Xcitium
- Refunded – Amount returned after cancelling an active license
- Download Activation Code - Click this link to save the activation codes as a CSV file.

- Activation Code - License details
- Recurrent - Indicates whether the license will be auto-renewed from the reseller's account. Applicable only for licenses set for auto renewal.
- Activation Code Link – The URL that the customer should use to activate the product license
- Click 'Export' to save the details as CSV file.
- Show License Keys – Click this link to view details of licenses in the order, copy activation link URL and activate the license.

- Activation Code - License details
- From – License validity start date
- To – License validity end date
- Auto Renew:
- True – Renew automatically (recurrent) is enabled and license is activated.
- False - Renew automatically (recurrent) is not enabled. Shows false even if the license is activated.
- Recurrent:
- True – Renew automatically is enabled.
- False – Renew automatically is not enabled.
- Distribution Company – Name of the reseller's partner organization. This will be blank if you have not selected any distributor at the time of purchase.
- Actions – The drop-down option in a license row allows you to:
- Click the drop-down and select 'Activation Link'
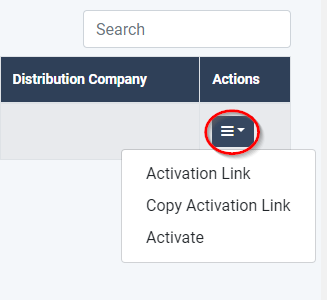
The activation link URL is shown:
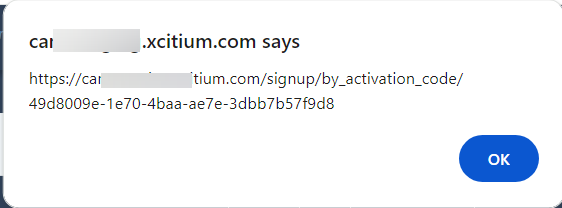
- Copy and send the URL to your customer for activation.
- Customer should click the link and sign up for the product.
- Click 'OK' to close the dialog.
- Click the drop-down and select 'Activate'
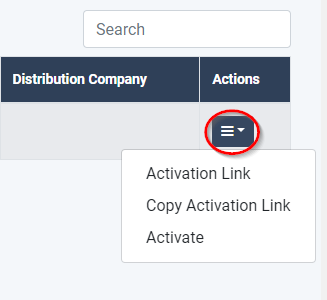
The activate license form is shown:
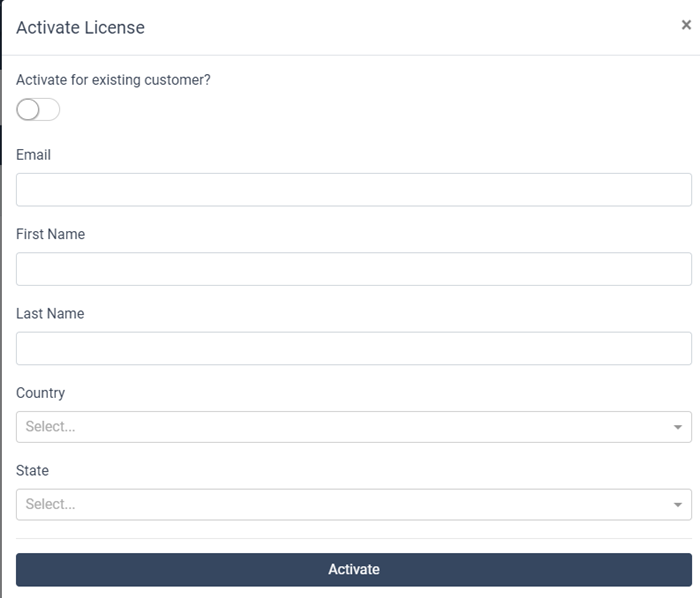
- Activate for existing customer – Select this if the organization has a Xcitium account.
- Enter the registered email and click 'Activate'
- New customer – Complete the form and click 'Activate'
- Customer receives an email about product activation.
- You can enable / disable auto-renewal for a license
Enable auto-renewal
- Note – You can enable / disable auto-renewal for an activated license only
- Click the drop-down and select 'Change Billing State'

The change billing state dialog is shown:
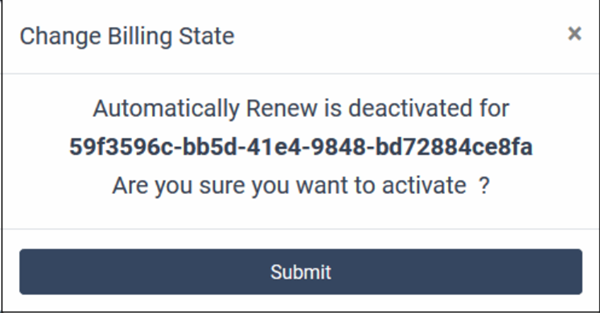
- Click 'Submit'
Auto-renew is enabled for the license and a confirmation message is shown:

Disable auto-renewal
- Note – You can only enable / disable auto-renewal for active licenses.
- Click the drop-down and select 'Change Billing State'

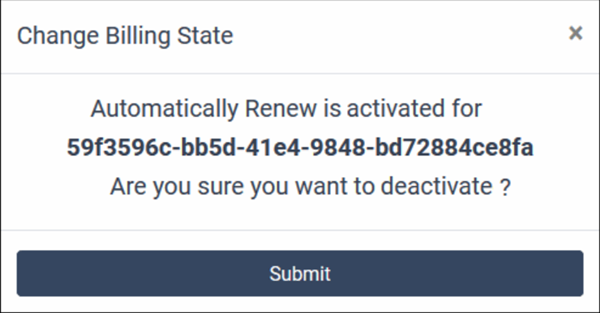
Click 'Submit' in the confirmation dialog:
Auto-renew is disabled for the license and a confirmation message is shown:


