


Scan Profiles
Creating a Scan Profile allows you to instruct Comodo Antivirus scan selected areas, folders or selected drives of your system. You will be asked to select a profile whenever you click the 'Scan Now' link on the Summary Screen.
You can create custom scan profiles, to define selected disks or folders to be scanned and the created scan profile can be re-used for any desired scan event i.e. Run a Scan (On-Demand Scanning) and Scheduled Scans. You can create as many number of custom scan profiles as you wish according to the usage of your system. A Scan Profile allows you to scan only a selected area of your storage, saving time and resources.
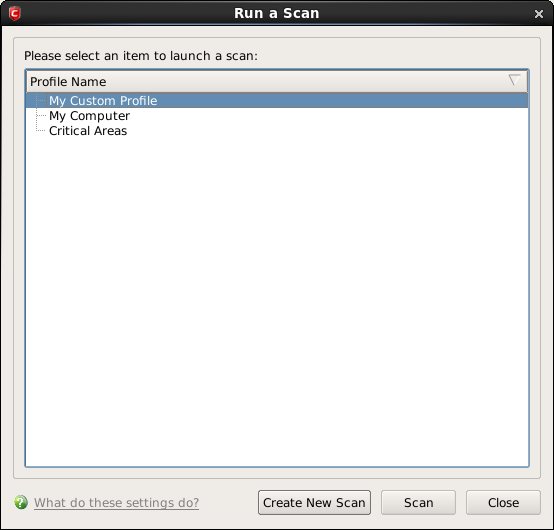
- New scan profiles can be created by clicking the 'Create New Scan' button in the 'Run a Scan' panel or by clicking the 'Add button' in the 'Scan Profiles' area.
-
New scan profiles can then be referenced when creating a new 'Scheduled Scan' and as the target of an on-demand scan in the 'Run a scan' area.
Just to clarify, Antivirus scan profiles are purely concerned with the location of a scan, not the parameters of the scan. All scan profiles use the parameters as determined in the specific 'Scanner Settings' tab of that type of scan.
To access the Scan Profiles interface
- Click 'Scan Profiles' from the main Antivirus Tasks interface.
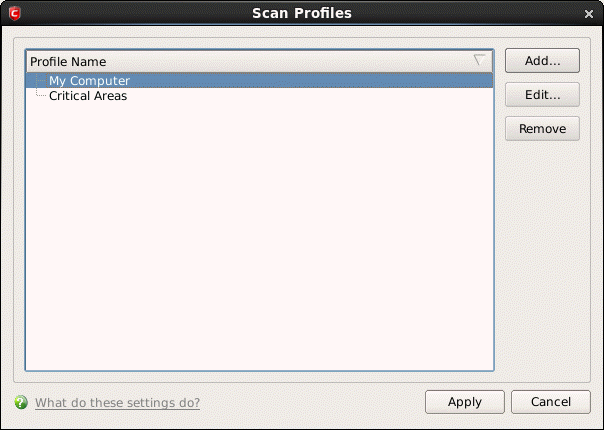
Comodo Antivirus contains two default Scan Profiles 'My Computer' and 'Critical Areas'. These profiles are predefined and cannot be edited or removed.
-
My Computer (Default) – When this profile is selected, Comodo Antivirus scans every local drive, folder and file on your system.
-
Critical Areas – When this profile is selected, Comodo Antivirus runs a targeted scan of important operating system files and folders.
You can select any one of these Scan Profiles if you want to scan the respective areas.
To create a new scan profile from Scan Profiles option
-
Click 'Scan Profiles' from the main Antivirus Tasks interface.
-
Click 'Add'. The 'Scan Profile' dialog appears.
-
Type a name for the scan profile to be created in the 'Name' box and click 'Add'.

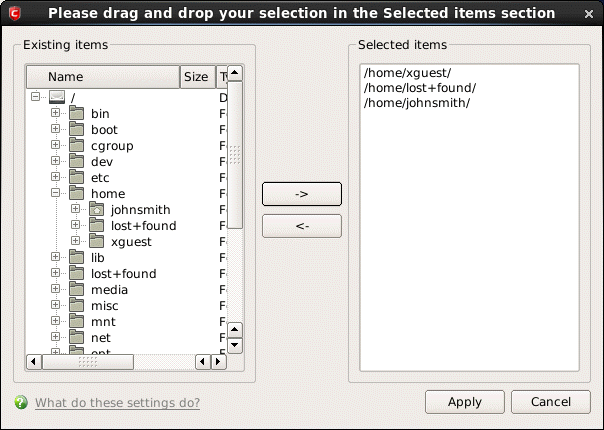
A configuration screen appears, prompting you to select the locations to be scanned when the newly created scan profile is selected. The left column displays all possible items (drives, folders and files) on your system for which scanning is available.
-
Browse to the folder location in the left column and select the folder.
-
Drag and drop all the files, folders and/or drives you require, into the right hand panel or select the files or folders and move them to right-hand pane by clicking the right arrow one by one. (If you want to revert a file, select the file from the left hand pane and click the left arrow).
-
Click 'Apply'.
-
Repeat the process to create more Scan Profiles.
-
Click 'Apply' in the Scan Profile interface for the created profiles to take effect.
You can see that the Scan Profile you have created, appearing as a target profile in the 'Run a Scan' panel...
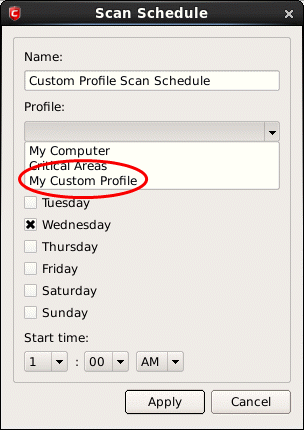
...and is also available for selection during a scheduled scan in the drop-down.
- To edit a Scan Profile, select the profile and click 'Edit'.
- To delete a Scan Profile, select the profile and click 'Remove'.