Manage Calendars
Service Desk allows staff members to manage appointments and schedule events on their calendars.
- There are two ways to add schedules and appointments to your calendar:
- Manual - Add an appointment to your calendar.
- From Tickets - Future tasks can be added when creating or working on tickets. For example, you could create a schedule for task that involves an on-site visit. For more details, see Create a Schedule for the Ticket in the section Ticket Details.
- Calendar entries and appointments can be shared among admins/staff members. This is useful when collaborating on tasks.
- You can also view and manage the calendars of other staff in order to create better and more transparent workflows.
View the calendars interface
- Open the 'Staff' panel (see last link on the left)
- Click 'Calendars' on the left
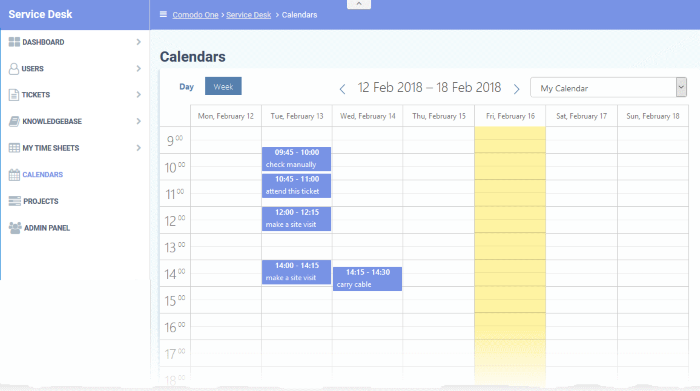
- The current week will be displayed by default. You can view the current week or day by clicking the respective button above the calendar.
- To move to previous/next week/day, use the '<' and '>' buttons above the table.
The following sections explain more about:
The drop-down at the top-right allows you to select the admin/staff whose calendar you want to view.
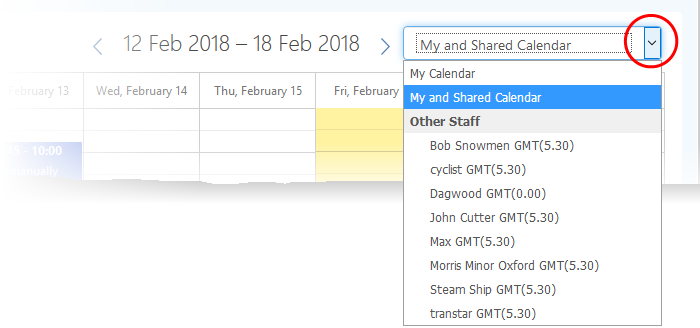
- My Calendar - Displays calendar events scheduled for you. The entries include:
- Events manually added by you
- Scheduled events created in tickets assigned to you
- Events scheduled for you by admins and other staff members
- My and Shared Calendar - Events scheduled for you as above and other peoples events marked as shared.
- Blue background – Events scheduled for you
- Gray background – Shared events
- Other Staff – Choose the staff member whose calendar you want to view. You will be able to create and view details of existing events for the staff member. See the following sections for more details.
Create a Manual Calendar Entry
You can schedule events for yourself and other staff members:
- Choose 'My Calendar' from the drop-down at top-right to create an event for yourself
- Alternatively, choose a staff member under 'Other Staff' to create an event for someone else
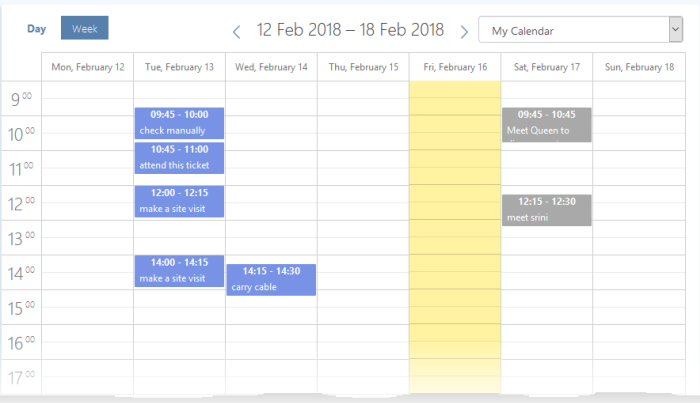
- Double-click on the time-slot which you wish to schedule for the ticket

- Enter a short description of the task
- Click
the tick mark
 to save the entry
- To share an event with others:
- Click on the event
- Click the 'Edit' icon that appears on the left (the top icon of the three)
- Enable the 'Shared' check-box
- Click 'Save'. See View Details and Manage a Calendar Entry if you need more help with this.
View Details and Manage a Calendar Entry
Calendar entries belonging to you and others can be edited to change the description, associate tickets, change the date/time, mark it as shared and more.
View/manage details of a calendar entry
- Choose 'My Calendar' or 'My and Shared Calendar' from the drop-down at the top-right
- Or choose another staff member from 'Other Staff'
- Click on the event to be viewed/managed
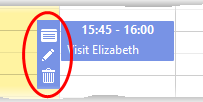
Three
options will appear on the left of the entry:
|
Edit dialog. Allows you to:
See Edit details of the calendar entry for more details. |
|
|
Edit the description of the event. |
|
|
Remove the event. |
Edit details of the calendar entry
- Click
the 'Details' icon
 to view and manage details of the ticket.
The 'Appointment Edit' dialog will appear:
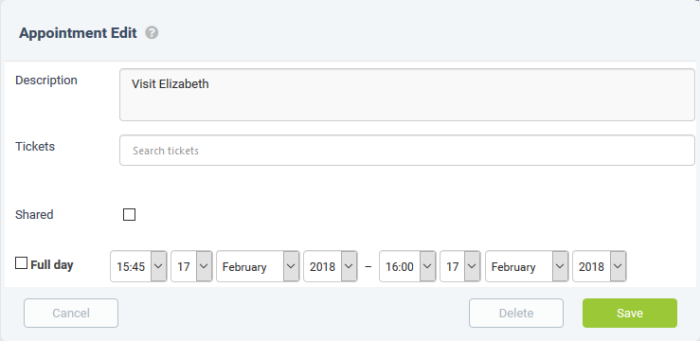
- Description – Information about the event. You can change the description if required.
- Tickets – View tickets associated with the event and add new tickets. This is optional. You can add multiple tickets to a calendar entry.
- Start typing the first few letters of the ticket number, username/email of the user that created the ticket or the subject of the ticket.
- Select the ticket you want to associate with the event from the search results:

- Repeat the process to add more tickets.
- Shared – Makes the event visible to all admins/staff members when they select 'My and Shared Calendar' from the drop-down.
- Time Period – Displays the date/time of the event.
- To change the date/time of the event, simply change the values in the the drop-downs.
- Select 'Full day' if you expect the event to last the full working day.
- Click
'Save' after making your changes.


