Canned Responses
The
'Canned Responses' feature allows staff to create stock replies
to common or routine issues. Staff can then quickly insert one or
more canned answers when replying to a ticket.
- Canned responses can be enabled in 'Admin Panel' > 'Settings' > 'Knowledgebase'. Disabling will not affect canned responses automatically sent out as part of a filter.
- Canned responses can be automatically sent out in reply to certain tickets. Admins can set this behavior in Ticket Filters ('Admin Panel' > 'Manage' > 'Ticket Filters').
- To open the 'Canned Responses' screen, click 'Knowledgebase' on the left then 'Canned Responses' in the 'Staff Panel'.
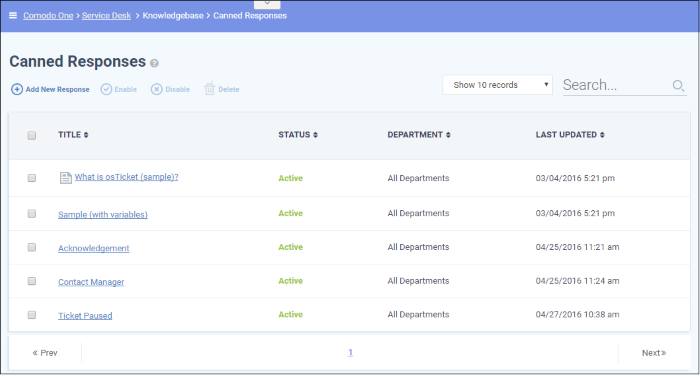
Sorting and searching options
- Click a column header to sort items in ascending/descending order
- Use the 'Show records' drop-down on the right allows you to select the number of entries to be displayed per page.
- Use the 'Search' field to filter by response name.
- To remove all filters, clear the search field and press 'Enter' (or simply click the 'Canned Responses' link).
Column Headers
- Title: The name of the 'Canned Response'. Click a name to open its update screen.
- Status: Indicates whether the 'Canned Response' is active or disabled. Only 'Active' responses will be available for selection from 'Ticket Details' interface while managing a ticket. See
'Ticket Details' for more details.
- Department: Displays to which department the pre-made reply is assigned and will be available for response to tickets for that department.
- Last Updated: The date and time the 'Canned Responses' was edited and updated.
From the interface, a staff member can:
- Click 'Add New Response' at the top
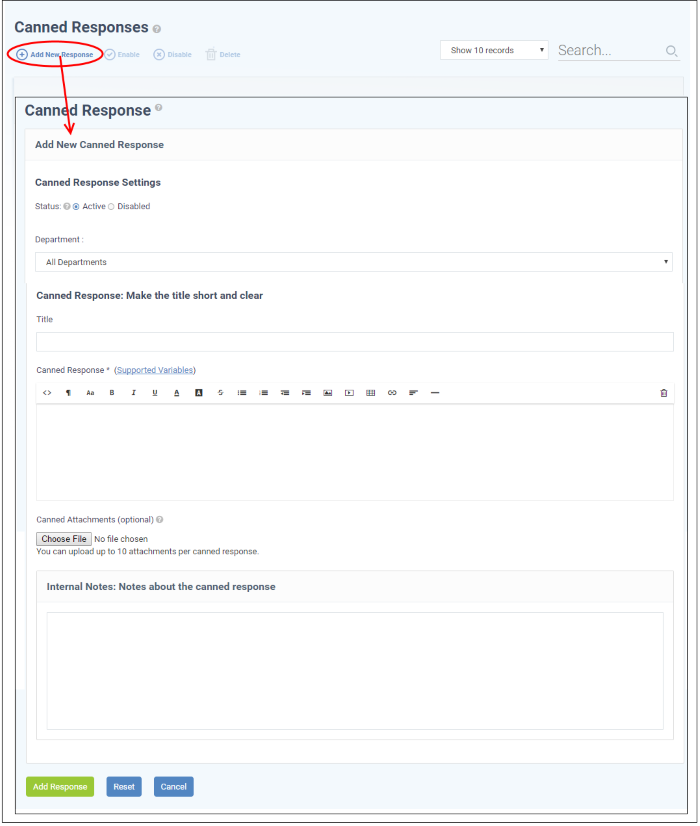
The 'Add New Canned Response'
screen will appear.
Canned Response Settings
- Status: Allows you to choose whether the canned response should be enabled by default or not.
- Active: The 'Canned Response' will be enabled and will be available for selection while processing a ticket, from the 'Response' drop-down in the 'Ticket Details' interface. See Ticket Details for more details.
- Disabled: The canned response will not be available for selection in the ticket details interface. You can enable the response at anytime.
- Department: Select the department to which the 'Canned Response' will be assigned. The response will be available for tickets that are assigned this department. If 'All Department' is selected, then it will be available for all ticket responses.
- Title: Enter a suitable title for the pre-made reply.
- Canned Response: Enter the reply text in the text editor. You can also insert variables into the text to fetch relevant information for the ticket from the database. To view the full list of variables available in Service Desk, click the 'Supported Variables' link.
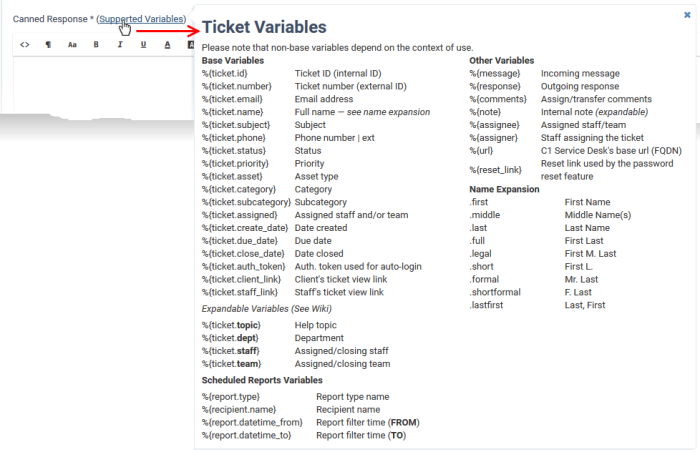
- To clear the text, click the trash can icon at the top right.
- Canned Attachments: To add any attachments to the reply, click the 'Choose File' button, select the required file and click the 'Open' button. To remove the attachment, click on the file and select 'OK' from the confirmation screen. You can attach up to 10 files per 'Canned Response'.
Internal Note
- Add notes for the 'Canned Response' that are for internal purpose only.
- Click the 'Reset' button to clear all selections and entries.
- Click the 'Add Response' button to save the reply text.
-
Click the canned response to be edited
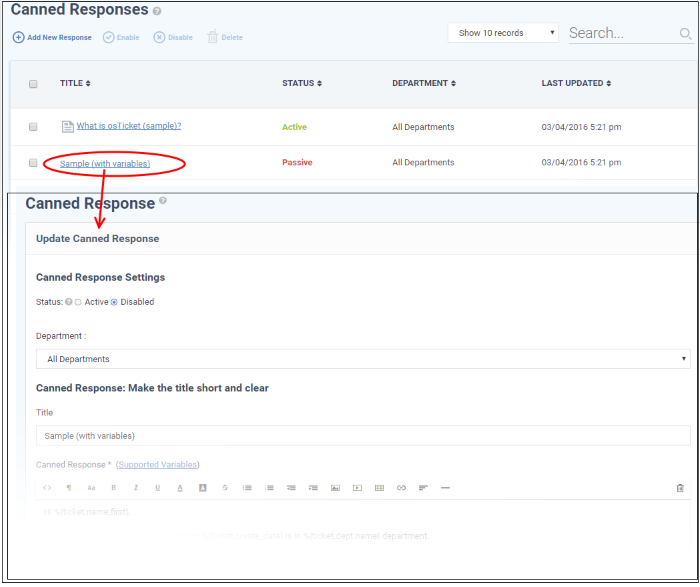
The 'Update Canned Response' screen will be displayed. The screen is similar to Add a New Canned Response screen. For descriptions of the parameters, see the explanation of adding a new canned response.
- Edit
the canned response as required and click the 'Save Changes' button.
-
Select canned responses you want to remove from the list and click 'Delete' at the top
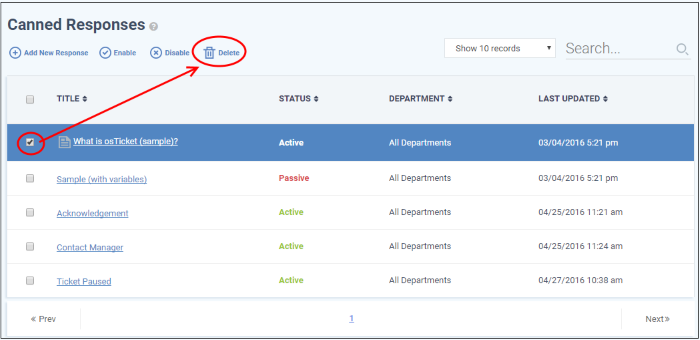
-
Click the 'Yes, Do it!' button in the confirmation screen.
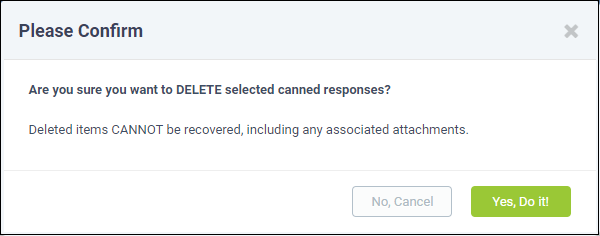
Enable or disable a 'Canned Response'
- To disable active canned response(s), select it/them and click 'Disable' at the top
- To make disabled canned responses active, select them and click 'Enable' at the top
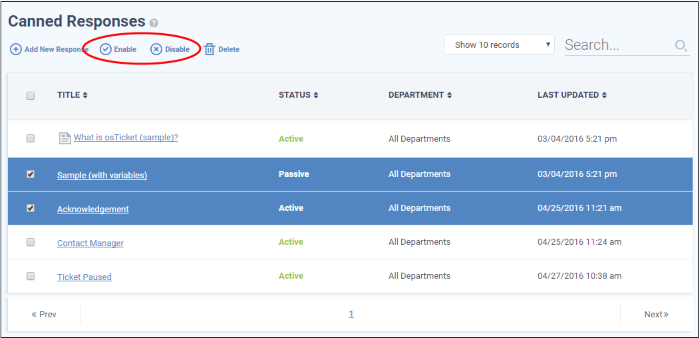
-
Click the the 'Yes, Do it!' button in the confirmation dialog.


