Run Data Loss Prevention Scans
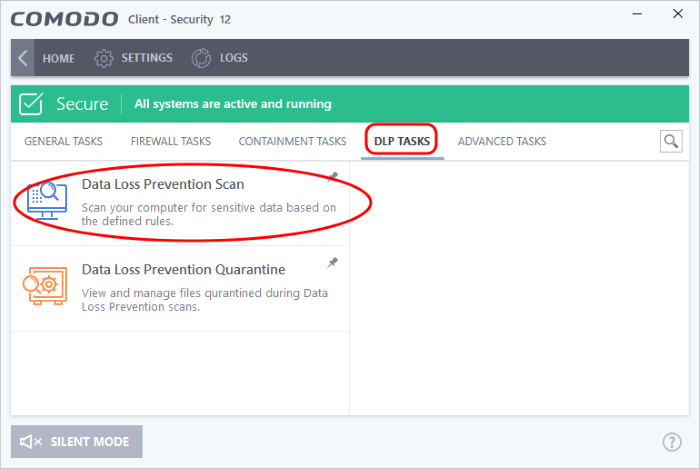
Click ‘Tasks’ > ‘DLP Tasks’ > ‘Data Loss Prevention Scan’
-
Data loss prevention (DLP) scans let you identify documents on your computer which contain sensitive information. Example sensitive data includes credit card numbers, bank account numbers, social security numbers and so on
- You can select the discovery rules to run a scan
- Each rule defines the areas to scan, the type of information to search for, and the action to take on discovered files. The possible actions are:
- Ignore – The file is retained in its original location. But you can view the identified file from the logs
- Quarantine - The file is moved from its original location to a secure holding area. Users cannot open quarantined files. You can review quarantined files by clicking 'Data Loss Prevention Quarantine' in the 'DLP Tasks' interface. See Manage DLP Quarantined Files for more details.
-
Your Endpoint Manager admin should have first created a DLP discovery rules in EM portal and added them to the EM profile active on your device. See DLP Discovery Rules to view the rules available on your device.
Run a Data Loss Prevention Scan
- Click 'Tasks' on the CCS home screen
- Click 'General Tasks' > 'Data Loss Prevention Scan'
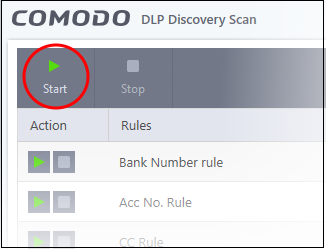
The scan interface shows all rules added to your device by the EM profile active on your device.

Action - Start and stop scans using a particular rule.
Rules - The label of DLP rule.
Last Scan - Date and time of the most recent DLP scan
- Click the ‘Start’ button at the top to run all rules at once
OR
- Use the start buttons on the left to run a scan with a specific rule.
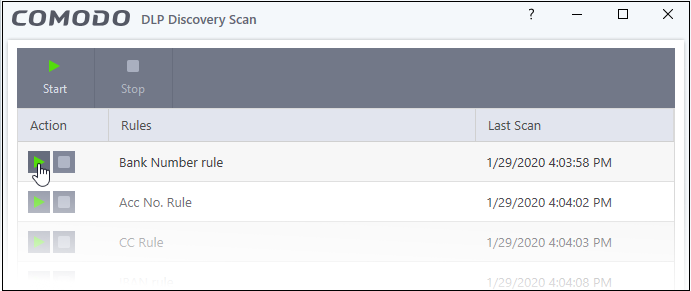
- CCS runs the selected DLP scan rule
- After the scan is started, you can pause, resume or stop the scan
-
Use the refresh button to refresh the discovery scan list while a scan is in progress.
-
You can view the newly created discovery rules after refreshing the scan
Next, view results of the scan.
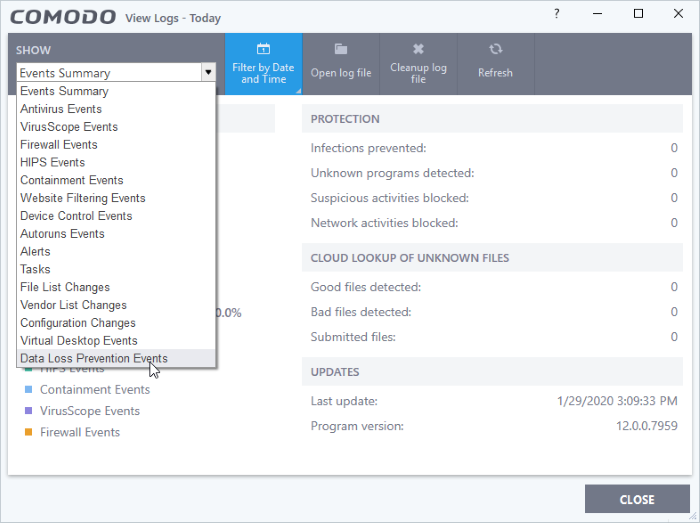
You can view DLP scan results in the logs section.
- Click ‘Logs’ at the top of the CCS interface:

- Select ‘Data Loss Prevention Events’ from the first drop-down:
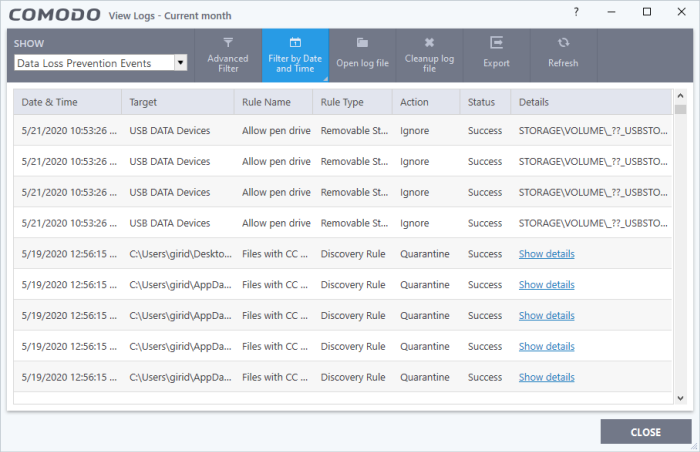
- Date & Time - When the event occurred.
- Target - The item affected by the rule.
- DLP Monitoring event - Shows the type of external storage device to which the data transfer attempt was made
- DLP Discovery event - Shows the file path of the identified file
- Rule Name - The DLP rule that found the target item. This could be a DLP discovery rule or a monitoring rule.
- Rule Type - Whether rule is a DLP discovery rule or a removable storage rule
- Action - How the file was handled in the DLP event. The possible values are:
- Ignore
- Quarantine
- Restore from quarantine
- Delete from quarantine
- Blocked
- Status – Shows whether the rule executed successfully or not
- Details - The specifics of the data found.
- DLP monitoring rule – Shows the removable storage device affected by the rule.
- DLP Discovery rule - Has a ‘Show details’ link which opens the specifics of the event. See View file details for more details.
- Advanced Filter - Search the logs by file location, rule or action. Use the advanced filter options to filter the logs of discovery events.
- Filter by Date and Time - Search for logs generated within a specific time-frame.
- Open log file - Browse to and view a saved log file.
- Cleanup log file - Delete the selected event log.
- Export - Save the logs as a HTML file. You can also right-click inside the log viewer and choose 'Export'.
- Refresh - Reload the current list to show the latest logs.
- Click the 'Show details' in the 'Details' column:
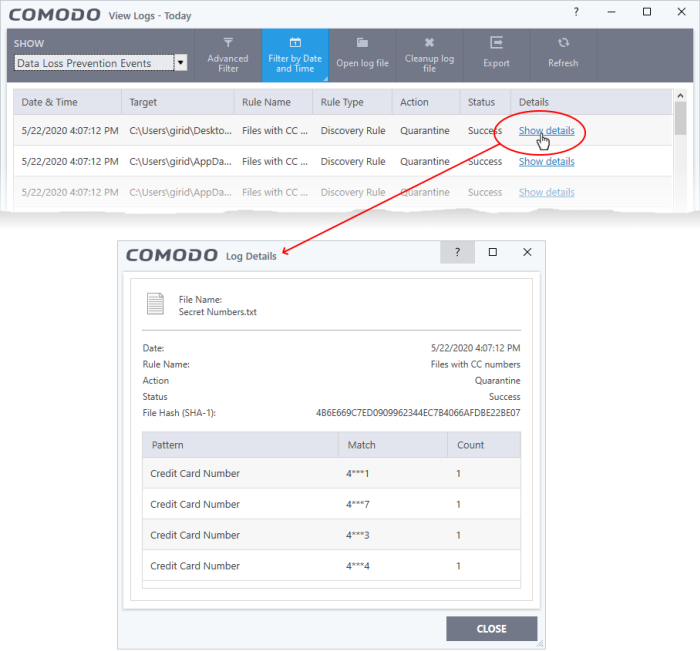
- The screen shows the name of the file, and the rule/pattern which discovered sensitive data in the file.
- The ‘match’ column shows the first and last characters of the actual discovered data. The option to show this should be enabled in the discovery rule.


