Manage Notifications
This section explains how to configure your outgoing mail server and cWatch system emails. System emails include account activation mails, license issuance mails
- Click the 'Notifications' tab:
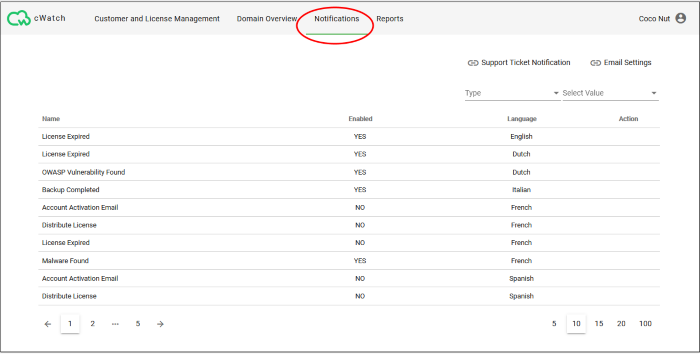
-
Click the buttons atupper-right to switch between support notifications, email settings, and the notification editor.
- Support Ticket Notification – Choose whether your customers receive notifications about malware removal operations.
- Email Settings - Configure outgoing mail servers and the accounts used to send notifications. See Configure Email Server Settings for more on this.
- Notifications - Edit email templates, select the sender email account, and specify recipients. See Configure Notification Email Templates and Recipients for more on this.
Support Ticket Notification Settings
- A support ticket is created when Comodo technicians are engaged
to remove malware from a customer website.
cWatch can notify your customers when a support agent comments on aticket about their site. For example, “Malware removal complete on www.example.com”.
- You
can enable or disable these notifications as per your preference.
Click the 'Notifications' tab then 'Support Ticket Notification'.
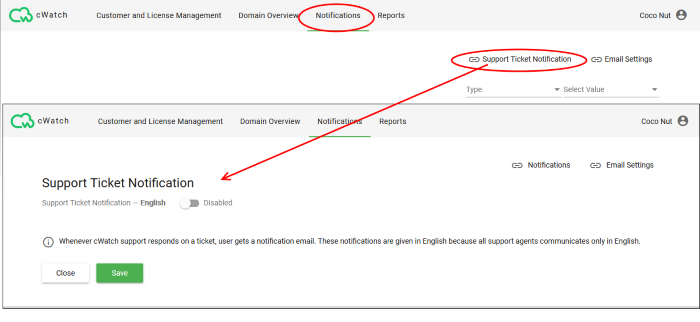
- Support Ticket Notification – If enabled, your customers receive email notifications when a support agent responds to a malware removal request.
- Notification emails are in English, as this is the common language used by our support team. No other language is available.
- Click 'Save' to apply your changes.
- This section lets you set up your outgoing mail server, and the accounts through which cWatch emails are sent
- Click 'Notifications' in the top-menu
- Click ‘Notifications’ or ‘Support ticket notification’ on the right, until the ‘Email Settings’ link appears
- Click the 'Email Settings' link
- This opens a list of existing accounts which can send notifications:

Add a new sender account
- Click the '+' icon at top-left
- Complete all fields in the 'Add Sender' screen:
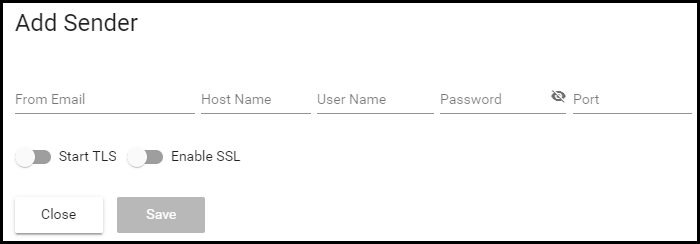
- From Email - The account from which the notification is sent. This address appears in the 'From' field of the notification email
- Host Name - Enter the hostname or IP address of your SMTP server
- User Name / Password - The login details of the sender account
- Port - The port number your mail server uses for outgoing mail. This is port 587 if you use StartTLS, or port 25 if you don't
- StartTLS - Enable if your mail server supports opportunistic encryption via StartTLS. StartTLS is a command, issued by an email client, which upgrades insecure connections between the client and the server to a secure connection.
Visit this site to find out if your mail server supports StartTLS - https://starttls-everywhere.org/
- Enable SSL – Select if your mail server uses an SSL/TLS certificate to secure the connection between the server and the recipient.
- Click 'Save'.
cWatch checks your mail server settings and, if valid, adds the account to the list of senders. You can now send cWatch notifications through this account.
Update a sender email account
- Click the 'Notifications' tab
- Click ‘Notifications’ or ‘Support ticket notification’ on the right, until the ‘Email Settings’ link appears
- Click the 'Email Settings' link
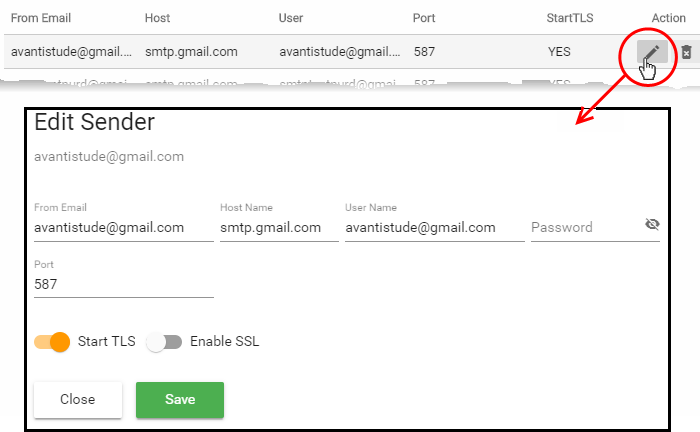
- Mouse-over the row of an email account user > Click the pencil button that appears in the 'Action' column
- Edit the details as required and click 'Save'
The fields in the form are explained above.
Remove a sender email account
- Click the 'Notifications' tab
- Click ‘Notifications’ or ‘Support ticket notification’ on the right, until the ‘Email Settings’ link appears
- Click the 'Email Settings' link
- Mouse-over the row of an email account user > Click the trash can icon that appears in the 'Action' column:
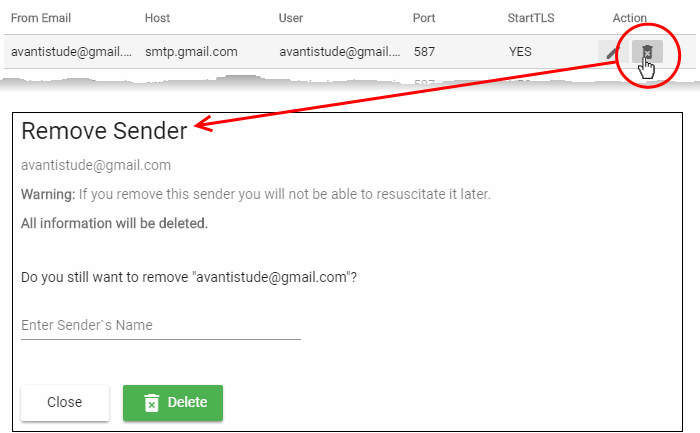
- Enter the email address of the sender account for confirmation
- Click 'Delete' to remove the account
|
Note: You cannot remove sender accounts which To remove the account from notification mails:
You can then delete the email account if required. See Configure Notification Templates and Recipients for more help with this. |
Configure Notification Templates and Recipients
cWatch can send the following types of notification:
Account activation email - Sent when you issue a license to a customer for the first time. The mail containsan activation link which allows them to complete the accountsetup process .
- Distribute License - Sent to provision a new license to a customer.
- Malware Found - Sent to customers when malware
is identified on their site.
- License Expired - Sent to customers when
the cWatch security license on their site expires. The mail contains a link for the customer to renew.
- OWASP Vulnerability Found - Sent to customers when a threat on the OWASP list is found on their site.
- Backup Completed - Sent to customers when a backup of their website
has just finished.
- Backup License Expired - Sent to customers when their cWatch
backup license expires. The mail contains a linkfor the customer to renew.
- Reset Password - Sent to customers who request a password reset
by clicking ‘Forgot Password’ on the login page. You can alsosend password resetmails from the 'Customer and License Management' page. The mail contains a link forthe customer to create a new password.
You can implement different settings per mail type:
- The content and language
- The sender account
- The recipients
Configure notification mails
- Click 'Notifications' in the top-menu
- Click the ‘Notifications’ link on the upper-right
- If you can’t see it, click ‘Email Settings’ or ‘Support ticket notification’ to make it appear
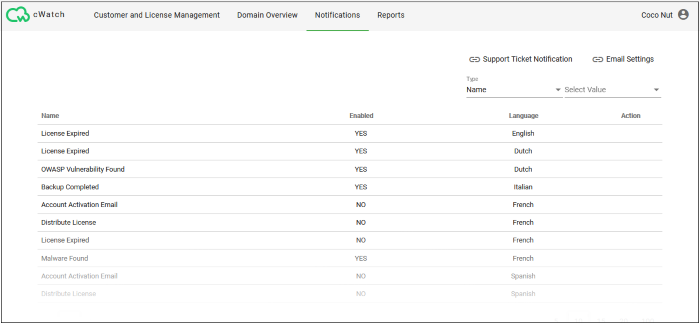
|
Notifications - Columns and Controls |
|
|---|---|
|
Column Header |
Description |
|
Name |
The event for which |
|
Enabled |
Switch the notification on or off. |
|
Language |
The language used in the mail. |
|
Action |
Configure the content, sender email address and recipients for the notification. See Configure a notification email for more details. |
Filter and Search Options:
- The fields at top-right let you filter/search notifications:
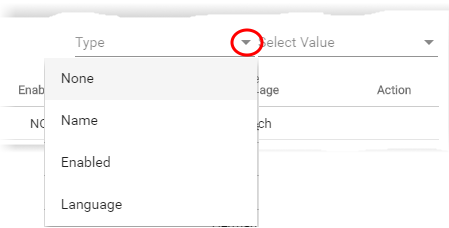
- Select your filter category from the 'Type' drop-down
- Select your search criteria in the 'Value' filed
The table shows five notifications per page.
- Use the number buttons at bottom-right to choose how many notifications are shown per page
- Use the page numbers at the bottom left to navigate through the pages
Click on an event to configure the notification mail.
- Notification templates are available in English, German, Dutch, French, Italian and Spanish. Mails are sent in the language that the customer selects for their portal.
Hover your mouse over the row ofa notification to reveal the 'Settings' button in the 'Action' column and click it.
- The 'Notification Settings' wizard starts:
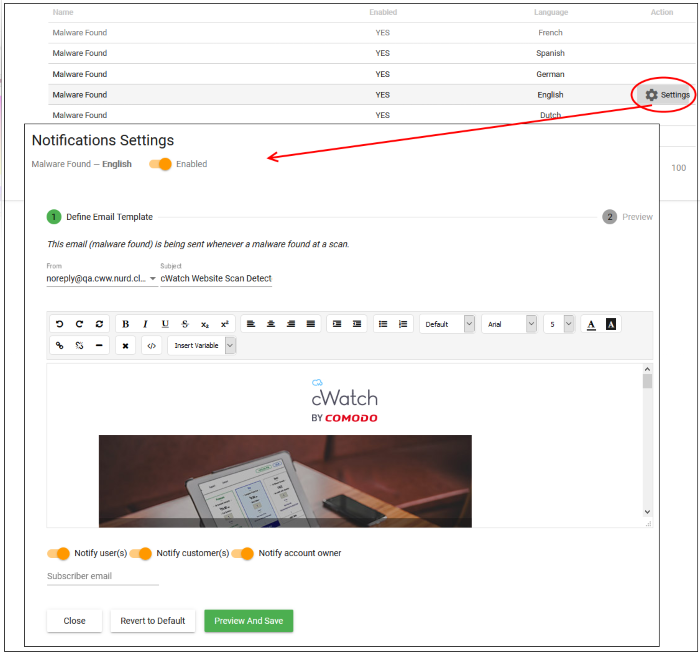
- Use the switch at the top-left to enable or disable the notification
- From - Select the email account from which the notification has to be sent to the recipients
- Subject - Edit the Subject line of the notification mail
- Email Template - Edit the content of the email displayed in the rich text editor. You can use the controls at the top to format the text
- Insert Variable - Variables are items like username, domain name, last scan date etc. The actual value is dynamically inserted in the mail. Place your cursor where you want the variable to go then select an item from the ‘Insert Variable’ drop-down
- Notify users - Select whether or not the email is to be sent to all admin users
- Notify customers - Select whether or not the email is sent to the customer
- Notify account owner - Select whether or not the notification is sent to the primary account holder of your partner account
- Subscriber email - Optional. Enter the email address of an external recipient
- Place your mouse over the field and click the '+' icon that appears to add additional recipients

- Place your mouse over the field and click the trash can icon that appears to remove a recipient

- Revert to Default - Click to reset the notification mail template to default content
- Click 'Preview And Save'
A preview of the full email content is shown:
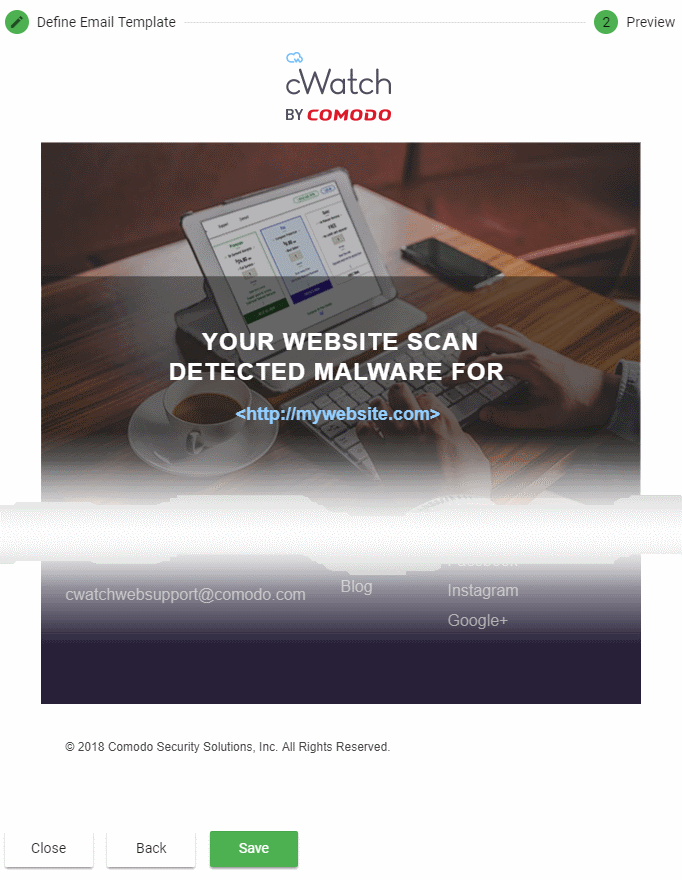
- Click 'Back' to make any changes, if required
- Click 'Save' for your changes to take effect
After saving, you can test the notification works in the following screen:
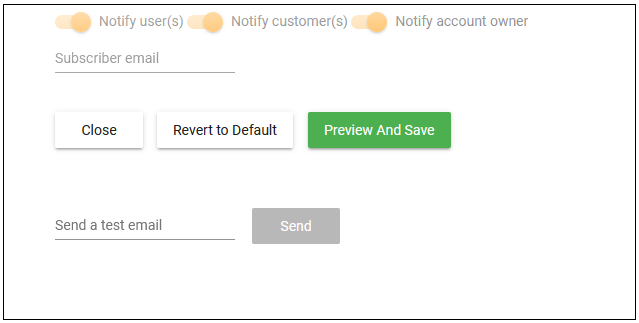
- Send a test email - Enter a valid email address and click 'Send'
Repeat the process to configure other email notifications.


