


Hard Assets
The 'Hard Assets' interface allows you to add and manage networks for enrolled customers. You can add several networks for each customer by specifying their start and end addresses. Each network can be divided into zones depending on organizational requirements.
For each network or zone defined for a customer:
-
A unique authentication token is generated. The authentication token can be used as 'AGENTLESS_AUTH_TOKEN' parameter on the configuration script that can be run on Linux and Windows endpoints with RSYSLOG and NXLOG utilities, for agent less log collection from them. See 'Configure Nxlog and Rsyslog to Send Logs to cWatch Network Server' for more details.
To open the Hard Assets interface for a customer
- Open the 'Asset Management' interface by clicking the 'Menu' button, then 'Assets' > 'Asset Management'.
- Select the customer whose assets are to be added, from the left hand side pane.
The Customer Details pane will open in the right.
- Click 'Manage' at the bottom left of the right pane and choose the 'Hard Assets' tab.
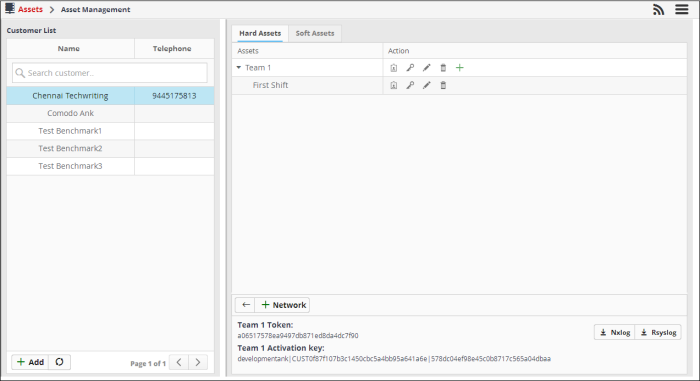
The list of networks/zones added for the selected customer is displayed in the right hand side pane with action buttons. The network token and the activation key for the selected network are displayed in the lower right pane.
|
Hard Assets: Action – Controls |
|
|---|---|
|
|
Clicking this icon displays the authentication token and download buttons for the pre-configured RSYSLOG and NXLOG configuration script files for the network/zone in the lower right pane. |
|
|
Allows you to reset the authentication token for the network/zone and generate new one. Once the token is changed, the old token becomes invalid. The cWatch Network server will not be able to collect logs from RSYSLOG and NXLOG utilities at endpoints with configuration script file containing the old token. |
|
|
Allows you to edit the name and IP address range of the network or the zone. |
|
|
Allows you to delete the network or zone. Deleting a network also deletes the zones configured under it. |
|
|
Allows you to add a zone to the network. |
The Hard Assets interface allows you to:
To add hard assets for a customer
- Select the customer from the left in the 'Asset Management' interface and click the 'Mange' button on the right pane.
- Click the 'Hard Assets' tab
- Click the 'Network' button at the bottom of the right pane.
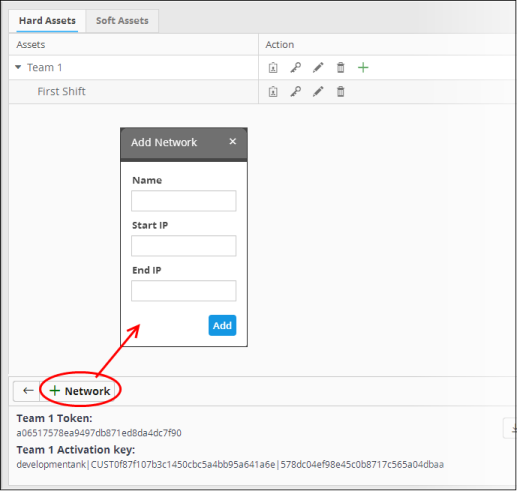
The 'Add Network' dialog will appear.
- Name - Enter the name of the network in the field.
- Start IP - Enter the start IP address if a range of endpoints are to be added. If a single endpoint is to be added, enter its IP address in both the 'Start IP' and 'End IP' fields.
- End IP - Enter the end IP address if a range of endpoints are to be added. If a single endpoint is to be added, enter its IP address in both the 'Start IP' and 'End IP' fields.
- Click the 'Add' button.
The network will be added and a unique authentication token and agent activation key will be generated for the network. Clicking the ![]() button in the new network row will display the token and the key at the bottom of the right pane.
button in the new network row will display the token and the key at the bottom of the right pane.
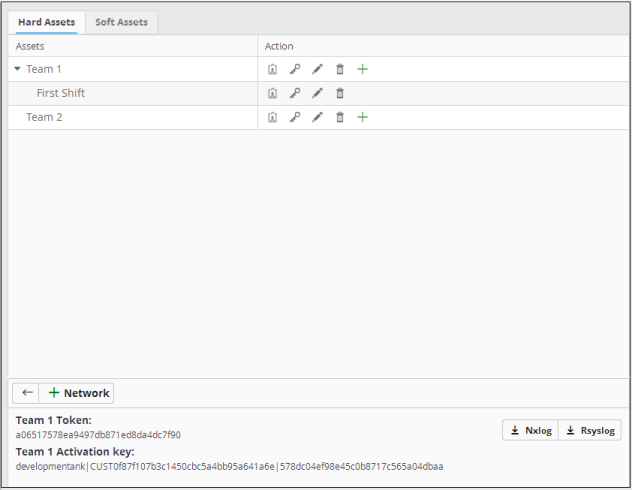
- Repeat the process to add more networks.
To add a zone to a network
- Click the
 button in the row of the network.
The 'Add Zone' dialog will appear.
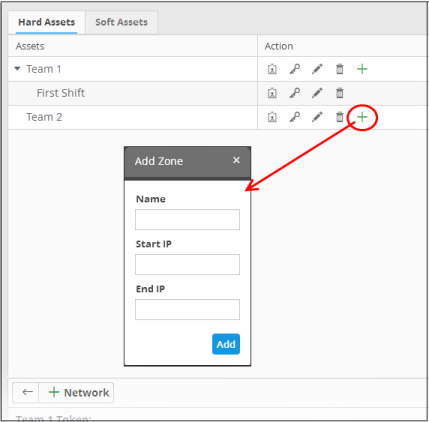
- Name: Enter the name of the zone in the field.
- Start IP: Enter the start IP address if a range of endpoints are to be added for the zone. If a single endpoint is to be added, enter its IP address in both the 'Start IP' and 'End IP' fields.
- End IP: Enter the end IP address if a range of endpoints are to be added for the zone. If a single endpoint is to be added, enter its IP address in both the 'Start IP' and 'End IP' fields.
- Click the 'Add' button.
The Zone will be added to the network and a unique
authentication token will be generated for the zone. Clicking the ![]() button in the row of the new zone will display the token and the key at the bottom of the right pane.
button in the row of the new zone will display the token and the key at the bottom of the right pane.
- Click the
 button in the row of the network or the zone.
The 'Edit' dialog will appear. The dialog is similar to Add Network or Add Zone dialog.
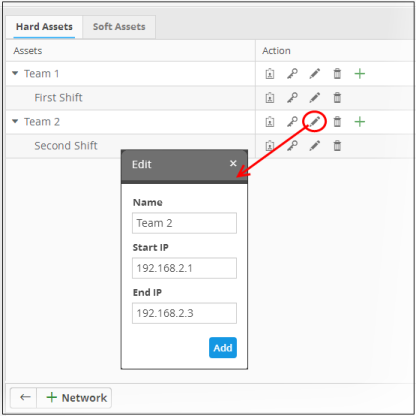
- Edit the details as required and click the 'Add' button.
- Click the
 button in the row of the network or the zone.
A confirmation dialog will appear.
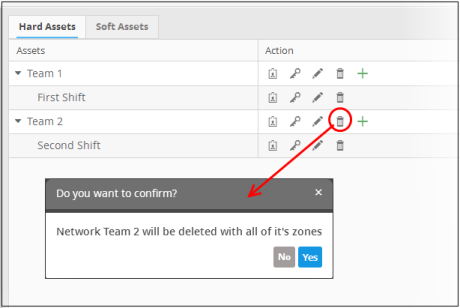
- Click 'Yes' to remove the network or the zone. Please note that if a network is removed, the zones under it will also be removed.
To get the authentication token, activation key and the configuration script files for a network or a zone
- Click the
 button in the row of the network or zone.
The authentication token and the agent activation key for the item will be displayed at the bottom of the screen.
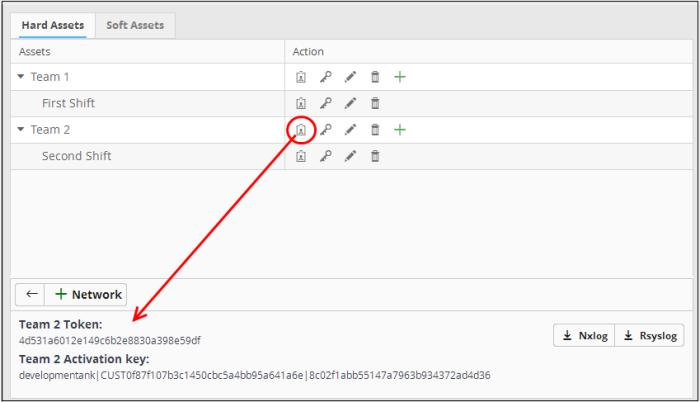
- Authentication token - The authentication token can be used as 'AGENTLESS_AUTH_TOKEN' parameter on the configuration script that can be run on Linux and Windows endpoints with RSYSLOG and NXLOG utilities, for agent less log collection from them. See 'Configure Nxlog and Rsyslog to Send Logs to cWatch Network Server' for more details.
- Configuration Script Download Buttons - The configuration files can be directly run on endpoints with RSYSLOG and NXLOG utilities respectively without any re-configuration, for them to send logs to cWatch Network server. See 'Configure Nxlog and Rsyslog to send logs to NxNetwork Server' for more details.