Category Action Management
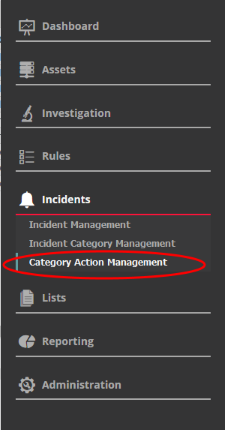
- Click the 'Menu' button > 'Incidents' > 'Incident Management'.
- The category action area lets you manage the actions performed on a class of incidents.
- You can also open this area from by selecting a category in the 'Incident Category Management' screen
- You can manually create and remove actions for incidents
- To open the interface:
- Click the 'Menu' button > 'Incidents' > 'Incident Management'.
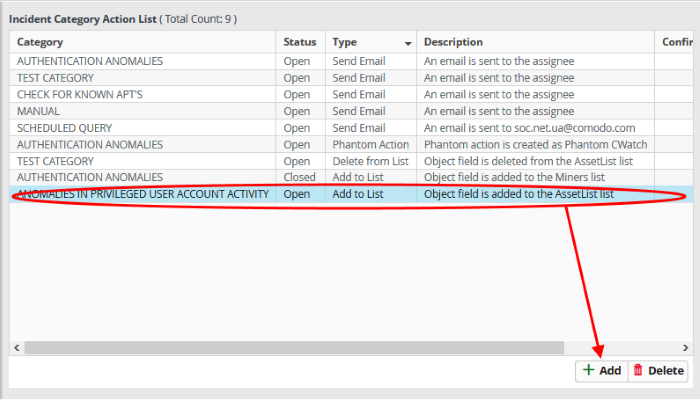
The 'Incident Category Action List' screen will open:
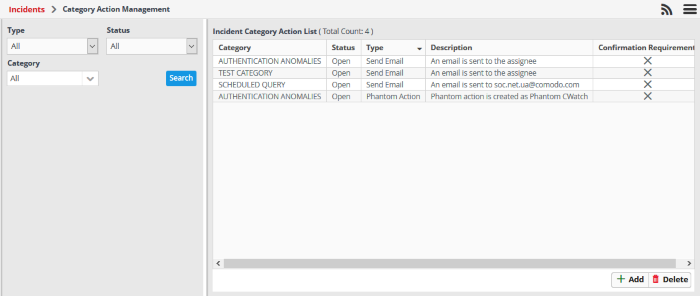
- You can filter the action list by selecting 'Type' and 'Status' of the incident
- The left hand side panel of the interface displays a list of filters to specify a particular group of incidents
- Specify values from the 'Type', 'Status' and 'Category' drop-down, and then click 'Search'
|
Custom Dashboards Interface - Table of controls |
|
|---|---|
|
Category |
The incident type. For example, 'Malware activity' or 'Unusual network Traffic'. |
|
Status |
Shows whether the incident is 'Open', 'In-Progress', 'False Positive' or 'Closed'. |
|
Type |
Whether the event was automatically or manually generated. Automatic events are called 'Correlated'. Manual events are called 'Default'. |
|
Description |
Specifies the current status of action in a line. |
|
Confirmation |
Confirmation required to perform the action. |
Add a Category Action
- Click 'Add' at the bottom-right of the interface:
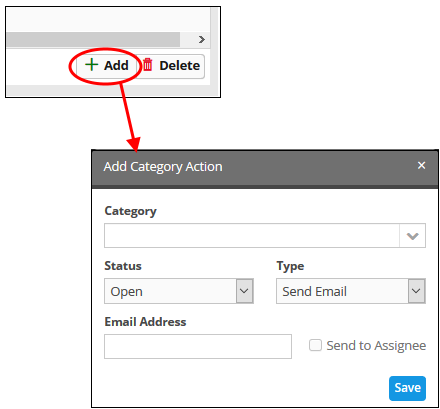
The 'Add Category Action' dialog will open. Users can now follow up and close their category of incidents with the actions assigned to them
- Select the category name to which you want to add an action
- Choose the status of your incident category from the 'Status' drop-down list
- Select the type of action you want to take from the 'Type' drop down
- Enter the email address of the user in the 'Email Address' field
- Select 'Send to Assignee' option if you want to send emails to the user assigned in the category management interface
- Click 'Save' to add the action to the list
Delete an Incident Action List
- Select the incident that you want to deleted and click the 'Delete' button on the bottom right
A confirmation dialog will be
displayed before you want to delete the incident.
