Manage Tagged Rules
- The 'Tagged Rules' interface lets you create rules to monitor network activity for specific events. You can tag those events with labels of your choice.
- If a matching event is found in the streaming logs then it is tagged with your label.
- Tagged
events can be queried from the 'Event
Query' page in the Investigation section.
- Tagged
rules can be applied to customers by their assigned administrators.
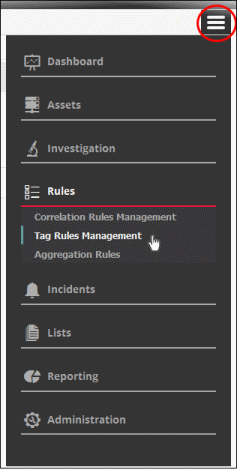
- Click the 'Menu' button > 'Rules' > 'Tag Rules Management' to open the tag-rules management interface:
The 'Tag Rules Management' interface will open:
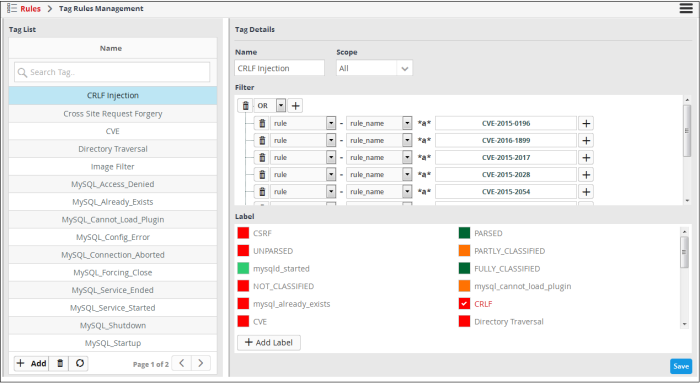
The left-panel shows existing tag rules. The main panel shows the parameters of the selected tag rule. You can configure the rule from here.
|
Tag Rules Management Interface - Table of controls |
|
|---|---|
|
|
Search for a particular tag rule. Enter the name of the rule fully or partially and click the search icon. The rules matching the entered text will be listed. To view the full list of rules again, clear the search field and press 'Enter'. |
|
|
Allows you to add a new tag rule. |
|
|
Allows you to delete selected tag rules. |
|
|
The refresh button allows to instantly update the rules list. |
|
|
Allows you to a add new name for the tag. |
|
|
Allows to select customers to whom the tag rule will be applied. |
|
|
Allows you to configure filter parameters for a tag rule. |
|
|
Allows you to add new labels for tag rules. |
|
|
Allows you to save the configured tag rule. |
The interface allows administrators to:
From the Tag Rules Management interface, you can create a new tag rule, edit it and delete if no longer required.
To create a new tag rule and apply it for a customer
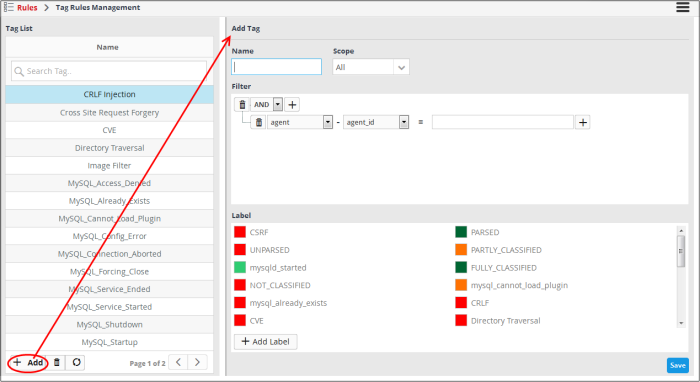
- Click the 'Add' button at the bottom of the left pane
The 'Add Tag' screen will be displayed on the right side.
- Enter a new name for the tag rule in the 'Name' field
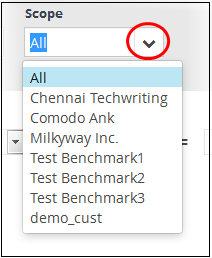
- Select the customer to whom the rule will be applied from the 'Scope' drop-down. Please note that you can apply the rule for all customers or any one customer. If you want to apply it to two or more customers, create a similar tag rule and apply it for each customer.
The next step is to add filters for the tag rule. By default, the 'AND' operator, 'agent' field group and 'agent_id' field will be displayed under the 'Filter' section.

The process of adding filters is same as explained' in 'Configure Event Queries'. Click here to view the details about adding filters. An example of filters added to a tag rule is shown below:
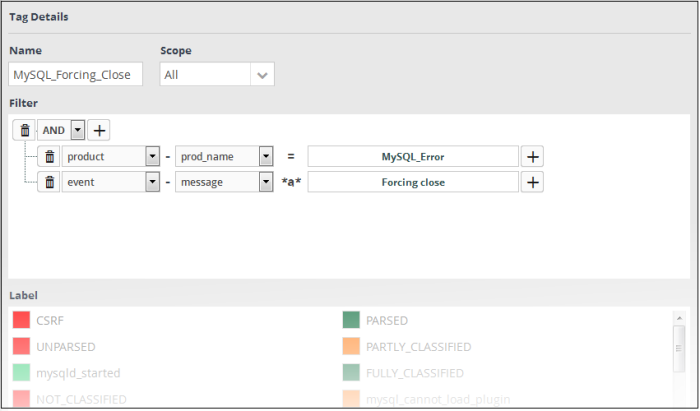
After adding filters for a tag
rule, the next step is to label it.
- Select a label from the 'Label' section. If you haven't yet created a label you can add one by clicking the 'Add Label' button. See 'Create a New Label' for more help with this.
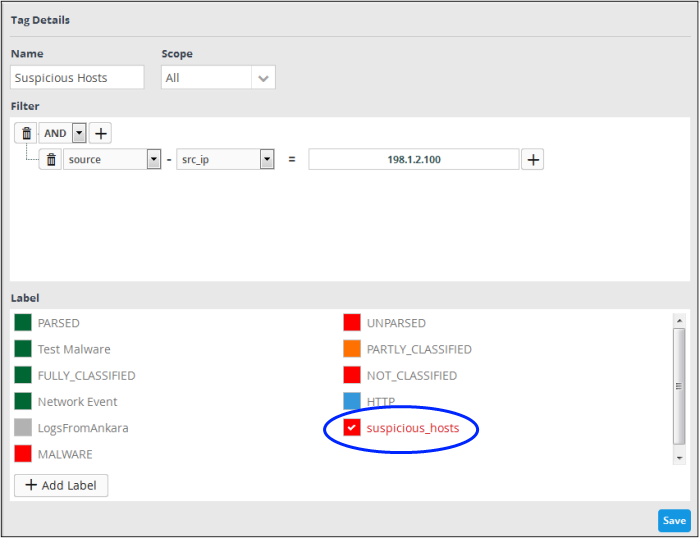
-
Click the 'Save' button.
The tag rule will be saved and listed on the left. The rules will be checked every 15 minutes by cWatch and the events will be updated accordingly.
Now that a tagged rule is created,
you can search for event queries that match the tagged rules.
- To do that, click the menu button, then 'Investigation' > 'Event Query'.
See 'Configuring Event Queries' for details about query building.
A 'New Query' builder interface will be displayed. An example of query building for searching events that matches tag rules is shown below:

The value field drop-down will display all the tag rule labels added for the customer.
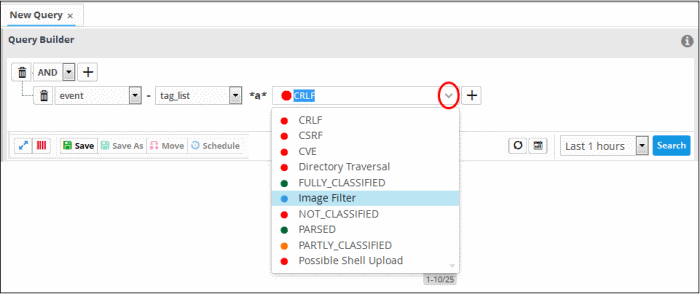
-
Select the tag rule label from the list, select the search period from the 'Last...' drop-down and click the 'Search' button.
The query results that matches the tag rule conditions will be displayed:
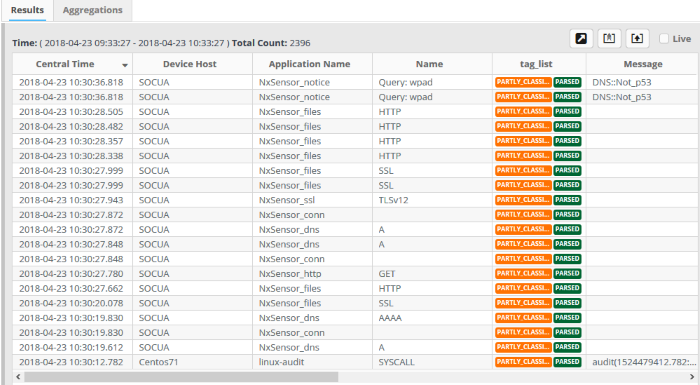
- You can also view the tag associated with the event by clicking on an event log.
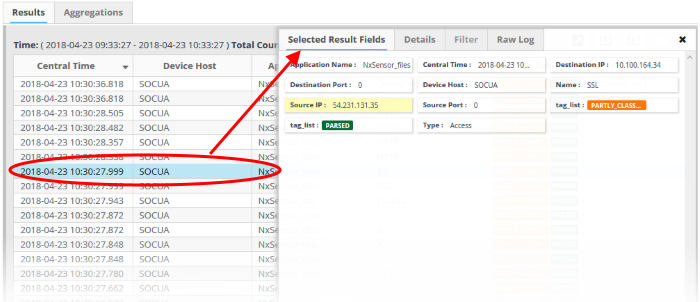
Multiple 'tag_list' labels in the details dialog indicates that the event satisfies more than one tag rule. You can save the query and use the same for incident creation. See 'Configure Event Queries', 'Manage Correlation Rules' and 'Manage Incidents' for details about query building and configuring correlation rules in order to create incidents.
To edit a tag rule
- Select the tag rule from the left menu
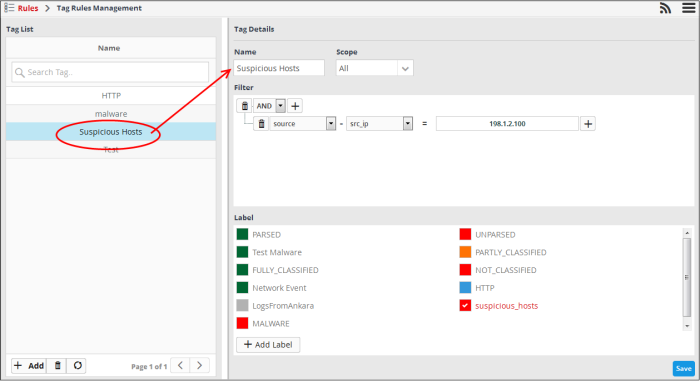
- To change the name, edit it directly in the 'Name' field.
- To change the customer, select it from the 'Scope' drop-down. Please note that you can apply the rule for all the customers or any one customer. If you want to apply it to two or more customers, create a similar tag rule and apply it for each customer.
- If required, modify the filters as explained above.
- Change the label for the rule from the 'Label' section.
- Click the 'Save' button. The rules will be checked every 15 minutes by cWatch and the events will be updated accordingly.
To delete a tag rule
-
Select the tag rule and click the trash can icon at the bottom
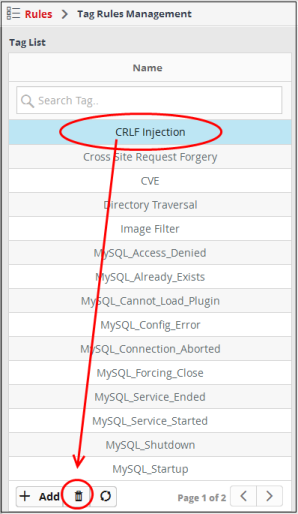
The selected tag rule will be removed from the list. Please note that the label associated with the rule will also be removed only in future events.
- Click the 'Add Label' button at the bottom of the 'Label' section.
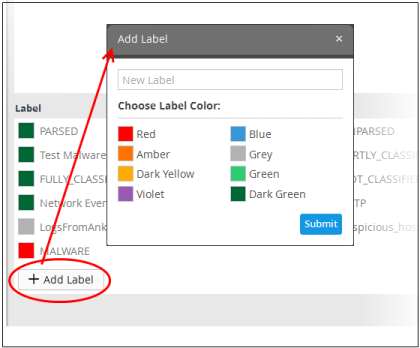
- Enter a name for the label in the 'New Label' field
- Select the color that should be displayed for the label in the event details dialog.
- Click the 'Submit' button
The new label will be added and displayed.
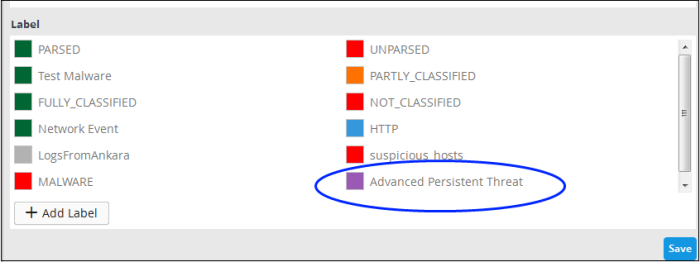
The newly added label can be used for a tag rule.


