Configure Customer Websites
- This section explains how you can add a customer's website to cWatch.
- After adding a site, your customer needs to configure their DNS to route traffic through cWatch. They also need to upload the cWatch agent to enable malware scans.
- Each domain requires one license. Please make sure you have enough licenses to cover the domains you want to protect.
There are three ways you can add customer websites to cWatch:
Add websites using the wizard
The 'Add Sites' wizard lets you create new sites in cWatch and associate them with licenses.
- Open the 'Customer and License Management' tab
- Select the customer for whom you want to add the site
- Click
the 'Add Sites' icon
 in the actions menu
OR
- Click the menu button at top-right and select 'Add Sites'
This starts the wizard:
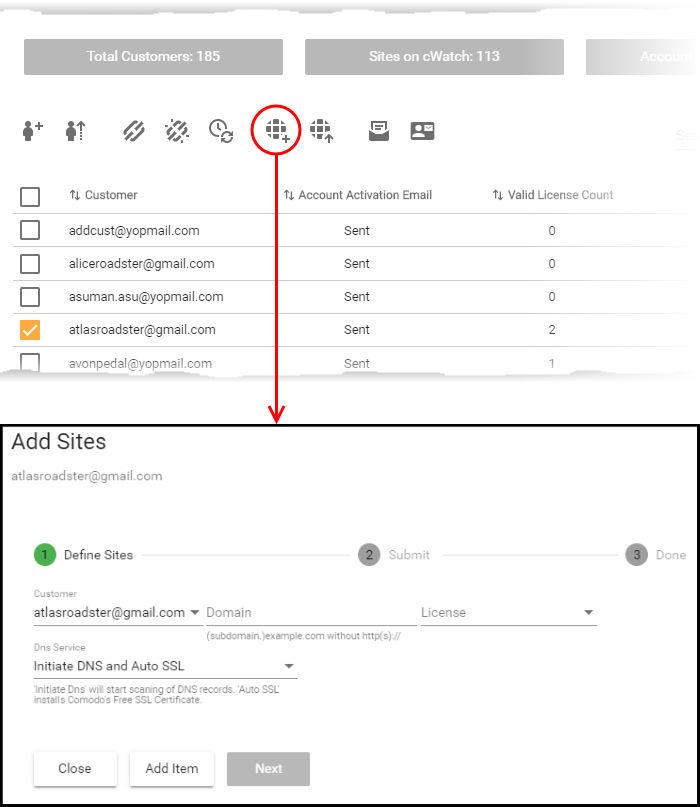
Step 1 - Define Sites
- Domain - Enter the website URL without http/https at the start. E.g. - example.com or subdomain.example.com.
- License - Select the customer license you would like to apply to the site
- DNS Service - The options available are:
- No DNS - Add a website but don't use Comodo DNS. DNS must be setup later by you, or the customer, in order to enable cWatch protection.
- Initiate DNS - Retrieves the DNS records of the website then implements these records in cWatch (dnsByComodo service). Your customer now only needs to point their name servers to cWatch in order to enable the service. This saves your customer the step of adding CNAME and A records to cWatch for each of their sites.
- Initiate DNS and Auto SSL - Configures DNS as explained above and also provides the customer a with with a free SSL certificate. The process first checks if the customer's name servers are pointing to dnsByComodo. After verification, cWatch generates a key pair, requests the certificate, creates a CNAME DNS record on dnsbyComodo, validates the domain, collects the certificate and installs it on cWatch edge servers.
The certificate will encrypt traffic between the CDN servers and the website's visitors. It will not secure the connection between the customer's server (where the site is hosted) and the CDN (where the customer's site is cached).
- Click 'Next'.
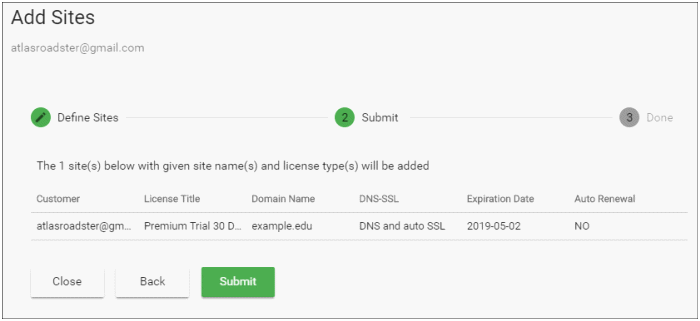
- Review the website and license parameters and settings
- Click 'Back' to change settings, if required
-
Click 'Submit'
Step 3 - Finalization
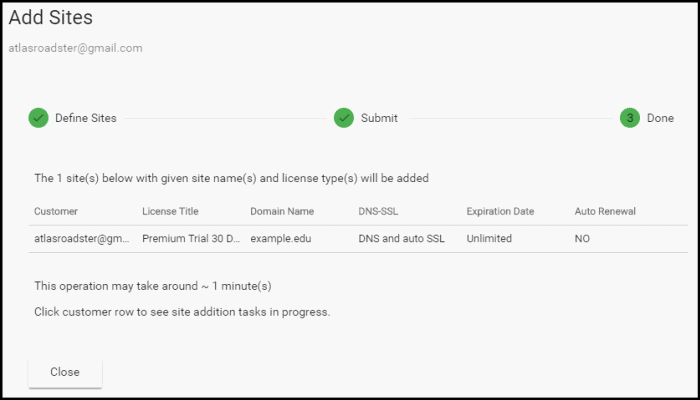
- Click 'Close'
cWatch protection is enabled on the site once provisioning is complete. You can see the progress in the 'Site Provisioning' column of the customer details screen:
- Open the 'Customer and License Management' tab
- Click on the row of a customer whose details you want to view
- The site integration status is displayed in the Site Provisioning column under 'Licenses'.

- See View Customer Details and Licenses for more details.
-
You can add a website backup license once the site is provisioned. See Associate backup license to a website in View Customer Details and Licenses for help with this.
Import Customer Websites from a CSV file
- You can add multiple websites by importing from a comma separated values (CSV) file.
Create CSV File
There are two ways to do this:
- Create a .csv file using a text editor or spreadsheet application
- Each line of the csv should contain five, separated values:
- Email address of the customer
- Domain name
- License key
- Initiate DNS
- Auto SSL
Example:
jack.potts@jacksgreatpots.com,jacksgreatpots.com,7bd632bc-81b4-4ca0-b187-8c78901a194f,true,false
- No spaces after the commas. All fields are mandatory.
- The file should not contain column headers and each line should contain a single customer.
- The file should not contain column headers and each line should contain a single customer.
Get a customer's license keys
- Open the 'Customer and License Management' tab
- Click on a customer to open their details screen
- Click 'Download' below 'Licenses' to download a list of their license keys
Download and modify a template
- Open the 'Customer and License Management' tab
- Click
the 'Import Sites' icon

OR
- Click the menu icon at top-right and choose 'Import Sites' from the options
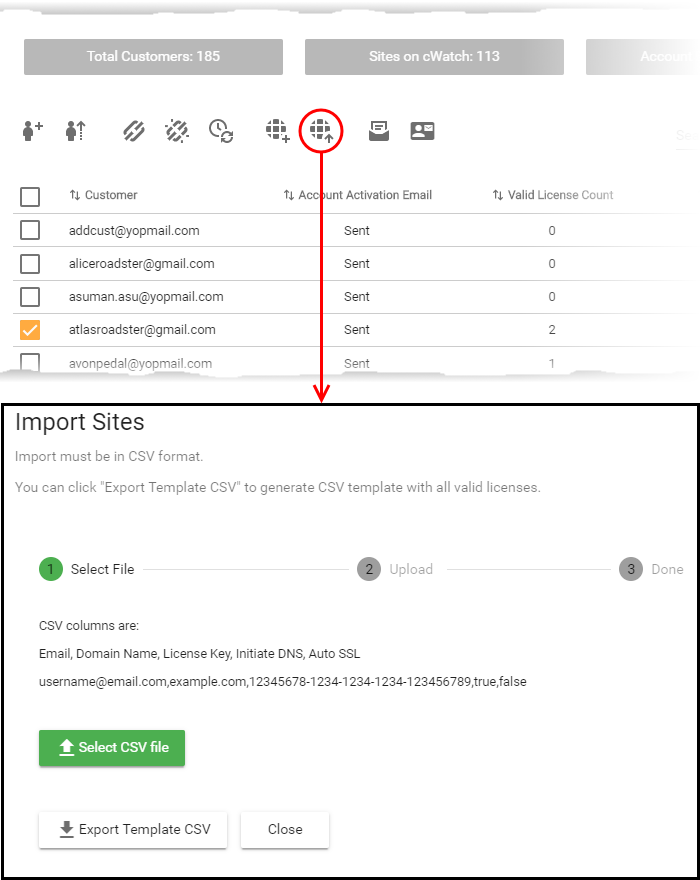
- Click 'Export Template CSV' at the bottom of the 'Import Sites' screen
- The export file is a list of your customers and their license keys:

- Delete all rows that you don't need. Keep the rows with customers/licenses for whom you want to add sites.
- Enter the domain you want to add for the customer in column B
- Edit the 'Initiate DNS' and 'Auto SSL' columns as required.
- Save the CSV file.
Import websites from a CSV file
- Open the 'Customer and License Management' tab
- Click
the 'Import Sites' icon

OR
- Click the menu icon at top-right and choose 'Import Sites'
The 'Import Sites' wizard starts:

 Click
'Select CSV File', browse to the file you want to import and click
'Open'
- Domain details will be fetched from the file and shown in the interface as follows:
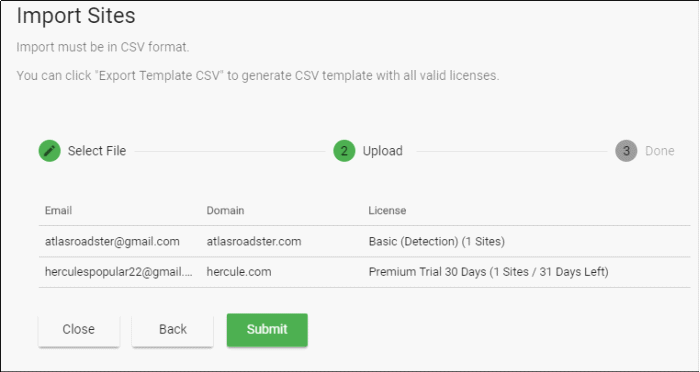
- Click 'Submit' to import the information into cWatch
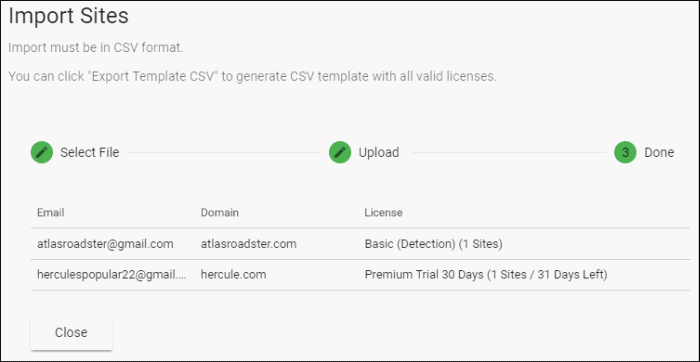
- Click 'Close' to finish the wizard.
The process may take a few minutes. You can view import status in the 'Customer Details' screen:
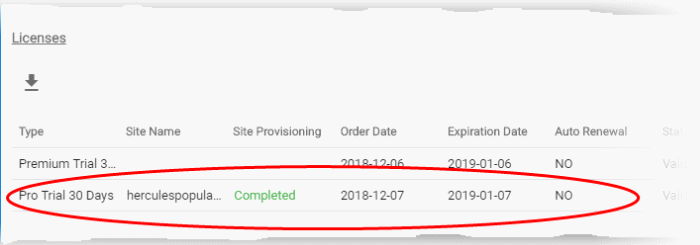
-
See View Customer Details and Licenses if you need help with this screen.
-
You can associate backup license to the site once provisioning is complete. See Associate backup license to a website in View Customer Details and Licenses for help with this.


