Comodo Help
Find the desired product help
Xcitium SIEM

Xcitium SIEM

cWatch Web Security - Partner Portal Guide

English

Print Help Download Help
Introduction To CWatch Partner Portal > Configure Additional Settings > Customer Portal Settings > Configure Hosting Access Link
  • Introduction To CWatch Partner Portal
    • Login To Your Account
    • Add Admin Users
    • Add And Manage Customers
    • Distribute And Manage Licenses
    • Configure Customer Websites
    • Manage Notifications
    • The Customer And License Management Interface
      • View Customer Details And Licenses
    • Domain Overview
      • View Domain Details Of A Website
    • View CWatch Reports
    • Configure Additional Settings
      • Customer Portal Settings
        • Set Customer Portal Access URL
        • Customize Name Server And CDN Zone
        • Configure Hosting Access Link
      • Configure Remote Access
      • License And SSL Purchase Settings
        • Set License Upgrade/Renewal Links
        • Set SSL Certificate Purchase Link
        • Set Domain & Hosting Transfer Links
        • Set New License Purchase Link
        • Configure Upgrade Notification Messages
      • Customer Portal White Labeling And Appearance Settings
        • Configure Brand Logos
        • Configure Trust Seal Images For Your Customers Websites
        • Configure Legal Information
        • Configure Customer Portal Languages
        • Customize License Names
        • Configure Online Chat
        • Set Customer Portal Browser Tab Title
        • Select Customer Portal Options
    • Add And Manage Sub-Resellers
      • Add A Sub-Reseller
      • View Sub-Reseller Details And Licenses
      • Edit A Sub-Reseller Profile
    • Membership Plans
    • Manage Your CAM Account

Configure Hosting Access Link


  • The host access link lets your customers login to cWatch from your website.
  • You must provide a first-level domain name. Sub-domains are not accepted. You must also upload a wildcard SSL certificate.

Set hosting access link

  • Click the 'Profile' icon at top-right then choose 'Settings'
  • Click the key icon  in the left-menu

Or

  • Click the menu button at top-right then select 'Access'
  • Click the 'Hosting Access Link' stripe


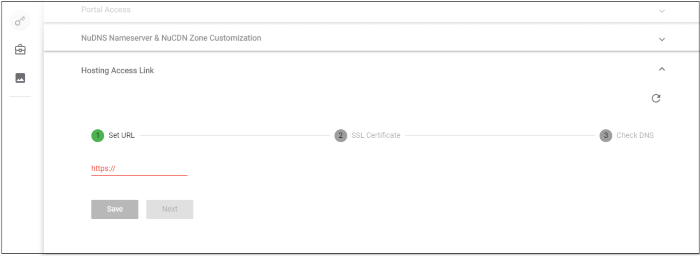
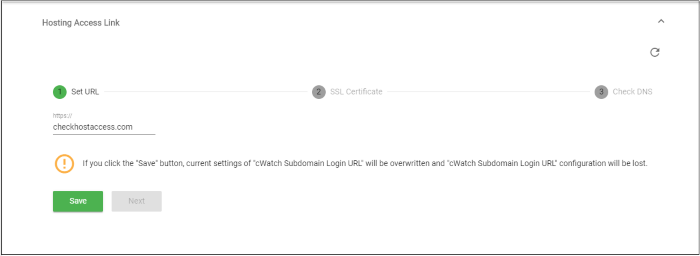
  • Enter your domain name and click 'Save'

Note – The above will overwrite any sub-domain login URL you may have configured (see above).


The process may take up to two minutes.
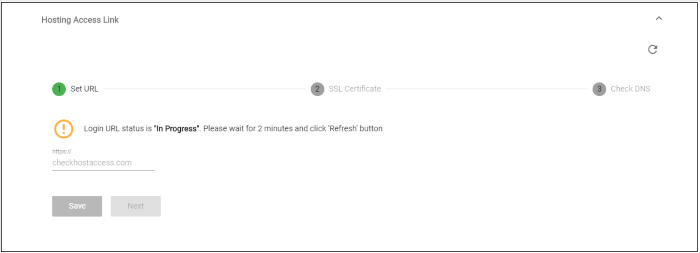


  • Click the 'Refresh' button after two minutes
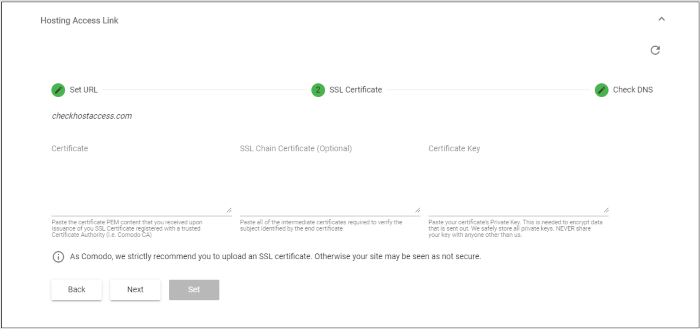
  • The wizard moves to step 2 - 'Upload SSL certificate' 
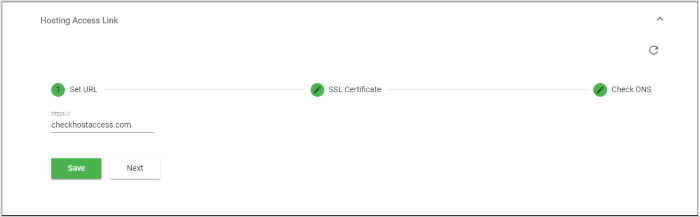


  • Click 'Next'
  • You need to upload an SSL certificate for your login page. The certificate will secure the connection between the login page and your customer, thus protecting their login details in transit.

The certificate is optional but very strongly recommended.


Upload Your Certificate - Form Parameters

Parameter

Description

Certificate

Paste the content of your certificate. The content you are looking for is something like this:


-----BEGIN CERTIFICATE-----
MIICUTCCAfugAwIBAgIBADANBgkqhkiG9w0BAQQFADBXMQswCQYDVQQGEwJDTjEL
MAkGA1UECBMCUE4xCzAJBgNVBAcTAkNOMQswCQYDVQQKEwJPTjELMAkGA1UECxMC
VU4xFDASBgNVBAMTC0hlcm9uZyBZYW5nMB4XDTA1MDcxNTIxMTk0N1oXDTA1MDgx
NDIxMTk0N1owVzELMAkGA1UEBhMCQ04xCzAJBgNVBAgTAlBOMQswCQYDVQQHEwJD
TjELMAkGA1UEChMCT04xCzAJBgNVBAsTAlVOMRQwEgYDVQQDEwtIZXJvbmcgWWFu
ZzBcMA0GCSqGSIb3DQEBAQUAA0sAMEgCQQCp5hnG7ogBhtlynpOS21cBewKE/B7j
V14qeyslnr26xZUsSVko36ZnhiaO/zbMOoRcKK9vEcgMtcLFuQTWDl3RAgMBAAGj
gbEwga4wHQYDVR0OBBYEFFXI70krXeQDxZgbaCQoR4jUDncEMH8GA1UdIwR4MHaA
FFXI70krXeQDxZgbaCQoR4jUDncEoVukWTBXMQswCQYDVQQGEwJDTjELMAkGA1UE
CBMCUE4xCzAJBgNVBAcTAkNOMQswCQYDVQQKEwJPTjELMAkGA1UECxMCVU4xFDAS
BgNVBAMTC0hlcm9uZyBZYW5nggEAMAwGA1UdEwQFMAMBAf8wDQYJKoZIhvcNAQEE
BQADQQA/ugzBrjjK9jcWnDVfGHlk3icNRq0oV7Ri32z/+HQX67aRfgZu7KWdI+Ju
Wm7DCfrPNGVwFWUQOmsPue9rZBgO
-----END CERTIFICATE-----

SSL Chain Certificate

If your certificate contains an intermediate certificate then paste it here. If not, leave this field blank.

Certificate Key

Private key of your certificate


  • Click 'Set' if you have pasted your certificate content
  • Click 'Next' to skip this step
  • The wizard moves to step 3 - 'Check DNS'


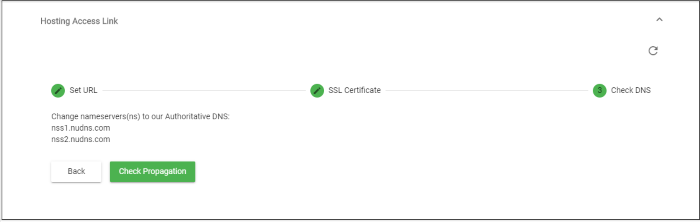
  • Details of the nameservers that you should change is shown
  • Go to your website's DNS management page and change the nameservers
  • Click 'Check Propagation'. You will be taken to https://dnschecker.org to see whether the DNS records have been updated
  • A green tick mark indicates the record update was successful and your login page is ready to use.
Our Products
  • Free Antivirus
  • Free Internet Security
  • Website Malware Removal
  • Free Anti-Malware
  • Anti-Spam (Free Trial)
  • Windows Antivirus
  • Antivirus for Windows 7
  • Antivirus for Windows 8
  • Antivirus for Windows 10
  • Antivirus for MAC
  • Antivirus for Linux
  • Free Endpoint Security
  • Free ModSecurity
  • Free RMM
  • Free Website Malware Scanner
  • Free Device Manager for Android
  • Free Demo
  • Network Security
  • Endpoint Protection
  • Antivirus for Android
  • Comodo Antivirus
  • Wordpress Security
Cheap CDN
  • Bootstrap CDN
  • Semantic UI CDN
  • Jquery CDN
  • CDN Plans
  • CDN
  • Free CDN
Enterprise
  • Patch Management Software
  • Patch Manager
  • Service Desk
  • Website Down
  • Endpoint Protection Solutions
  • Website Security Check
  • Remote Monitoring and Management
  • Website Security
  • Device Manager
  • ITSM
  • CRM
  • MSP
  • Android Device Manager
  • MDR Services
  • Managed IT Support Services
  • Free EDR
Free SSL Certificate
Support Partners Terms and Conditions Privacy Policy

© Comodo Group, Inc. 2025. All rights reserved.