


Setup Local Resolver Virtual Machines and Import Sites
- The local resolver VM is an alternative method of importing networks to Secure Internet Gateway. The feature is only available with Platinum licenses.
- The resolver is deployed as a virtual machine on your network and will forward public DNS queries to Secure Internet Gateway DNS servers.
- The network will be automatically imported to Secure Internet Gateway after you deploy the resolver.
- The resolver method offers some key benefits over the 'direct' method of the wizards:
Benefits:
- DNS data is encrypted in transit, enhancing your network security.
- The resolver records the IP address of the client from which the DNS request originated. These addresses are included in Secure Internet Gateway logs and reports, which gives you insight into the browsing patterns of your endpoints.
- You can apply different policies to internal IP addresses and sub-nets, giving you granular control over the network
- See Add Internal Networks for more on defining internal address blocks for different policies
- You do not need to install agents on endpoints. You just need to change the DNS settings on the endpoint to point to the resolver's local IP address.
- Local resolver virtual machines require minimal configuration (only one CPU and 1GB of RAM) to process millions of DNS queries.
Best Practices:
- For high-availability, we recommend you deploy two local resolvers for each network you import. You can configure the resolvers in a master-slave relationship. If the master fails, the slave will continue to forward queries to Secure Internet Gateway DNS.
- Master and slave resolvers should be implemented on separate servers/hosts.
- If you have multiple DNS egress points from separate sites, you will need to deploy separate pairs for each site of the same office/environment.
Minimum System Requirements:
- A virtual machine application (VMWare, VirtualBox or Hyper-V)
- One virtual CPU
- 1024 MB of RAM
- 7 GB of disk space
|
Important Note: For high traffic sites, we recommend 2 virtual CPUs and 2048 MB of RAM for each VA. A high-traffic site is one that receives more than 500 DNS queries per second. |
The rest of
this section explains
how to install the local resolver VA's
Setup the Local Resolvers
Step 1 - Download the Setup File
- Login to Secure Internet Gateway
- Click 'Configure' > 'Objects' > 'Sites & Virtual Appliances'
- Click 'Download Component' at the top-right
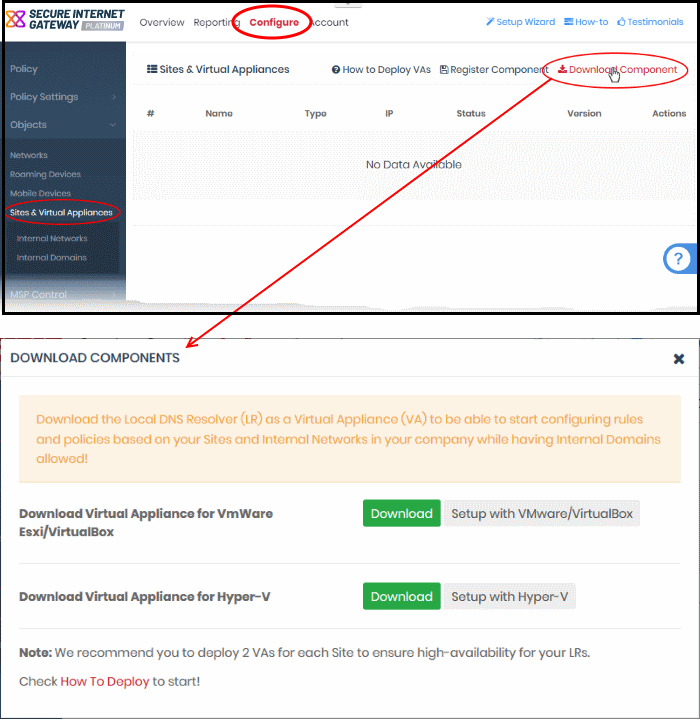
The resolver VA can be setup on virtual machines like VMWare, VirtualBox and Hyper - V.
- Click the 'Download' button beside the VM application you want to use
- The setup package will download in .zip format
- The package contains an OVA or HYPER-V file depending on the VM you chose. The package also contains a text file with login credentials to access the appliance.
Step 2 - Setup the Master Virtual appliance
- Copy the package to the hosts on which you want to setup the appliance.
- Extract the package.
- Install the virtual appliance.
The XSIG interface contains tutorials to help you install the VA on VMWare, VirtualBox and Hyper-V.
- Click Configure > Objects > Sites & Virtual Appliances
- Click 'How to Deploy VAs'
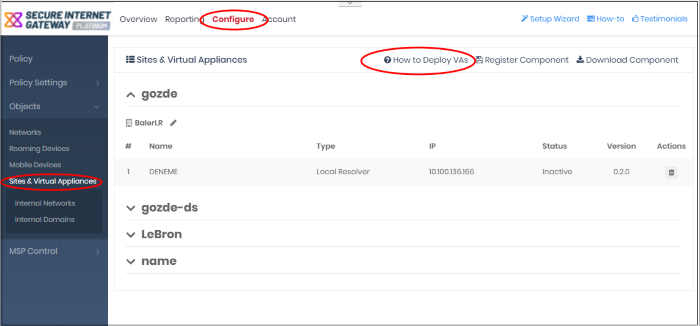
The instructions page explains how to install the VA on VMWare, VirtualBox and Hyper-V:

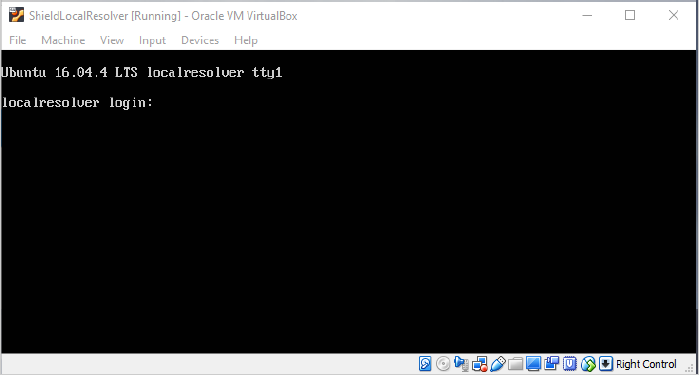
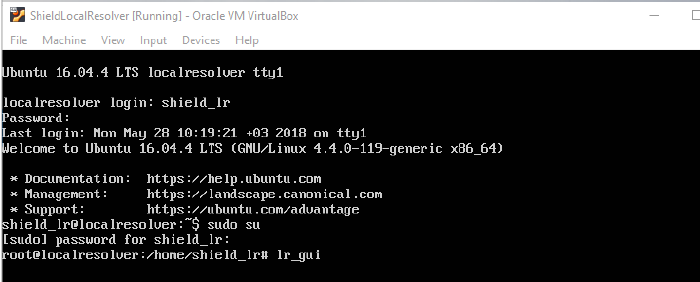
- Start up the VA once installation is complete.
- Login to the appliance with the username and password in credentials .txt. This file is in the VA package you downloaded.
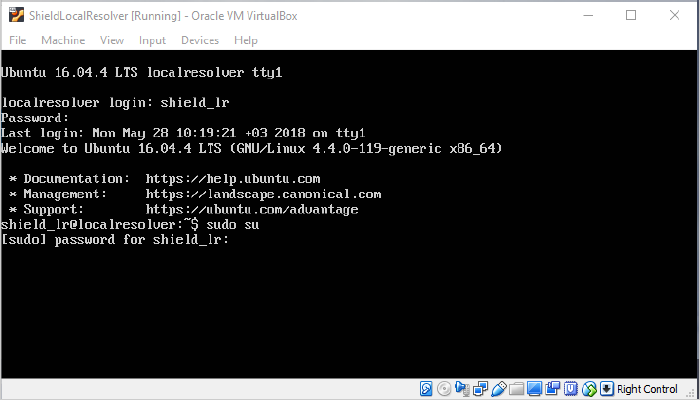
- Run the 'sudo su' command and enter the root password contained in the 'credentials.txt'. This gives you root access.
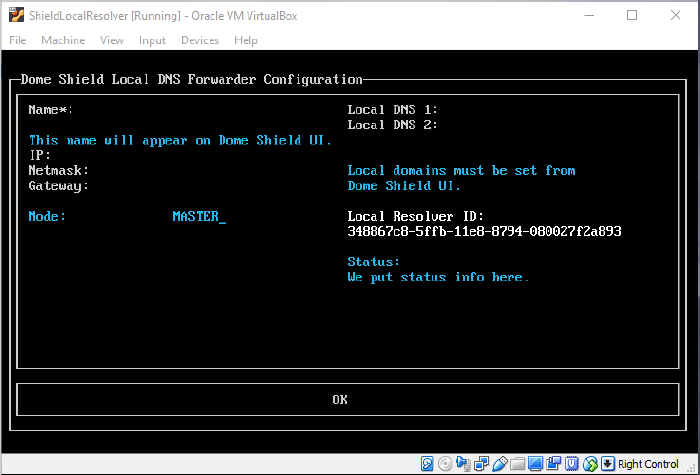
Run 'lr_gui' command as shown below to open the resolver configuration screen:
The resolver configuration screen opens.
|
LR Configuration Screen – Table of Parameters |
|
|---|---|
|
Form Element |
Description |
|
Name |
Type a label to identify the master VA. This name will appear in the Secure Internet Gateway interface after registration. |
|
IP |
Assign an IP address to the local resolver. |
|
Netmask |
Enter the LR netmask. |
|
Gateway |
Enter the IP address of the network gateway. |
|
Mode |
Select 'Master' if this is the first resolver on the network. |
|
Local DNS 1 and Local DNS 2 |
Enter the IP of your primary and secondary local DNS server to resolve local names. |
|
Local Resolver ID |
Make a note of this ID string. You need this to register the resolver and import the network into Secure Internet Gateway. See Step 3 - Register the Master VA for more help. |
|
Status |
Progress of the VA setup process. |
- Configure the parameters, select OK and press 'Enter'
Your configuration is saved.
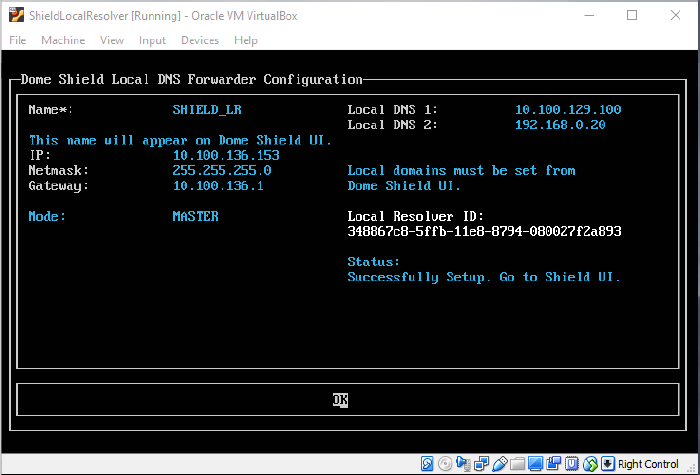
The next step is to register the LR with Secure Internet Gateway.
Step 3 - Register the Master VA
- Login to Secure Internet Gateway
- Click 'Configure' > 'Objects' > 'Sites & Virtual Appliances'
- Click 'Register Component'
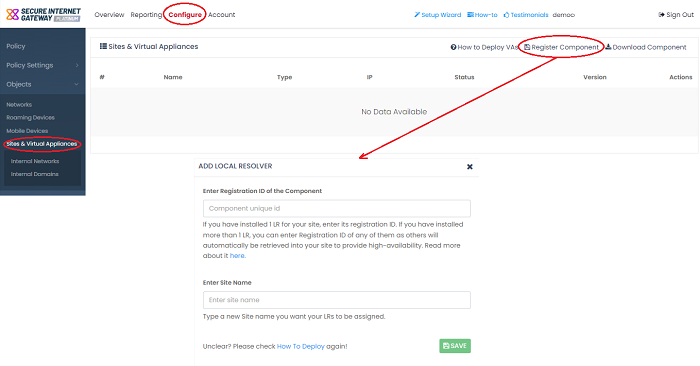
The 'Add Local Resolver' dialog will appear.
|
'Add Local Resolver' dialog – Table of Parameters |
|
|---|---|
|
Form Element |
Description |
|
Enter Registration ID of the Component |
The local resolver identity string generated for the resolver during setup. See the last screen in Step 2 - Setup the Master Virtual appliance if you need help. |
|
Enter Site Name |
Type a label for the network you are about to import. The name is used to identify the network in the Secure Internet Gateway interface. |
|
Select Company |
MSPs' only.
|
- Click 'Save' to register the local resolver and import the network
Click
'Sites & Virtual Appliances' to view the local resolver. You can
apply policy to the whole network, or to internal network segments. See Manage
Imported Sites and Local Resolver Virtual Appliances for more
details.
Step 4 - Setup the Slave VA (Optional)
- Install a local resolver Virtual Appliance on a different server/host on the network. The process is similar to setting up the master LR.
- Start the VA and open the configuration screen
as explained above. Setup the VA as slave resolver:
|
LR Configuration Screen - Table of Parameters |
|
|---|---|
|
Form Element |
Description |
|
Name |
Type a label to identify the slave VA. |
|
IP |
Assign an IP address to the local resolver. |
|
Netmask |
Enter the LR netmask. |
|
Gateway |
Enter the IP address of the network gateway. |
|
Mode |
Select 'Slave'. |
|
Master IP |
Appears after choosing 'Slave' as the mode. Enter the IP address of the master local resolver. |
|
Local DNS 1 and Local DNS 2 |
Enter the IP addresses of the network's primary and secondary DNS servers. |
|
Local Resolver ID |
Make a note of this ID string. You need this to register the resolver and import the network into Secure Internet Gateway. See Step 3 - Register the Master VA for more help. |
|
Status |
Progress of the VA setup process. |
- Configure the parameters, select OK, then press 'Enter'
Your configuration will be saved. The resolver will be registered as 'Slave' to the 'Master'.
Step 5 - Configure endpoint DNS Settings to point to the Local Resolvers
The next step is to configure your endpoints to forward DNS queries to the local resolvers. Open the DNS configuration screen on your endpoints and use the following settings:
- Preferred DNS server – IP address assigned to the master LR VA
- Alternate DNS server - IP address assigned to the slave LR VA