Comodo Help
Find the desired product help
Xcitium Secure Internet Gateway

Xcitium Secure Internet Gateway

Admin Guide Version

English

Print Help Download Help
Introduction To Xcitium Secure Internet Gateway > Setup Options Explained > Setup Wizard - Add Networks
  • Introduction To Xcitium Secure Internet Gateway
    • Purchase A License
    • Login To Secure Internet Gateway
    • Setup Options Explained
      • Tutorial To Add Networks To Secure Internet Gateway
      • Tutorial To Add Roaming Endpoints To Secure Internet Gateway
      • Tutorial To Add Mobile Devices
      • Tutorial To Deploy XSIG Virtual Appliances
      • Setup Wizard - Add Networks
      • Setup Local Resolver Virtual Machines And Import Sites
  • The Admin Console
  • The Dashboard
    • Web Overview
    • Security Overview
    • View Logs
  • Add Networks, Roaming Endpoints And Mobile Devices
    • Add Networks
    • Add Roaming Endpoints
    • Add Mobile Devices
    • Manage Imported Sites And Virtual Appliances
      • Add Internal Networks
      • Add Internal Domains
  • Manage XSIG Rules
    • Manage Security Rules
    • Manage Category Rules
    • Manage Domain Blacklist And Whitelist
    • Manage Block Pages
    • Manage Cloud Browser Settings
  • Apply Policies To Networks And Roaming/Mobile Devices
  • Domain Classification Requests
  • View Protection Details By Customer
  • Reports
  • Read Testimonials
  • View Account Details
  • Appendix - Ports, IP Nos Allowed For SIG Roaming Agent And Local Resolver
  • About Xcitium Security Solutions

Setup Wizard - Add Networks


    • The setup wizard lets you quickly enroll your networks to Secure Internet Gateway protection.
        • If you haven’t yet added a network, then the wizard will start automatically after logging in.
          • You can also start the wizard at any time by clicking 'Setup Wizard' link at top-right:


          • Click 'Secure my network now!'
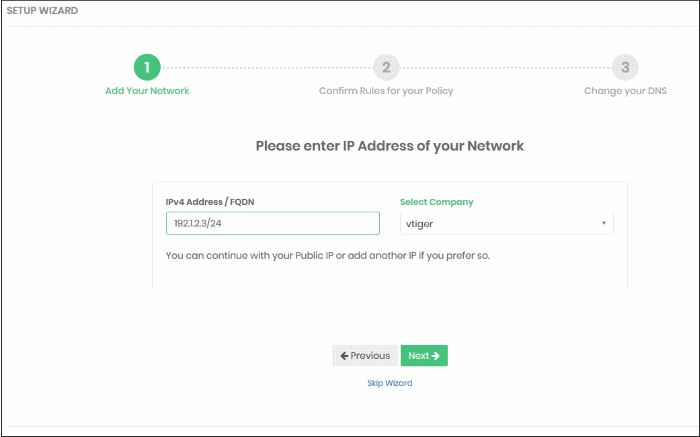

          Step 1 – Add your IP Address


          IP Address / FQDN
          • By default, this shows the public IP of the network from which you are connecting. This network is automatically activated after initial enrollment.
          • You can also add the IP address of a different network you want to protect. Enter the network IP address or fully qualified domain name in CIDR notation.
          • Secure Internet Gateway can accept network prefixes from /24 to /32.
          • Any IP you add here will be automatically activated for protection. Make sure you are able to change the network's DNS settings to Secure Internet Gateway, as explained in step 3.
          • XSIG also supports dynamic IP addresses. You need to download the 'Windows Dynamic IP Updater' agent and install it on a network endpoint. See 'Add Networks' for more information. 
          Select Company - MSPs only. Select the customer organization for which you want to enroll the network. 
          • Click 'Next' to configure rules for the default policy.

          Step 2 - Configure Rules for your Policy


          Configure security and website category rules for the default policy. These will be immediately applied to the network on enrollment.


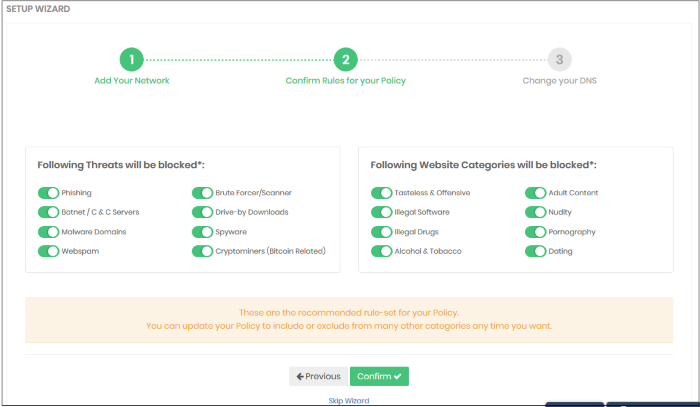
          • All rules are enabled by default. You can enable / disable rules here as required.
          • If you are unsure, then a good rule of thumb is to just leave everything enabled. This will give you maximum protection, and you can easily modify the settings later if any issues transpire.
          • You can modify the policy later by clicking 'Policy Settings' in the left-hand menu. See 'Manage Security Rules' and 'Manage Category Rules' if you need help with these areas.
          Click 'Confirm' to apply your policy.

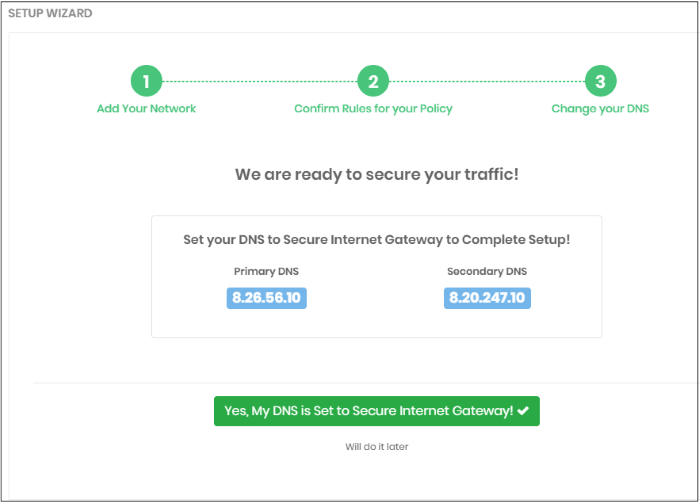
          Step 3 - Change your DNS Settings


          Change your DNS addresses to following XSIG addresses:

          • Preferred DNS server - 8.26.56.10
          • Alternate DNS server - 8.20.247.10

          Click 'Yes, My DNS is set to XSIG' once you have done this:


          That's it. You have now added a network to Secure Internet Gateway.


          • Click 'Configure' > 'Objects' > 'Networks' in the XSIG interface to see all networks that you have added.
          • Note – To support dynamic IP addresses, you need to download the 'Windows Dynamic IP Updater' agent and install it on a network endpoint. See 'Add Networks' for more information.

          Next, see the following items for help with specific areas:

          • Manage XSIG Rules
          • Add Networks, Roaming Endpoints and Mobile Devices to Secure Internet Gateway
          • Apply Policies to Networks Roaming / Mobile Devices
          • The Dashboard
          Our Products
          • Free Antivirus
          • Free Internet Security
          • Website Malware Removal
          • Free Anti-Malware
          • Anti-Spam (Free Trial)
          • Windows Antivirus
          • Antivirus for Windows 7
          • Antivirus for Windows 8
          • Antivirus for Windows 10
          • Antivirus for MAC
          • Antivirus for Linux
          • Free Endpoint Security
          • Free ModSecurity
          • Free RMM
          • Free Website Malware Scanner
          • Free Device Manager for Android
          • Free Demo
          • Network Security
          • Endpoint Protection
          • Antivirus for Android
          • Comodo Antivirus
          • Wordpress Security
          Cheap CDN
          • Bootstrap CDN
          • Semantic UI CDN
          • Jquery CDN
          • CDN Plans
          • CDN
          • Free CDN
          Enterprise
          • Patch Management Software
          • Patch Manager
          • Service Desk
          • Website Down
          • Endpoint Protection Solutions
          • Website Security Check
          • Remote Monitoring and Management
          • Website Security
          • Device Manager
          • ITSM
          • CRM
          • MSP
          • Android Device Manager
          • MDR Services
          • Managed IT Support Services
          • Free EDR
          Free SSL Certificate
          Support Partners Terms and Conditions Privacy Policy

          © Comodo Group, Inc. 2025. All rights reserved.