


Service Level Agreements (SLA)
Click 'Admin Panel' > 'Manage' > 'SLA Plans'
- Service Level Agreement (SLA) plans are an agreement between you and your customer. They define the length of time before a first response must be sent on a ticket, and the length of time by which the ticket must be closed.
- The system default SLA is applied to all tickets unless you apply a custom SLA. You can apply custom a custom SLA to a ticket category, a ticket stage, or a department.
- You can apply an SLA to a particular customer by creating a ticket filter (‘Admin Panel’ > ‘Manage’ > ‘Ticket Filters’).
- Admins can set alerts if the SLA plan is breached.
Open the SLA interface
- Click 'Admin Panel' > 'Manage' > 'SLA Plans'
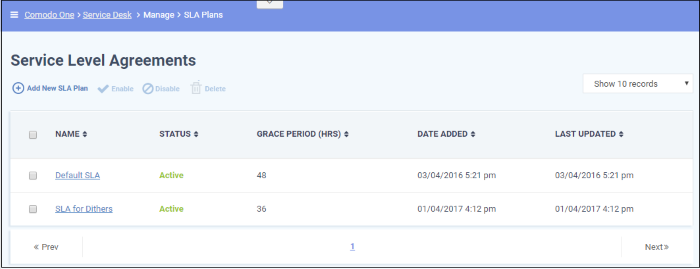
- Name: The name of the SLA. For example, you could name plans after the customer to whom they apply.
- Status: Indicates whether the SLA is enabled or disabled. Only active plans have an effect on tickets.
- Grace Period: Shows how long a ticket can remain open before it is marked as overdue. Your team should aim to close tickets within this time period.
- Date Added: The date on which the SLA was created.
- Last Updated: The date and time the SLA was most recently updated.
- Click 'Admin Panel' > 'Manage' > 'SLA Plans'
- Click 'Add New SLA Plan' at the top:
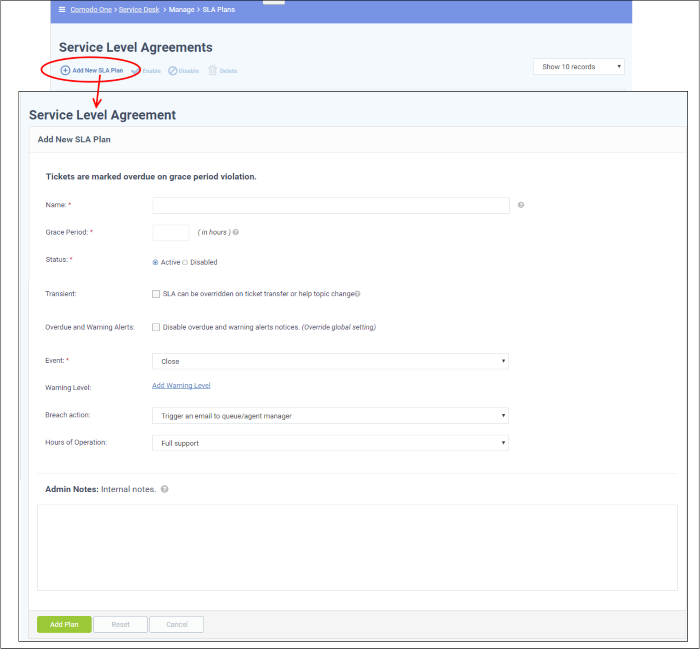
- Name: Enter a unique label for the SLA. For example, you could name it after the customer to whom it applies.
- Grace Period: Enter the max. length of time a ticket can remain open before it is marked ‘Overdue’. The timer starts from the moment the ticket was submitted.
- Status: Activate or deactivate the SLA. Inactive plans have no effect on tickets.
- Transient: Transient plans are overridden if the ticket is transferred to a department or category with a different SLA. This includes by the default/system SLA.
- Overdue and Warning Alerts: If enabled, you will not get overdue and warning alerts for tickets that breach the SLA.
- Event: Choose whether internal alerts are sent if certain actions are not taken by the end of the grace period.
- First Response - An alert is sent to admins/staff if a ticket is not replied to within the grace period.
- Close - An alert is sent to admins/staff if a ticket is not closed within the grace period.
- Warning Level: Warning levels let you generate alerts before the grace period ends. You can set as many alerts as required. Click 'Add Warning Level' to get started:
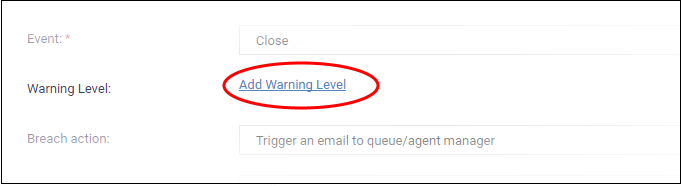
- Level – Enter the % of the grace period that must elapse before the alert is sent. For example, if the grace period is 48 hours and you enter 25% here, then an alert is sent after 12 hours.
- Action – Choose whether to send an email or an SMS to the admin, or increase the ticket’s priority level.

- Breach Action: Select the action to be taken if the ticket is not closed in time.
- Hours of Operation: Choose 'Full Support' and 'Business Hours'.
- Full Support - Your support team is considered available to work on the ticket 24 hours per day.
- Business Hours – Support is available during your business hours. You can define your business hours in Settings > System > Business hours.
For example, say your SLA specifies a ‘Grace Period’ of 12 hours, and your business hours are 9 AM – 5 PM, Mon-Fri. If a ticket is submitted on a Sunday, the SLA will start counting on Monday morning at 9 AM (for 8 hours) and continue on Tuesday (for max. 4 hours). The SLA is breached if the issue is not solved by Tuesday 12 PM.
Admin Notes
Add any notes related to the SLA Plan for internal purpose.
-
Click the 'Add Plan' button to save your new plan.
Edit an SLA plan
- Open the 'Admin Panel' (see the last link on the left)
- Click 'Manage' > 'SLA Plans'
- Click on the SLA Plan name in the list.
The Update SLA Plan screen will be displayed. The update procedure is same as explained above while adding a new SLA Plan.
Delete an SLA plan
- Open the 'Admin Panel' (see the last link on the left)
- Click 'Manage' > 'SLA Plans'
- Select the SLA Plan that you want to delete from the list, click the 'Delete' button at the top of the screen and confirm it.