Active Directory Integration
- Integrating Dome Firewall with your Active Directory (AD) server allows you to implement identity-based security on your network.
- Once a directory has been imported, Dome Firewall will map usernames to IP addresses. This lets you apply firewall policy to individuals or groups.
- The firewall uses LDAP (Lightweight Directory Access Protocol) to import users from Active Directory.
AD server integration involves four steps:
Step 1 - Install the Comodo Dome Firewall AD Agent onto the AD Server
You first need to install an agent on your AD server to facilitate communications:
1. Download the agent setup file:
- Login to your DFW account
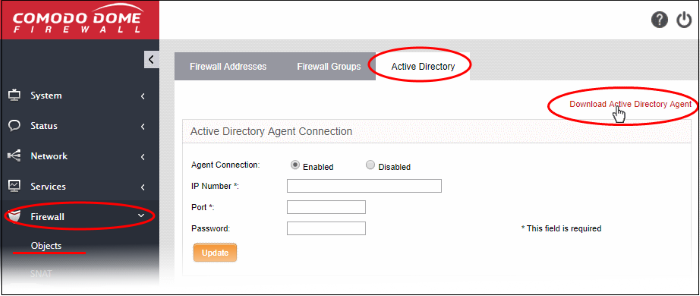
- Click 'Firewall' on the left then 'Objects' > 'Active Directory'.
- Click the 'Download Active Directory Agent' link at the top-right
- Copy the setup files to your AD server
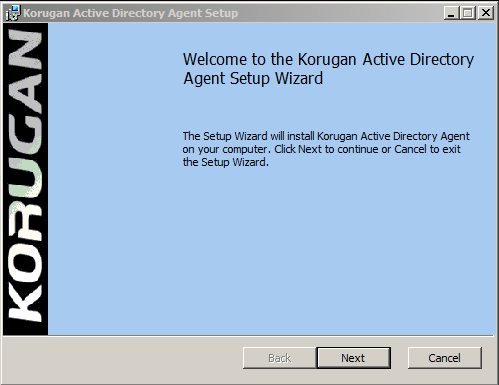
2. Open the setup file to start the installation wizard:
-
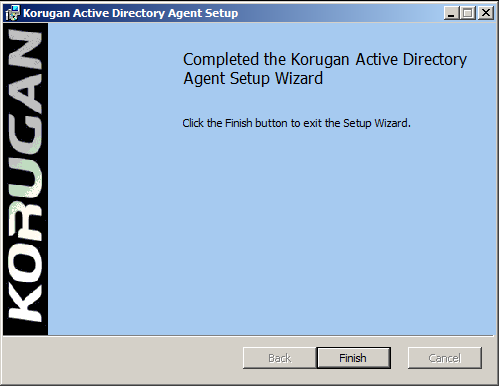
Follow the wizard and complete the installation. By default, the agent will be installed to C:/Program Files (32 bit system) or C:/Program Files (x86) (64-bit system).
Step 2 - Add Socket Exception for the AD Agent in the server
The next step is to configure a socket exception for the agent in Windows Firewall on your server. This will allow the agent to communicate with Dome Firewall.
1. Open the Windows control panel on the server2. Click the 'Windows Firewall' icon to open the firewall configuration panel. Please note, the following instructions may vary slightly depending on your server version
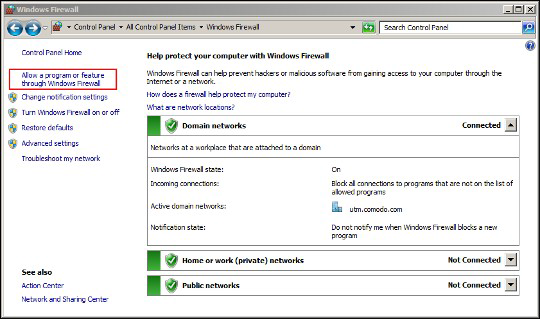
3. Click 'Allow a program or feature':
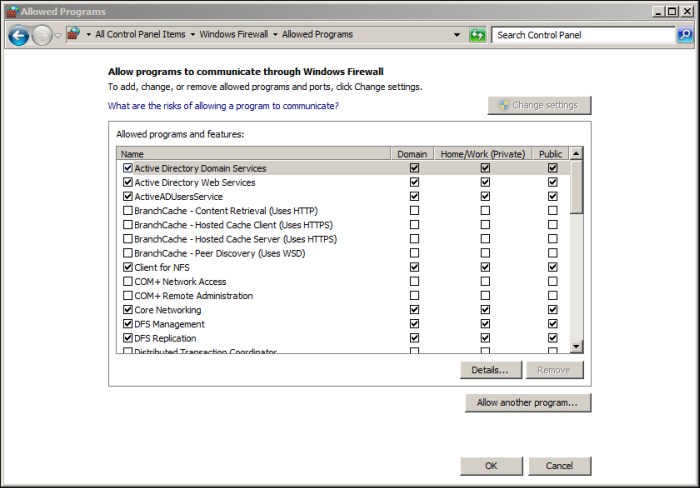
4. On the next screen, click 'Allow another program' to add the agent to the list of exceptions.
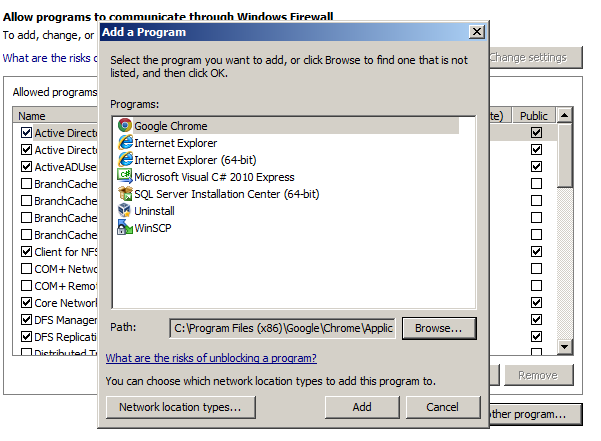
5. Click 'Browse' in the resulting 'Add a Program' dialog. Navigate to the agent's install folder, select 'ActiveADUsersService.vshost' and click 'Open'.
6. Click OK in the 'Allow programs to communicate through the Windows Firewall' dialog to save the settings.
Step 3 - Configure the AD Agent
Next, the agent needs to be configured to connect to the Dome Firewall virtual appliance.
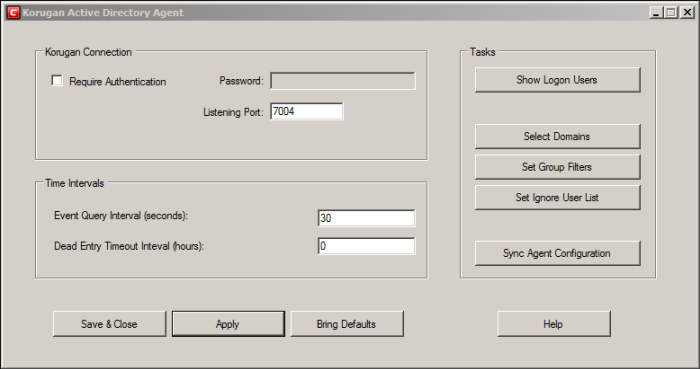
1. Browse to the agent installation folder (C:/Program Files on 32-bit system and or C:/Program Files (x86)) and open 'ActiveADUsersService.exe'.
-
Configure the parameters as shown below:
Connection Parameters
- Require Authentication – Enable if you want the agent to supply a password in order to connect to the AD server. Specify the password in the space provided.
- Listening Port - By default, the server listens to the virtual appliance through port 7004. If you want to change the port, enter the port number in the text field.
Time Intervals
- Every Query Interval - Enter the time interval (in seconds) at which the agent should poll Dome Firewall for updates. It is recommended to set the interval according to the size of the directory. Directories with larger amount of users should be checked more frequently.
- Dead Entry Interval - Dome Firewall will delete a username/IP pair if a user does not login for a certain period of time. For example, if the 'Dead Entry Interval' is set as 720 hours then the pair will be deleted if the user does not login for 30 days.
Tasks
- Show Logon Users – Displays the currently logged-in users and their IP addresses.
- Select Domains – By default, the agent tracks login events for all domains which have been added to the AD server. Click the 'Select Domains' button to enable or disable tracking on specific domains.
- Set Group Filters - By default, the agent tracks login events for all AD user groups. Click the 'Set Group Filters' button to enable or disable tracking on specific domains.
- Set Ignore List - By default, the agent tracks login events for all AD users. Click the 'Set Ignore Users' button to choose which users should not be tracked.
- Sync Agent Configuration – Enables you to export the current configuration of the agent.
- Click 'Apply' to save the configuration
- Click
'Save and Close' to close the application window. The agent process
will continue to run in the background.
The agent is now configured to connect to the virtual appliance. The next step is to configure Dome firewall to receive the connection.
Step 4 - Configure the AD Agent connection and LDAP server connection to the appliance
- You need to create a rule in 'Firewall' > 'System Access' to allow the agent to access the firewall. See below for help with this.
- You also need to add the IP address and port of the AD server so the firewall can receive the username/IP mapping tables. See Configuring the Active Directory Connection for more details.
Allowing Access to the Appliance
- Click 'Firewall' > 'System Access' to open the 'System Access' interface
- Click the 'Add a new system access rule' link at the top-left:
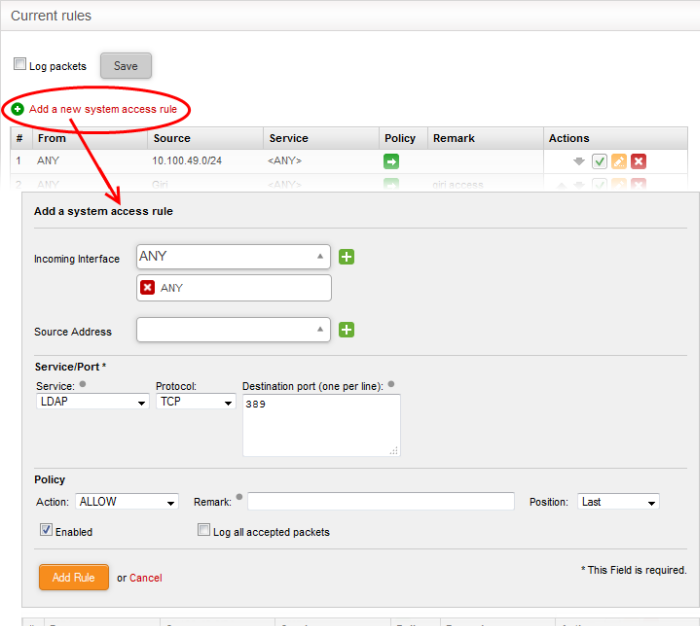
- Enter the following settings:
Incoming Interface - Select 'Any' from the drop-down
Source Address - You do need not select any firewall object
Service/Port- Select the LDAP service traffic received at port 389
- Service - Choose 'LDAP' from the drop-down
- Protocol – By default TCP will be chosen
- Destination port - The default port number of 389 will be auto-populated. Enter a new port number if the LDAP port of your server is different.
Policy – Choose 'Allow'.
General Settings
- Remark (optional) - Enter a short description of the rule. The description will appear in the 'Remark' column of the rules interface.
- Position - Set the priority of the rule with respect to other rules in the list. Rules in iptables are processed in the order they appear on the list.
- Enabled – If selected, the rule will be activated immediately after saving.
- Log all accepted packets - All packets allowed by the rule will be logged. See View Logs for more details on configuring storage of logs and viewing the logs.
- Click 'Add Rule'
To add the rule for the agent to access the appliance
- Open the 'System Access' interface by clicking Firewall > System Access from the left hand side navigation
- Click 'Add a new system access rule' link from the top left
- Enter the parameters for the new rule as shown below:
Incoming Interface – Select 'Any' from the drop-down
Source Address – Need not select any firewall object
Service/Port - Select the TCP traffic received at port 389
- Service - Choose 'User Defined' from the drop-down
- Protocol – Choose TCP from the drop-down
- Destination port – Enter the agent port as configured in the server in Step 3. (Default = 7004).
Policy - Choose 'Allow'.
General Settings
- Remark (optional) - Enter a short description for the rule. The description will appear in the Remark column of the rules interface.
- Position - Set the priority of the rule with respect to other rules in the list. Rules in iptables are processed in the order they appear on the list.
- Enabled - If selected, the rule will be activated immediately after saving.
- Log all accepted packets - All packets allowed by the rule will be logged. See View Logs for more details on configuring storage of logs and viewing the logs.
- Click 'Add Rule'.
The rules will be added to the System Access interface.
-
Place new two rules to uppermost levels by clicking arrow buttons / and click 'Apply' to apply new order.
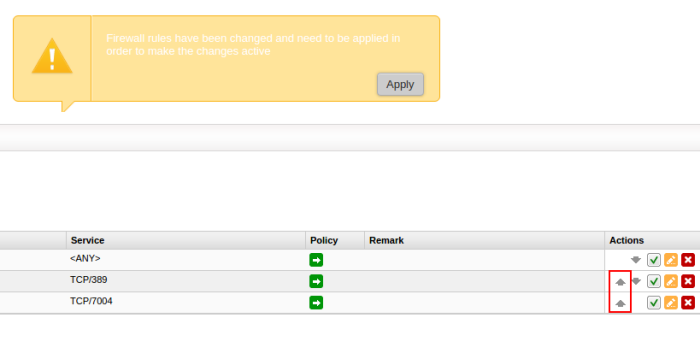
Configuring the Active Directory Connection
The Active Directory interface in the administrative console allows you to configure the virtual appliance for the connection.
To access the Active Directory interface
-
Click 'Firewall' > 'Objects' from the left hand side pane
-
Click the 'Active Directory' tab
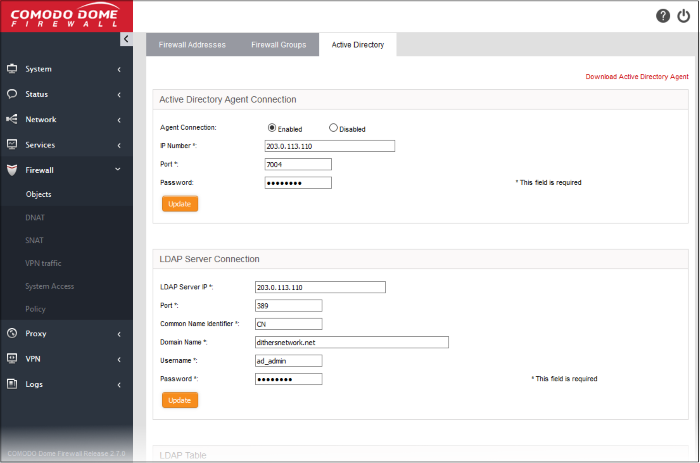
-
Enter the parameters for the agent and the AD server as shown below:
Active Directory Agent Connection
- Agent Connection – Choose 'Enabled' to enable the connection from the agent
- IP Number – Enter the IP address of the server on which the agent is installed
- Port – Enter the agent connection port as configured in the server in Step 3. (Default = 7004).
- Password - Enter the password if it is set on agent in Step 3
- Click 'Update' to save and activate the agent connection.
LDAP Server Connection
- LDAP Server IP - Enter the IP address of the AD server. The IP address is generally same with the agent's address.
- Port - Enter the LDAP service port of the server. By default, the LDAP port is 389. If you have configured a different port, enter the new port number.
- Common Name Identifier - Enter the Common Name Identifier of Active Directory. (Default = CN).
- Domain Name - Enter the Domain Name to select which domain is going to monitored on LDAP Table displayed at the bottom of the page.
- Username and Password - Enter the Username and Password of a user account that has the 'Read' access the AD server. 'Write' access is not required.
- Click 'Update' to save and activate the AD server connection.
The selected domain(s) will be displayed in the 'LDAP Table' at the bottom of the interface.
Clicking the Domain name expands the tree structure of the active directory.
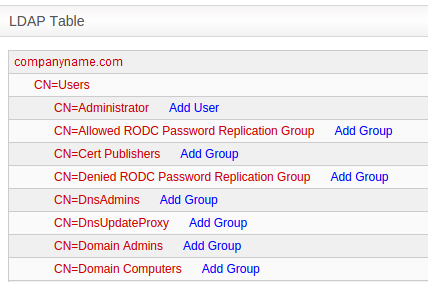
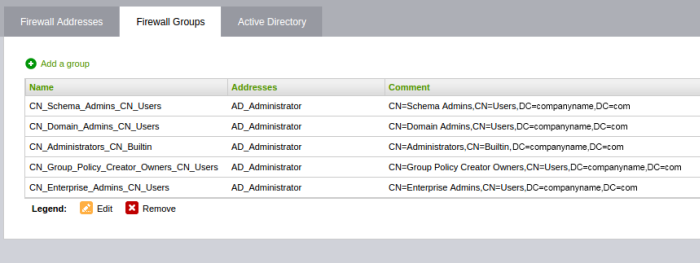
You can add the users to firewall objects and user groups to firewall object groups from the tree LDAP table.
- Click the Domain name to expand the tree structure of the active directory.
- Locate the user by expanding the parents.
- Click 'Add User' to add the user to Firewall Objects.
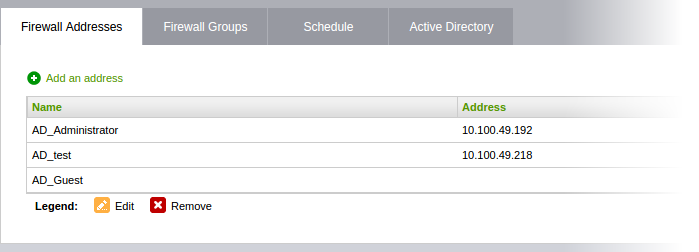
Add User Groups to Firewall Objects
- Click the Domain name to expand the tree structure of the active directory.
- Locate the user group by expanding the parents.
- Click 'Add Group' to add the user group to Firewall Object Groups.
