


Configure the Management Console
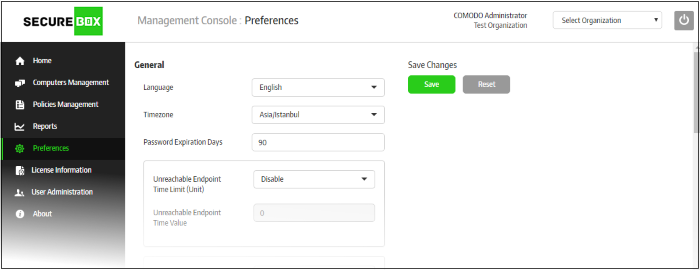
The 'Preferences' section allows administrators to configure language, timezone, password expiry intervals, endpoint settings, reports, notifications and more.
To configure preferences, click 'Preferences' on the left:
|
Preferences Settings – Table of Parameters |
|
|---|---|
|
Parameter |
Description |
|
General |
|
|
Language |
Select the console language from the drop-down. Currently only 'English' is supported. |
|
Timezone |
Select the management console operational
timezone. |
| Password Expiration Days | If you change the protected item's settings details, then the 'Product Name' will remain the same, but CSB will update the secure application for the edited protected item. If you change the 'Product Name', then a new security application with the changed name will be created for the same protected item with the same settings. |
|
Unreachable Endpoint Time Limit (Unit) |
The unit of time for the 'Unreachable Endpoint Time Value' setting.
The options available are:
|
|
Unreachable Endpoint Time Value |
Set whether or not Secure Box protection should be disabled on an endpoint if it does not contact the management console for a certain period of time. For example, if this value is set to ‘1 Day’, then applications will no longer launch in the CSB container if the endpoint does not communicate for a period of 24 hours. Protection will resume immediately after communications are restored. Endpoint installations regularly receive updates from the management console, so administrators may not want the CSB application to launch if it has not been updated for some time. If you select ‘Disabled’ in the drop-down, CSB will continue to operate on endpoints regardless of connection status to the management console. |
|
Absent Time (Unit) Absent Time Value |
CSB shows an alert icon in the 'Computers' screen if an endpoint has been unresponsive for a period of time.
|
|
CMC Secure App Only |
If selected, only secure applications from CMC
can be run on endpoints. |
|
Endpoint Settings |
|
|
Administrator Password for Open Secure App |
Enter the password for administrators to open a secure application on an endpoint. This works only for secure applications which have ‘Open Password’ set under the ‘SECURE APPS’ tab when creating a secure application. |
|
Use Uninstall Password |
If enabled, users will have to enter a password before they can uninstall CSB from an endpoint. |
|
Administrator Password for Uninstall Secure App |
Specify the password required for uninstalling CSB on endpoints. |
|
Report Settings |
|
|
Remove Reports Older Than |
The threat and activity reports for the account
will be removed from the server as per the period set here.
Select the period from the drop-down after which the reports will
be removed. |
| Polling Interval Settings | |
| Polling Interval Settings | Select the frequency at which CSB on the endpoints connects to the management console to check for updates. Available frequencies range from 15 seconds to 2 minutes. |
|
External Services |
|
|
Log Server |
Global Log Server setting, used for the endpoint to send logs to. If it’s set, the ‘Log Server’ on ‘Management’ tab will be filled with the global setting when creating a secure application. |
|
Time Server |
Global Time Server setting, used for the endpoints to sync-up their system time. If it’s set, the ‘Time Server’ on ‘Settings' tab will be filled with the global setting when creating a secure application. |
|
Secure Box Installer Upgrade Server |
Global Upgrade Server setting, user for the endpoint to send logs to. If it’s set, the ‘upgrade Server’ on the ‘Management’ tab will be filled with the global setting when creating a secure application. |
|
Packages |
|
|
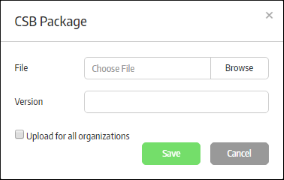
Available Secure Box Versions |
Displays the CSB installer versions that has been uploaded to the server. When enrolling endpoints, the uploaded installers will be available from the drop-down. Refer to the section 'Enrolling Endpoints for Management' for more details.
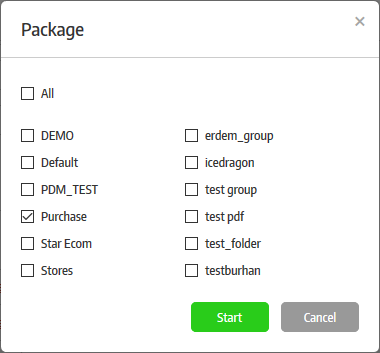 A schedule will be created for the update.
|
|
E-Mail Notifications |
|
|
Send E-Mail Notifications |
If selected, email notifications to the configured addresses will be sent for the enabled categories such as threat, activities and licenses. |
|
E-Mail Address(es) |
Enter the email addresses of the administrators to whom the configured notifications should be sent. |
|
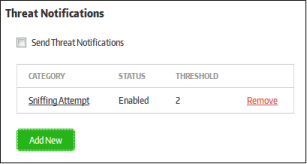
Send Threat Notifications |
Please note that 'Send E-Mail Notifications' should be enabled for the alerts to be sent. |
|
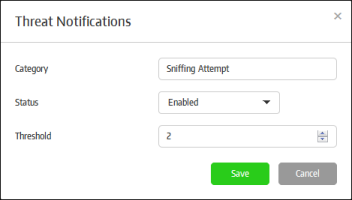
Configure Threat Notifications |
You can configure the threat notifications by clicking the 'Add New' button in the 'Threat Notifications' section.
Enter the threat category name in the field. Please note the logs for these threat categories should be enabled in the endpoint Group Properties dialog.
The threat categories will be listed.
|
|
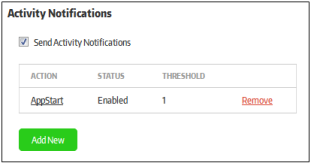
Send Activity Notifications |
If selected, the activity notifications will be sent to the subscribed administrators. Please note that 'Send E-Mail Notifications' should be enabled for the alerts to be sent. |
|
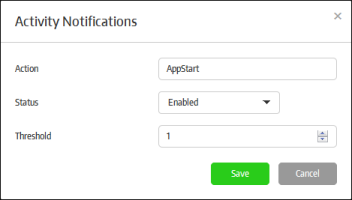
Configure Activity Notifications |
You can configure the activity notifications by clicking the 'Add New' button in the 'Activity Notifications' section.
Enter the activity name in the field. Please note the logs for these events should be enabled in the endpoint Group Properties dialog.
The action categories will be listed.
|
|
License Notifications |
|
|
Send License Notifications |
If selected, a license notification will be sent to the subscribed administrators if the number of enrolled endpoints in percentage with respect to the purchased license satisfies the condition in the 'Inform after 'N%' licenses are used'.
|
|
SMTP Settings – Allows to configure the mail server for sending out notifications |
|
|
Email Host |
Enter the SMTP server from which the notification mails are to be sent |
|
Email Port |
Enter the outgoing port of the SMTP server |
|
Username |
Enter the username for the email account from which the notification mails are to be sent |
|
Password |
Enter the password for the email account |
|
Email From |
Enter the address to be displayed in the 'From' field of notification emails |
|
Auto-Discovery Settings – Allows to configure 'Active Directory' and 'Workgroup' in order to enroll endpoints within a network |
|
|
Discovery From |
The options available are 'Active Directory' and 'Workgroup'. If 'Active Directory is selected, provide the following details:
If 'Workgroup' is selected, provide the following details:
|
|
Discovery Period |
Determines the scanning intervals by the management console for auto-discovery in the network. Select the scanning interval from the drop-down. If 'Disabled' is selected, then no scanning will be performed. |
|
Code Signing Certificate |
|
|
|
The certificate used to sign the created secure
applications, so that the secure application can be authorized to
run on endpoints. CSB will check the certificate. Code signing certificate part is divided into 2 parts: SHA2 and SHA1 certificate. Secure applications will be signed with both of the certificates if they are configured. SHA1 certificate is needed for secure applications to be used in Win XP.

The certificate will be uploaded and the details will be displayed under the 'Code Signing Certificate' section. This certificate will be used for creating a new secure app each time.
|

- Click the 'Save' button to apply your changes.