Setup Wizard - Add Networks
- The setup wizard lets you quickly enroll your networks to Secure Internet Gateway protection.
- If you haven’t yet added a network, then the wizard will start automatically after logging in.
- You can also start the wizard at any time by clicking 'Setup Wizard' link at top-right:
.png)
- Click 'Secure my network now!'

IP Address / FQDN
- By default, this shows the public IP of the network from which you are connecting. This network is automatically activated after initial enrollment.
- You can also add the IP address of a different network you want to protect. Enter the network IP address or fully qualified domain name in CIDR notation.
- Secure Internet Gateway can accept network prefixes from /24 to /32.
Select Company - MSPs only. Select the customer organization for which you want to enroll the network.
- Any IP you add here will be automatically activated for protection. Make sure you are able to change the network's DNS settings to Secure Internet Gateway, as explained in step 3.
- XSIG also supports dynamic IP addresses. You need to download the 'Windows Dynamic IP Updater' agent and install it on a network endpoint. See 'Add Networks' for more information.
- Click 'Next' to configure rules for the default policy.
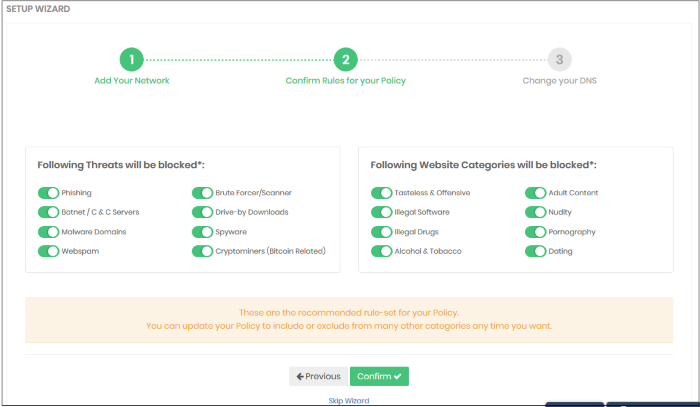
Step 2 - Configure Rules for your Policy
Configure security and website category rules for the default policy. These will be immediately applied to the network on enrollment.

- All rules are enabled by default. You can enable / disable rules here as required.
- If you are unsure, then a good rule of thumb is to just leave everything enabled. This will give you maximum protection, and you can easily modify the settings later if any issues transpire.
- You can modify the policy later by clicking 'Policy Settings' in the left-hand menu. See 'Manage Security Rules' and 'Manage Category Rules' if you need help with these areas.
Click
'Confirm' to apply your policy.
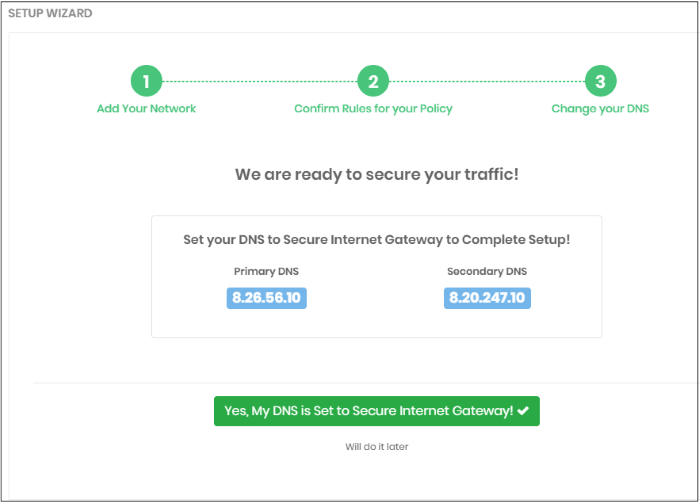
Step 3 - Change your DNS Settings
Change your DNS addresses to following XSIG addresses:
- Preferred DNS server - 8.26.56.10
- Alternate DNS server - 8.20.247.10
Click 'Yes, My DNS is set to XSIG' once you have done this:

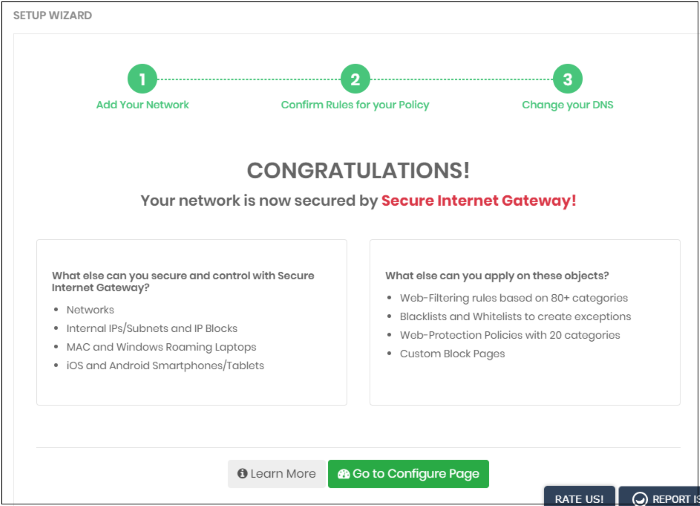
That's it. You have now added a network to Secure Internet Gateway.

- Click 'Configure' > 'Objects' > 'Networks' in the XSIG interface to see all networks that you have added.
-
Note – To support dynamic IP addresses, you need to download the 'Windows Dynamic IP Updater' agent and install it on a network endpoint. See 'Add Networks' for more information.
Next, see the following items for help with specific areas:


