Manage URL and Content Filtering Profiles
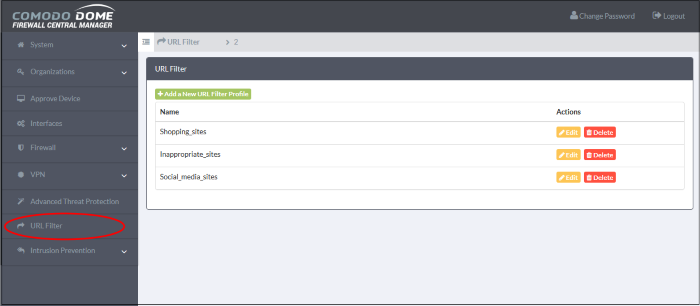
- Click 'URL Filter' in the left-hand menu to open the filter configuration screen
- The web filter allows you to control which websites your end-users can access.
- You need to create a URL/content filter profile to implement this feature. The profile can then be added to a firewall rule
There are two elements of a URL profile:
- A website category filter.
- A whitelist / blacklist of specific websites.
Once created, URL profiles can be activated in the 'Web Protection' section of a firewall rule. See Web Protection Settings for help with this.
- Profiles created for an organization are available to all devices in that organization.
- Profiles created for an individual device are only be available to that device.
Open the URL filter interface
- Click 'URL Filter' on the left

|
URL Filter - Column Descriptions |
||
|---|---|---|
|
Column |
Description |
|
|
Name |
Profile label. |
|
|
Actions |
Edit |
Opens the profile editor so you can modify the profile. The editor interface is similar to the interface for adding a profile. See Create a URL Filter Profile for more details. |
|
Delete |
Removes the profile. |
|
URL filter profiles are constructed from the following two items:
- Content categories - Web pages with content which falls into a chosen category will be automatically blocked
- URL Whitelist/Blacklist - Users can access whitelisted addresses. Blacklisted addresses will be blocked. These lists are often used to create exceptions for sites blocked (or allowed) by content categories.
To create a URL filtering profile
- Click 'URL Filter' on the left
- Select an organization/device from the drop-down in the title bar
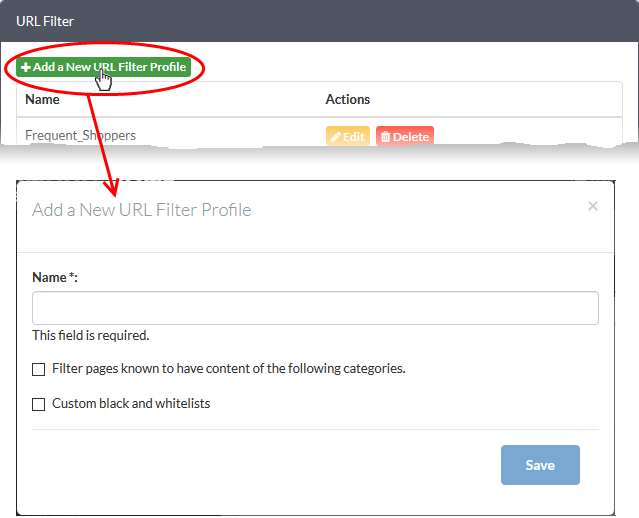
- Click the 'Add a New URL Filter Profile' button at the top-left of the interface.

Complete the following details in the form:
- Name - Friendly label to identify the purpose of the profile.
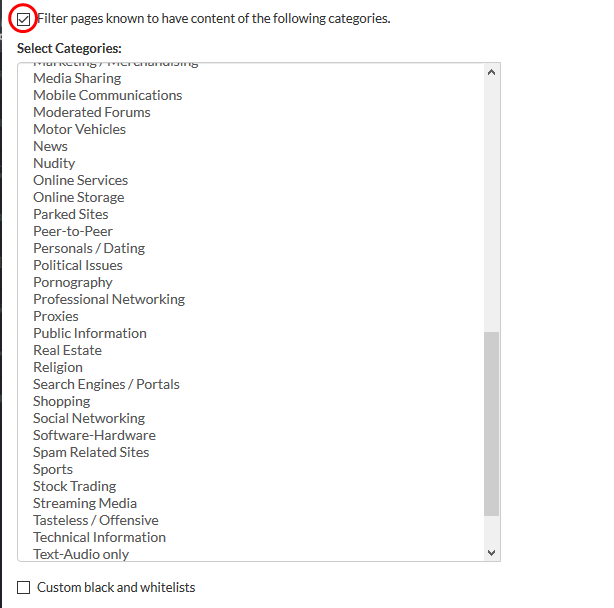
- 'Filter pages known to have...' - Choose website categories that you want to block:

|
Tip: Press and hold the 'Ctrl' key to select mutiple items. |
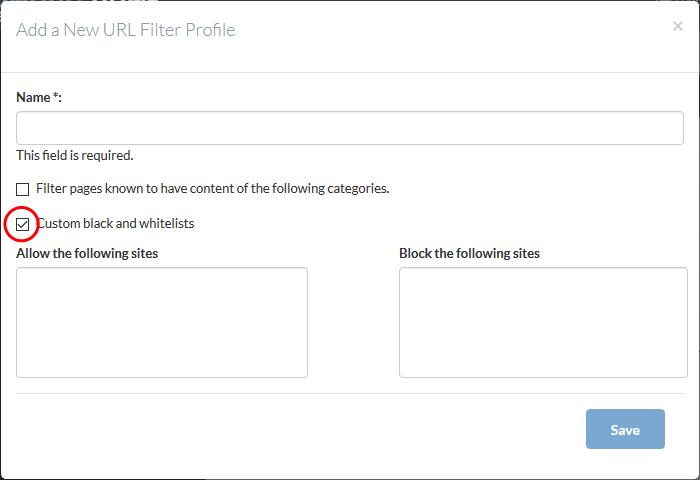
- 'Custom black and whitelists' - Specify URLs you want to allow or block. Black and whitelists are usually created to provide exceptions to the categories you have allowed/blocked.

- 'Allow the following sites' – Whitelisted websites. Users are allowed to access the sites you type here.
- 'Block the following sites' – Blacklisted websites. Users are not allowed to access sites you type here.
|
Note:
|
- Click 'Save'.
The profile is now available in the 'URL Filter' drop-down when creating/editing a firewall rule.
- Repeat the process to add more filter profiles.


