


Integrate Central Manager with Comodo One / Comodo Dragon / ITarian
The following sections explain how to integrate different versions of CM to C1 / CD / ITarian:
Dome
Firewall Central Manager Virtual Appliance
Single Sign-on (SSO)
from C1/ CD/ ITarian is not enabled by default in the virtual
appliance version. Integrating the CM virtual appliance with your
portal involves two steps:
Step 1 - Enable SSO in the virtual appliance
|
Note: Ensure that you have assigned a public IP address to the virtual appliance |
- Login to the root account of the linux virtual machine with default credentials:
username = rootpassword = comodo
- Open the settings file of the central manager at /home/ubuntu/central-manager/centralmgr/settings.py using an editor.
- Scroll down to the 'cONE SSO settings' area
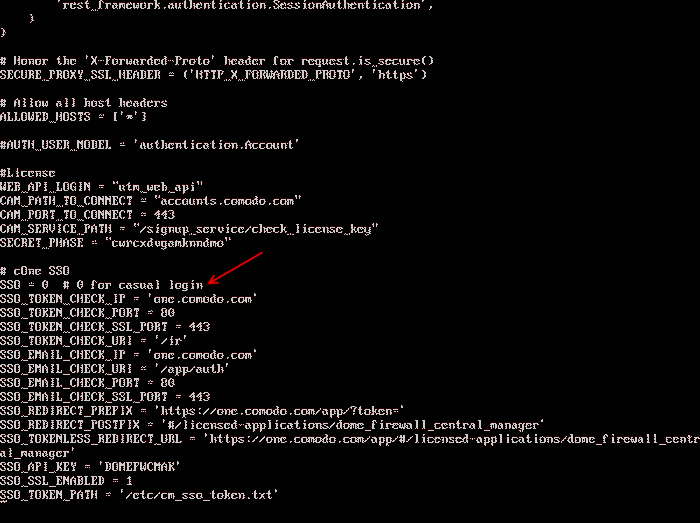
- Set the SSO flag to1
- Save the 'Settings' file
- Restart the apache service using the Sudo
command: sudo apache2ctl restart
SSO with your portal is enabled in the CM appliance.
Step 2 -Add Dome Service URL for Dome Firewall Central Manager to your Comodo One / CD / ITarian account
The IP Address of your appliance is the Dome service URL. You need to add this to C1 / Dragon / ITarian.
- Login to your Comodo One / Comodo Dragon / ITarian account
- Click 'Manage' > 'Applications' to open the application management screen. (Comodo One portal is shown below as an example)
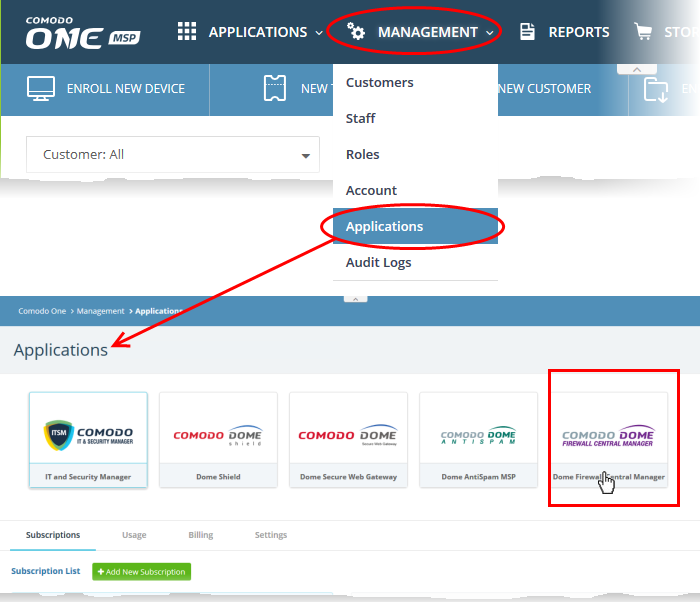
- Click the 'Dome Firewall Central Manager' tile
- Select the 'Settings' tab in the bottom pane
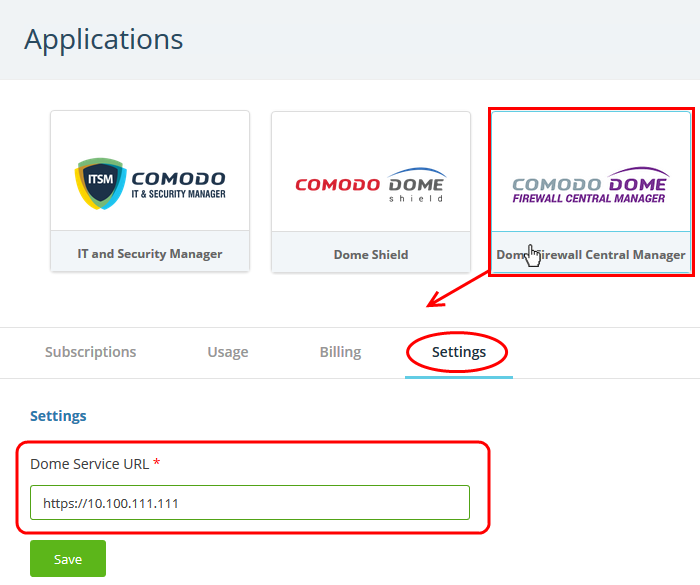
- Enter the IP address of your appliance (in the
form https://
) in the Dome Service URL text box and click 'Save'.
Your
central manager appliance is now integrated with your Comodo One / CD
/ ITarian account. You can login to the
central manager console from your portal.
Dome Firewall Central Manager Cloud Mode
Single Sign-on (SSO) is enabled by default in the cloud version. You need to add your CM URL or IP as the service URL in C1 / Dragon / ITarian.
Integrate central manager with your Comodo One / Comodo Dragon / ITarian account
- Login to Comodo One / Comodo Dragon / ITarian
- Click 'Manage' > 'Applications' to open the application management screen. (Comodo One portal is shown below as an example)
- Click the 'Dome Firewall Central Manager' tile
- Select the 'Settings' tab in the bottom pane
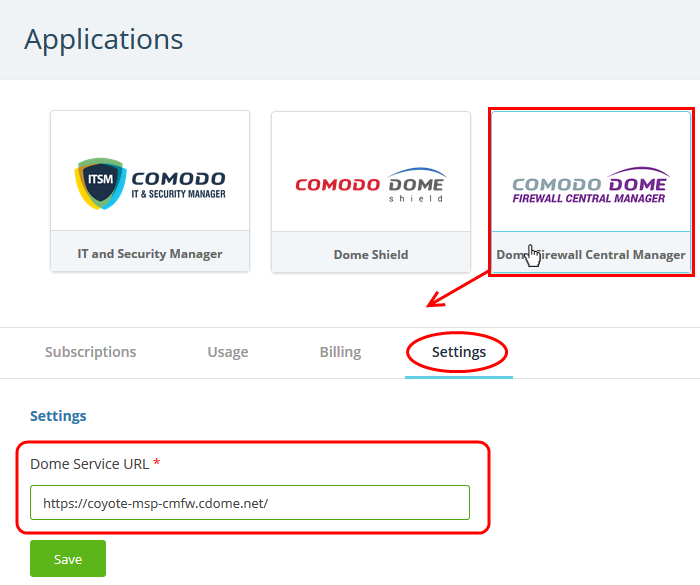
- Enter the given domain or IP address (Format = https://[given IP address]) in the Dome Service URL text box and click 'Save'
- Dome Firewall Central Manager is now integrated with your portal account
- You can access CM from your portal as follows:
- Login to your Comodo One / Comodo Dragon / ITarian account
- Click 'Applications' > 'Dome Firewall Central Manager'

Central manager will open at the dashboard in a new tab.