


Departments
-
Service Desk ships with three default departments:
- Maintenance
- Support (default)
- Sales
- All new staff are initially assigned to the default, 'Support' department. You can change the default department at anytime in 'System Settings & Preferences' ('Admin Panel' > 'Settings' > 'System')
- Tickets will also be assigned to the default department if they are not already routed to a different department. Tickets can be re-routed by a ticket category, by incoming email settings, or by ticket filter settings. See 'Ticket Settings and Options' for more details.
- You can create additional departments based on your requirements. For example, a department called 'Computer Maintenance' could be populated with staff who have the required skill set to deal with such tickets. Ticket Categories and Ticket Filters can be configured to route new tickets to staff members in the appropriate department.
- Open the 'Admin Panel' (see last link on the left)
- Click 'Staff' > 'Departments' in the left-hand menu
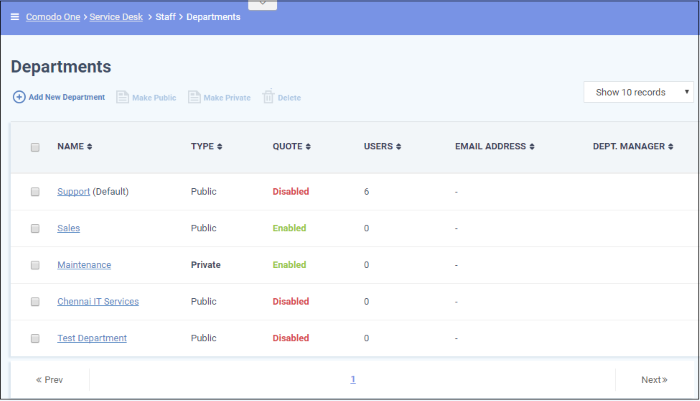
- Name: The department label.
- Type: 'Public' or 'Private'. 'Users can submit tickets to a private department, but will not be able to view the department name. The department signature will not be included in email replies.
- Click a department name to open its settings and switch its type between public and private.
- The default department must be public. Go to 'Admin Panel' > 'Settings' > 'System' to set the default department.
- Quote: If enabled, staff can create price quotes for the cost of the ticket from within the ticket itself.
- Users: The number of staff that have access to the department. Click the number to view all entitled staff members.
- Email Address: The outgoing email address configured for the department.
- Dept. Manager: The staff member/admin assigned to manage the department. Click the name to open the 'Update Staff' screen.
- Open the 'Admin Panel' (see last link on the left)
- Click 'Staff' > 'Departments' in the left-hand menu
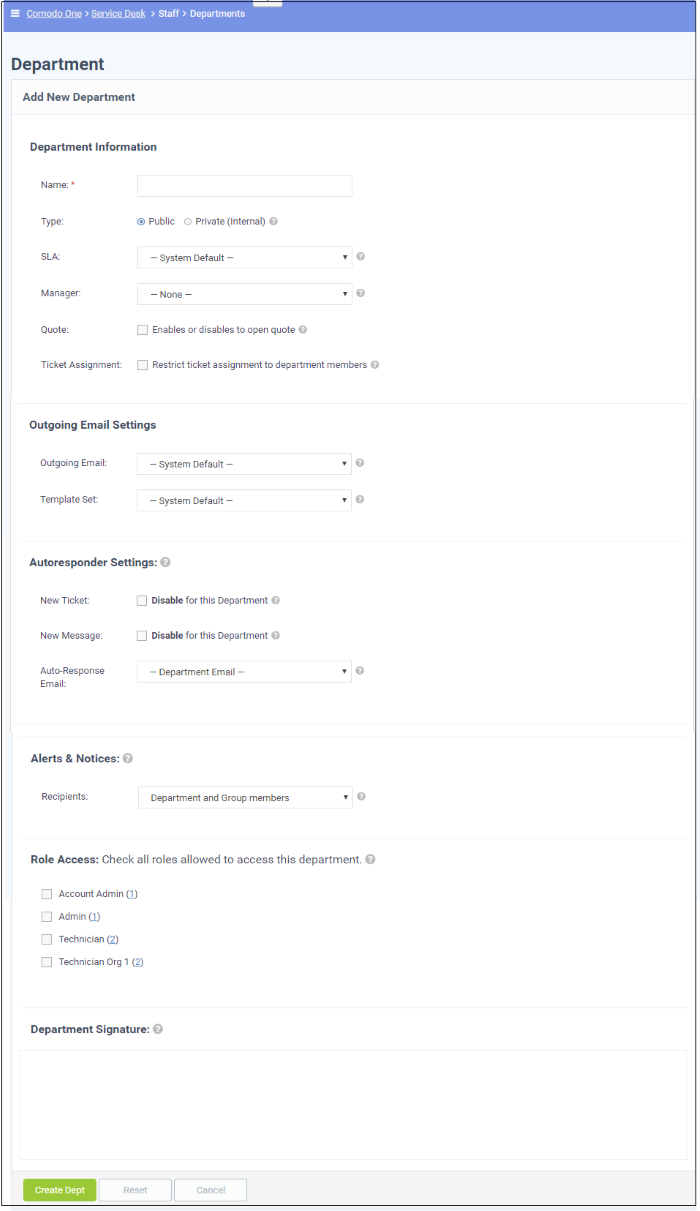
- Click the 'Add New Department' link:
Department Information
- Name: Enter a label for the department
- Type: 'Public' or 'Private'.
- 'Public' - Users can submit support tickets to public departments. Users can view the assigned department in the client portal.
- 'Private' - Users can submit support tickets to private departments, but cannot view the assigned department in the client portal. The department signature is not shown in email replies.
- SLA: Select the Service Level Agreement (SLA) for the tickets routed to this department.
- Manager: Select a manager for this department from the list of staff members. Managers have the right to un-assign tickets and can be configured to receive special alerts. See Configure Alerts and Notices for more details.
- Quote: Choose whether the department should be allowed to generate quotes for billable products and services from the Service Desk console. If enabled, staff members attending to a ticket assigned to the department can initiate a quote from the 'Ticket Details' interface. See explanation of quote generation in the section Ticket Details for more details.
-
Ticket Assignment: If enabled, new tickets created can be assigned to staff members belonging to this department only and staff members of different groups having access to this department.
Outgoing Email Settings
-
Outgoing Email: Select the outgoing email address that should be used for this department's replies to users in response to their tickets. See Setup your Support Email Addresses for details about how to add/edit email addresses.
- Template Set: Select the email template set that should be used for sending auto-responses and alerts & notices for tickets routed to this department. See Email Templates for details about how to add/edit email templates.
Autoresponder Settings
- New Ticket: If selected, auto-response emails on creation of new tickets and routed to this department is not sent. This setting overrides the global settings configured in Autoresponder Settings screen.
- New Message: If selected, auto-response emails to users to confirm newly posted messages for tickets in this department is not sent. This setting overrides the global settings configured in Autoresponder Settings screen.
- Auto-Response Email: Select the auto-response email address that should be used for this
department. See
Setup
your Support Email Addresses to know more about how to
add/edit email addresses.
-
Recipients: Select the recipients from the drop-down options who should receive the configured alerts & notices on ticket events.
Role Access
This section displays the list of staff roles and the number of members in each. Select the roles so that the staff with those roles can access the tickets assigned to the department, and to participate in departmental activity.
Department Signature
Enter
the signature of the department that will be displayed in the ticket
reply emails. The option to select this is available in the Staff
Panel in ticket related screens.
-
Click the 'Create Dept' button at the bottom of the screen for the settings done in the page to take effect.
Edit department's details
-
Click on the department name in the list.
The 'Update Department' screen will be displayed. The update procedure is same as explained above while adding a new department.
Delete a department
- Select the department that you want to delete, click 'Delete' at the top and confirm the deletion in the 'Confirmation' dialog. Please note that the default department is public and therefore cannot be deleted.