SSL/HTTPS Security Settings
The 'SSL/HTTPS' security setting allows you to view and modify settings relating to SSL certificates and security protocols.
View and
manage SSL/HTTPS and settings
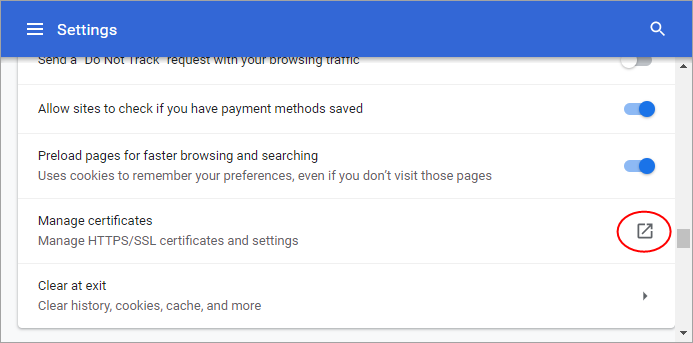
- Click the menu button
 located at the top-right
- Select 'Settings' > scroll down and click 'Advanced'
- Scroll down to the 'Privacy and security' section
- Click 'Manage certificates'

Manage certificates
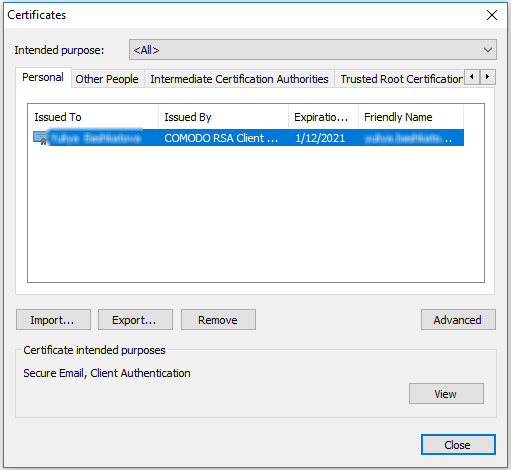
- Click 'Manage certificates'. The 'Certificates' dialog will open:

The 'Certificates' manager has the following tabs:
- Personal - displays your own client/secure-email certificates.
- Other People - displays a list of client certificates belonging to other people (usually your contacts).
- Intermediate Certificate Authorities – displays a list of intermediate certificates. This type of certificate forms a link in the chain of trust between a certificate on a website and a trusted root certificate.
- Trusted Root Certification Authorities – displays a list of trusted root certificates.
- Trusted Publishers – A publisher is a developer who has created a macro, ActiveX control, add-in, or other application extension for use by you and other people. Trusted publishers are reputable developers.
- Untrusted Publishers - a list of untrusted publishers.
Import certificates
- Click 'Import'.
- Follow the Certificate Import wizard.
- Select the file you want to import and click 'Next'.
- Choose a password which you can remember later. Click 'Next', then check 'Mark this key as exportable. This will allow you to back up or transport your keys at a later time' and 'Include all extended properties'.
- Select Personal Certificate Store you want to save the certificate to.
- You will see a confirmation screen listing the settings you have chosen. Click 'Back' if you wish to amend any details. Click 'Finish' to import the certificate.
- Once finished, the certificate and associated private key is saved as a .pfx file. You can export this into other browsers and mail clients as required.
Export certificates
- On the 'Personal' tab, select the certificate you wish to back up and click ‘Export’.
- Follow the Certificate Export wizard.
- When requested, select 'Yes, export the private key'
- Leave the 'Type' as 'Personal Information Exchange (*.pfx)' and select 'Include all certificates in the certification path, if possible'. Click 'Next'
- Choose a password which you can remember later. Click 'Next'.
- First create a file-name for the exported .pfx then click the 'Browse' button to choose where you want to save the file to.
- You will see a confirmation screen listing the settings you have chosen. Click 'Back' if you wish to amend any details. Click 'Finish' to export the certificate.
- Once finished, the certificate and associated private key is saved as a .pfx file. You can import this into other browsers and mail clients as required.
Remove expired or revoked certificates
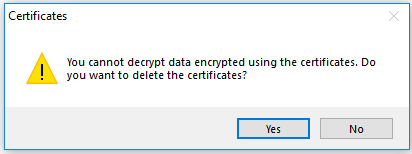
- Select
the certificate to be deleted and click 'Remove'.

- Click 'Yes' in the confirmation dialog.
| Note: If you
delete your currently active certificate, you will not be able to use
it for identifying yourself to the websites that require it. |
The advanced options dialog displays a list of certificate purposes under 'Advanced Purposes'.


