Associate Records from other Modules to a Contact
The 'Contacts Summary' interface lets you associate various records with a contact. Records you can associate include opportunities, campaigns, invoices, purchase orders, quotes and more. Contacts that are members of a single organization will be listed in the organization record on viewing its associated contacts.
View and manage the records of modules associated with a contact record
- Click 'All' > 'Contact' to open the 'Contact List' interface
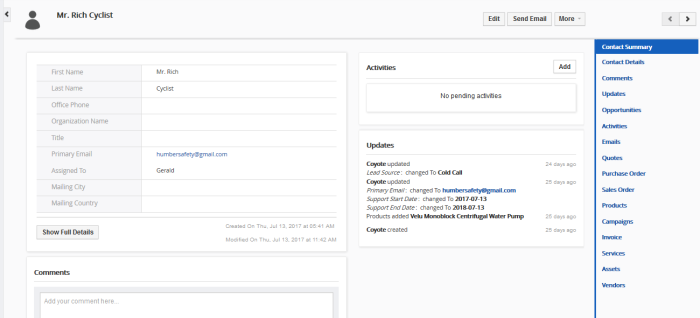
- Click on any contact to open the 'Contact Summary' page
- Click the 'Contact Details' link on the right to see even more information
The right-hand menu contains links to the records of other modules which are associated with the contact:

Click these
links to create records in other modules which will be linked to the
contact.
- Opportunities - View and edit existing opportunities associated with the contact. Associate a new opportunity with the record
- Activities - View and edit existing activities associated with the contact. Add new events and 'To-Do's
- Emails - View, create and send emails to the contact
- Quotes - View and edit existing quotes associated with the contact. Create new quotes for the contact
- Purchase Order - View and edit existing purchase orders associated with the contact. Create a new purchase order for the contact. The details of the contact will be automatically populated
- Sales Order - View and edit existing sales orders associated with the contact. Create a new sales order for the contact. The details of the contact will be automatically populated
- Products - View and edit existing products associated with the contact.Associate a new product with the contact
- Campaigns - View campaigns associated with the contact. Select new campaigns to associate with the product
- Invoice
- View and edit existing invoices associated with the contact. Add a new invoice for the contact. The details of the contact will be automatically populated
- Services - View and edit existing services associated with the contact. Select new products to associate with the contact
- Assets - View and edit existing invoices associated with the contact. Add a new assets for the contact
- Vendors - View and edit existing vendors associated with the contact. Add a new vendor for the contact
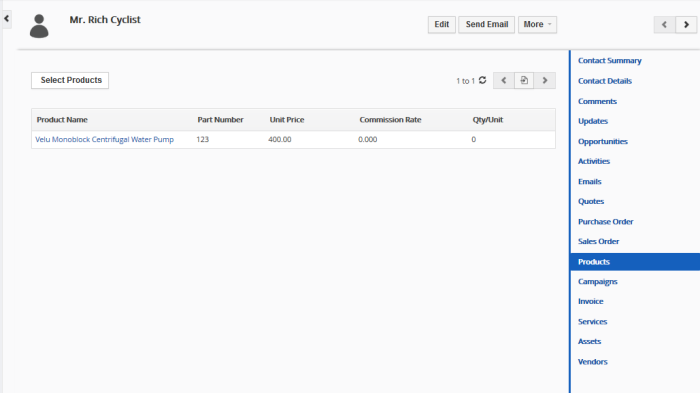
- Open a contact as described earlier then click 'Products' in the menu on the right

- This will open a list of products (product records) that are already associated with the contact
From here you can:
Customer Relationship Management (CRM) also allows you to send
emails to selected persons from anywhere in the interface. See Emails to know more about sending emails to contacts.
Associate Product Records to the Contact
You can associate product records to the contact in two ways:
Manually associate products records
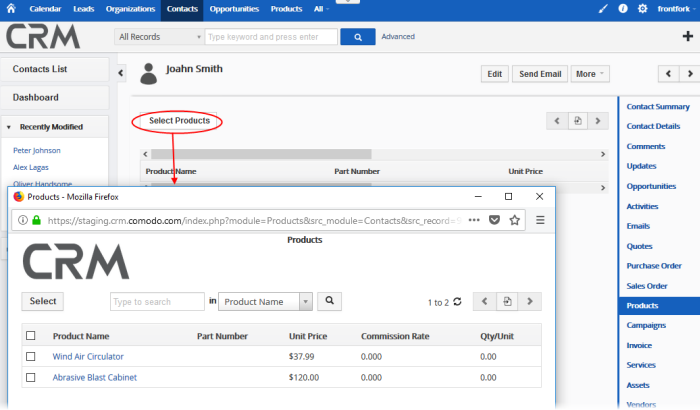
- Click 'Select Products'

A list of available product records will be displayed.
- Choose the product(s) you want to associate with the contact and click the 'Select' button (top left)
The product will be added to the list of associated records.
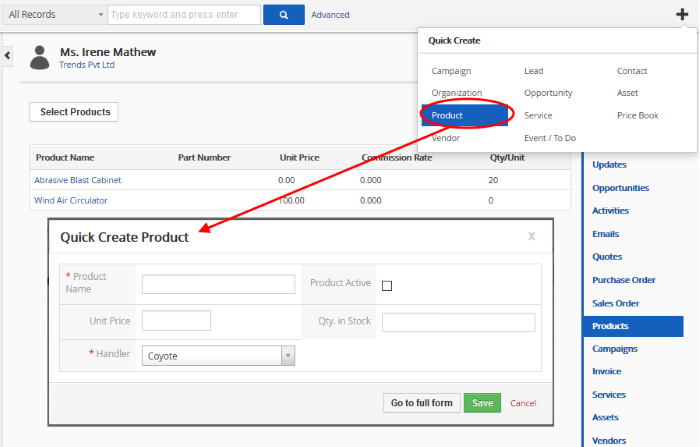
- Click the '+' symbol on the top right corner of the 'Product' interface.'
- Click 'Product' from the drop down.

The 'Quick Create Product' dialog will appear.
- Complete the details of the new product and click 'Save'.
The information in the 'Quick Create Product' dialog is basic in nature. Use the 'full form' if you want to enter more details for the product.
You can view, edit and add products which are associated with a contact by clicking the 'Products' link on the right:
- Click 'Contacts' then click the name of an individual contact
- Click 'Products' in the menu on the right
- Click 'Select Products' to associate a new product with the contact
- Mouse over an existing product record to view options at the far right end of the row:

|
- |
View product details. See Products for more details. |
|
|
- |
Edit product details. See Products for more details. |
|
|
- |
Removes the product's association with the contact. |
The information above also applies to the other module types listed in the right-hand menu.


